What is Clockify?
Introduction
Clockify is a great time management tool for a team to stay organized and efficient, especially when the team members are working remotely. Clockify allows you to track our time spent based on tasks. This function helps you guide future timelines and generally helps you to identify and improve in areas where we may be slow – and celebrate areas where we are extra efficient in.
If you’re using Notion, Jira, or other collaborative platforms, Clockify smoothly integrates with them to make the platforms more seamless and less tedious to utilize. We are not recommending this tool to create any “big brother” system that seeks to track every move of your employees – which it simply doesn’t anyways. Instead, it is meant to help reduce distractions, save time, ensure better planning, prioritization, and support from the management team, and more. Ultimately, research also shows that it enhances teamwork and workflow.
Where to download Clockify
How to Use Clockify
Web App Key Functions
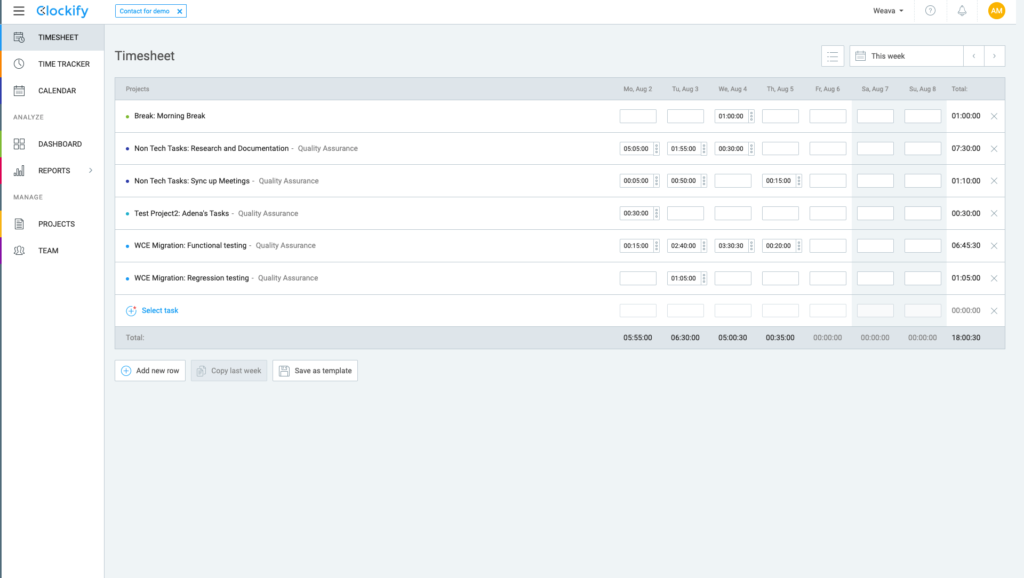
- Timesheet – shows you a weekly overview of tasks and allows you to modify the time spent on the task. It also shows the total amount of time spent working on tasks for each day.
- Time Tracker – this is where you log the time for the task you are currently working on. Clockify gives you two options:
- Track your tasks with a timer (by simply pressing ‘start’ after inputting the name of the task you’re working on)
- Manually add the start/end time for the task.
- Track your tasks with a timer (by simply pressing ‘start’ after inputting the name of the task you’re working on)

- You can integrate Clockify with other apps such as Notion, Google Calendar, etc. (See more about this below) You should see a timer button (like the one below) on the site page. Simply click on it to start the time for the task.
- Calendar – gives a weekly overview of tasks with time blocks for each day. You can drag blocks to adjust the time spent on the task.
- To connect your Google calendar, navigate to Calendar. Then click the link icon beside Teammates.

- Select Connect Clockify to your Google account.
- To connect your Google calendar, navigate to Calendar. Then click the link icon beside Teammates.
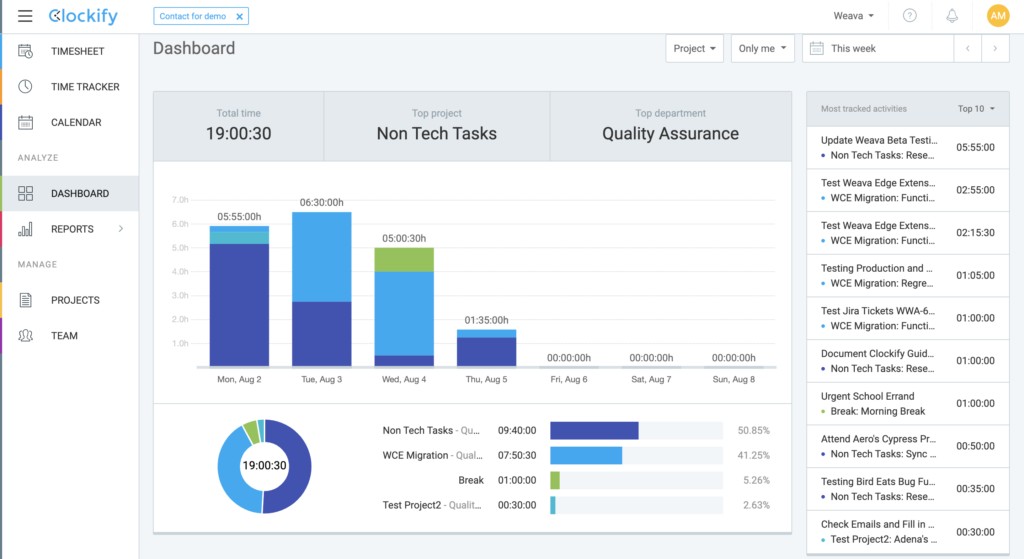
- Dashboard – shows you an overview of the total time you’ve spent working each day/week and the percentage of time you’ve allocated to your tasks.
- Reports – Summary, detailed, weekly, and shared reports can be generated in this tab. Various filters such as team, department, project, etc. can also be applied.
Integrating Clockify with Other Software
💡 Note that to integrate Clockify with other software, the user should first have a Clockify account and should already be part of the team.
Jira
- Install Clockify for Jira
- Generate API Key to start timer – In order to start the timer on the task/issue, each user has to first generate their personal API key and paste it in the “Clockify API Key” field on Jira
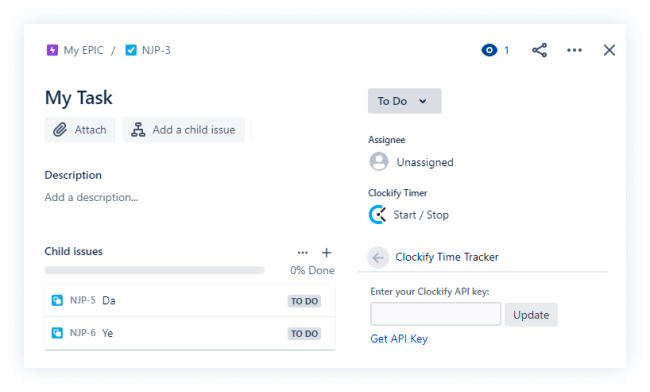
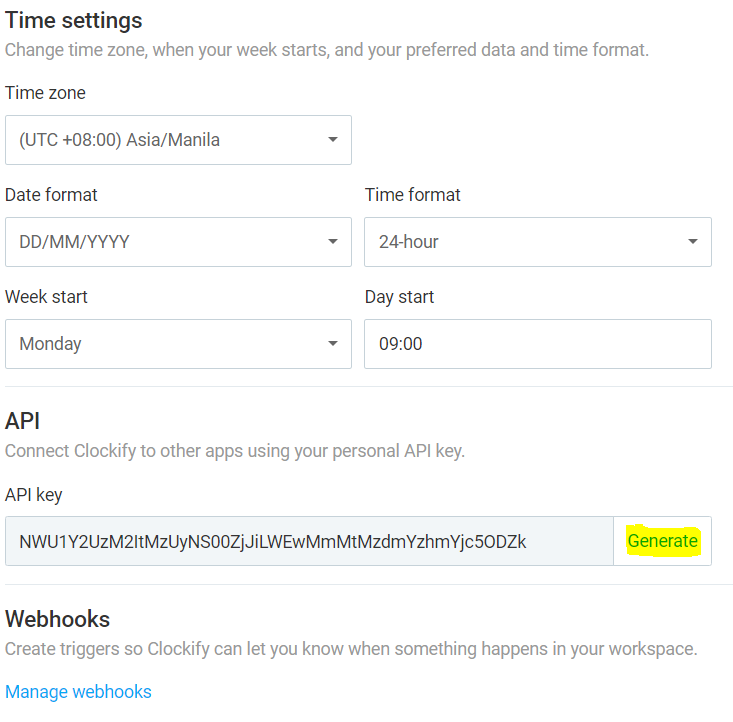
- To Get API Key, navigate to your web app account, click Profile Settings. Click Generate, then copy API key to your Jira ticket. Note: You only need to do this once.
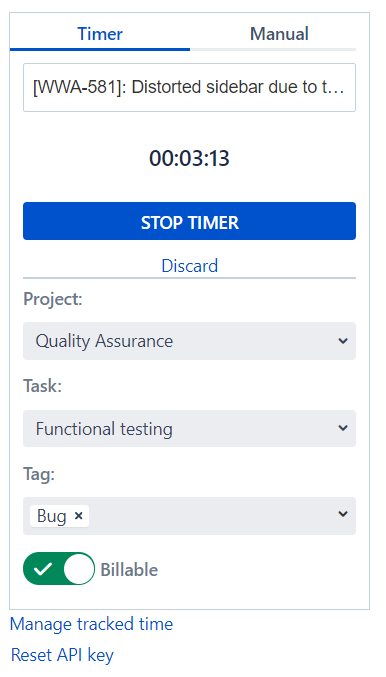
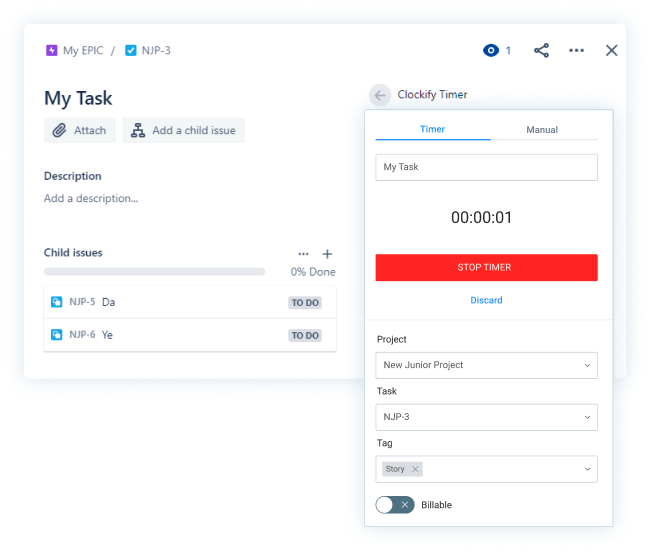
- Start the timer – The timer can be started on Jira or via Clockify apps on browser, mobile, or desktop. To start timer in Jira, click the Start/Stop Clockify field in the specific Jira ticket, click START TIMER then enter details such as Project, Tasks and Tag.
- Stop the timer – The timer can be stopped either on Jira or via the Clockify apps on browser, mobile, or desktop. If the timer was stopped on Jira, a time log will be created and added to the “Time Spent” field (if enabled).
- Add time manually – You may either log your time manually on Jira or open the Clockify web app to do so.

Google Calendar
- Connect Google Calendar – When you go to the Calendar tab on the Clockify web app, click on the connect button and connect to Google Calendar.
- Once connected, you should be able to see both events on your Google Calendar and tasks tracked on Clockify.
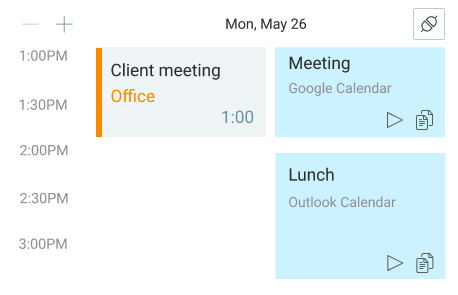
- Track Time for Google Calendar Events – You can start a timer by clicking on the event, or copy the whole event as a time entry. You can also click or drag&drop to directly create a time entry.

Notion
💡 Note that the user should have the Clockify browser extension installed.
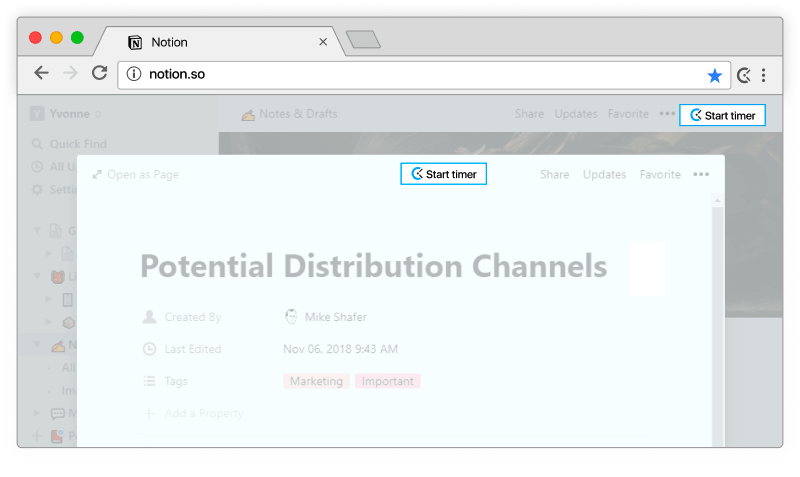
- Start the timer – Once you have opened your Notion task page on your browser, you should be able to see the Clockify timer button. Simply click on it to start the timer. Clockify will automatically log the task name as the one you have set on Notion.
- Stop the timer – The timer can be stopped either via the Clockify apps on browsers, mobile, or desktop.
Other tips for your team
For employees
- Make it a habit to check your Clockify at the end of the day to fill in missing gaps and/or fix your schedule throughout the day
- As with any new habit, it’s difficult to transform the Clockify tracker into a habit the first couple of days, but once you start to use it more, it should almost become like “second nature” to start/stop times.
- Clockify should only be used as a general estimate of what you do each day – hard to track if someone’s working on urgent or “pop-up” tasks throughout the day. A general rule of thumb, if it takes more than 15 minutes, it should deserve its own time entry.
- The best time to categorize time is when you record it. If you do it right then, you’ll save yourself from much of the hassle later of having to recall this.
- If you sometimes forget to start the timer while working, set up reminders, so the app can send you a notification if it notices the timer isn’t running during your work hours (https://clockify.me/help/time-tracking/idle-detection-reminders#reminders)
- The biggest nuisance with using a timer is starting and stopping it. When you go on a break or are away from the computer, you have to remember to stop the timer. If you constantly go away from a computer but forget to stop the timer, you can enable idle detection. (https://clockify.me/help/time-tracking/idle-detection-reminders#idle-detection)
For your HR team
- The HR team can have a regular audit time once a week to check if all time recorded by your employees is labeled and reported properly.
- The HR team should have admin access to create Projects, Tasks, and Departments for your employees to correctly select the appropriate tasks they’ve completed & record their time.
- Use Projects to break up the task types that your employees will be working on, and also to assign Departments that will likely work on such Projects. For example:
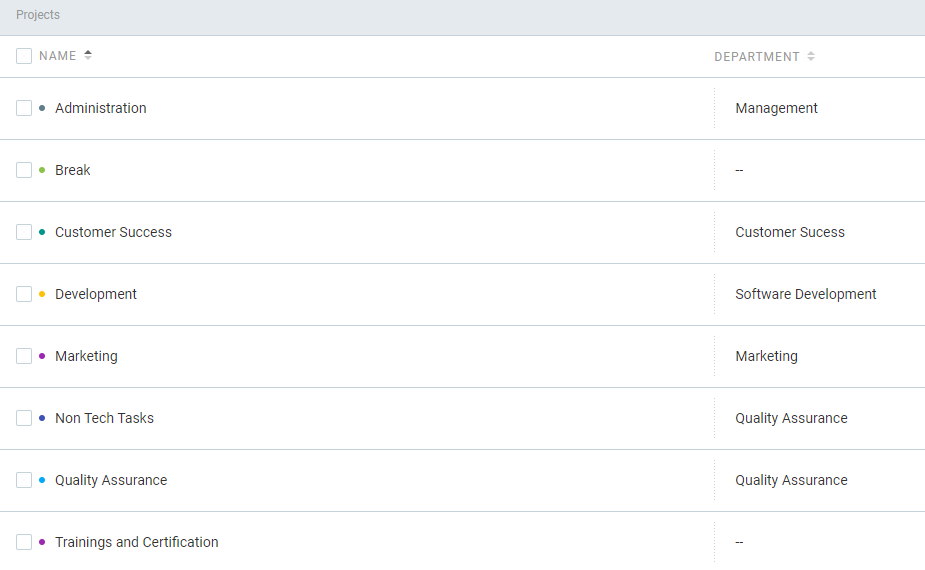
- Assign Tasks to each Project.
- Set internal guidelines on what time to track, the minimum time to track and record per day, and how to select the projects & tasks. (e.g. Minimum 9 hours including the break, but making task items “breaks” and “trainings and certifications” projects not billable i.e. not counted as working hours)
Other Resources & Links
- Clockify’s helpdesk: https://clockify.me/help/
- Link to Clockify’s Youtube Channel: https://www.youtube.com/channel/UClKn0rMofAHHbswCgKhWHUA
- Clockify’s official tutorial video