Zapier is an tool that allows you to automate your workflow by connecting different work spaces, such as Airtable, Google Sheet, Mailchimp, Slack, and more. On the guide, we have outlined all the key information you need to fully get onboarded to Zapier and examples of usages.
Why should I use Zapier?
Routine tasks slow down our work and drag our productivity. With the help of Zapier, even if you do not know how to code, you can still achieve productivity through automation. Zapier helps to integrate apps and build workflows for automating repetitive tasks, ranging from sending emails, tracking notifications, to organising data in spreadsheets.
Use cases of Zapier
- Automate your accounting process, e.g. updating and creating invoices
- Monitoring your brand or any sites on Social Media, e.g. social media listening whenever your account is tagged
- Automating emails
- Getting notifications and alerts, e.g. sending monthly reminders for your team’s Slack workspace to submit annual reports, reminding employees that they have used up a certain percentage of your budget, etc.
Navigating through Zapier
The Zapier Homepage
Go to Zapier to create an account. Once you are logged in, you will see the dashboard displayed below, allowing you to either connect apps right away and create your own workflow, or to use the recommended workflows.
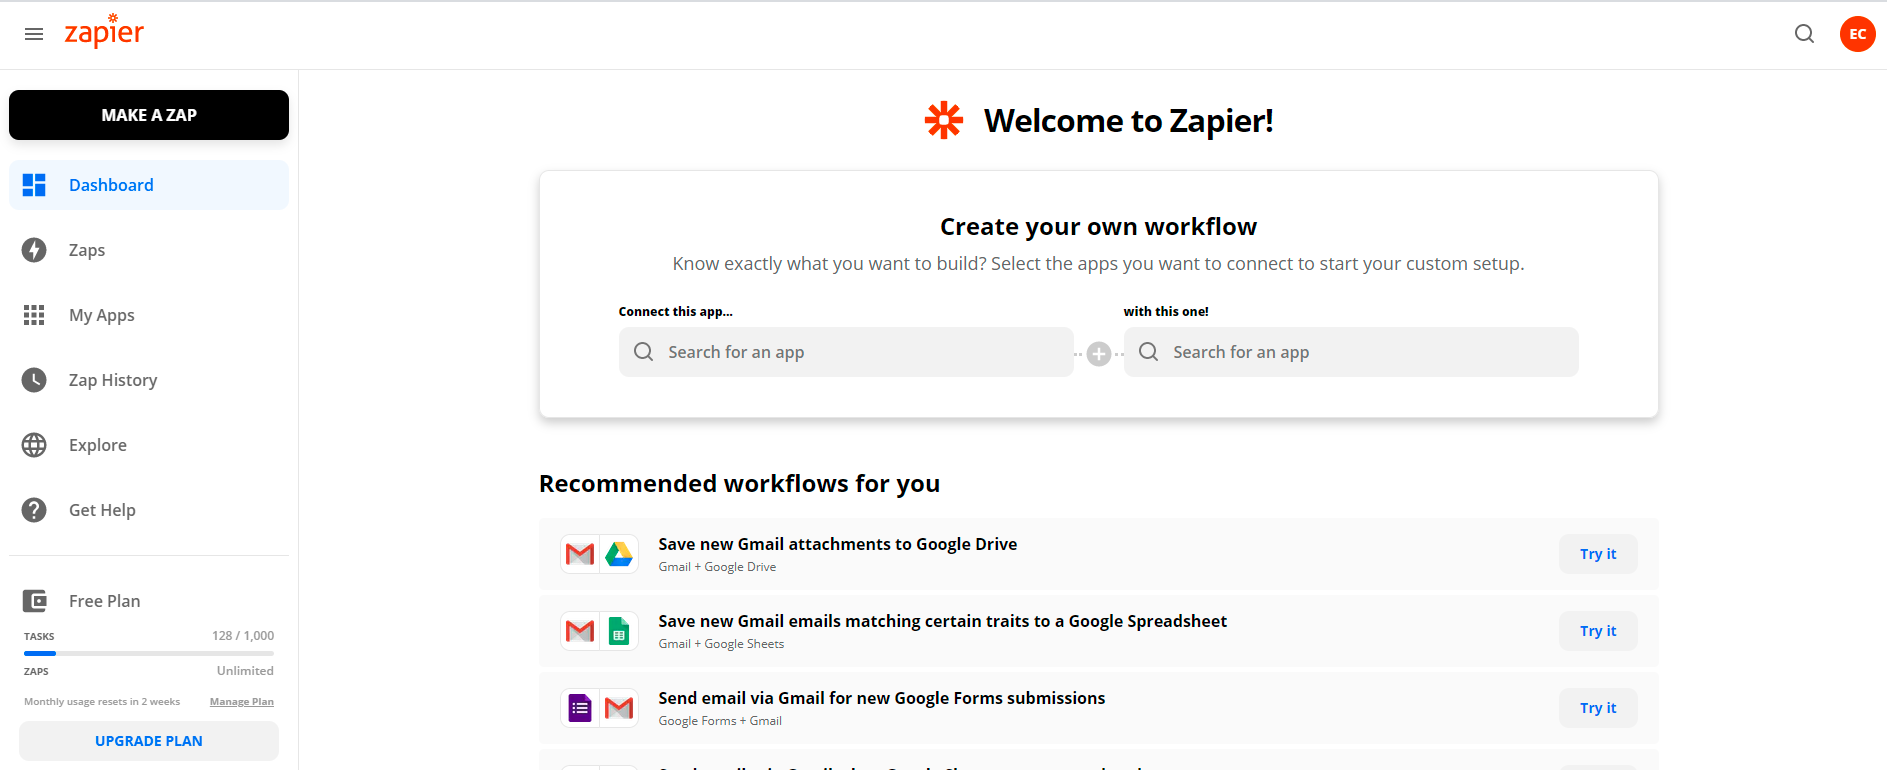
The sidebar on the left links you to the sub-pages of Zapier.
On the top, you see the Make A Zap button – click this to start building workflows.
Setting up a Zap
Zaps are the automated workflows that help you do your routine work. Each zap contains a trigger and one or more actions.
- Triggers are app events that start Zaps.
- Actions are events that Zaps perform after they are triggered.
There are numerous events that you can select from:
- Events in other apps such as Airtable, Google Sheets, Gmail… etc
- Events happened within Zapier apps, which includes but does not limit to:
- Schedule from Zapier
- This function allows you to set the frequency at which your Zap runs, it can be every hour, week, or month, it also let you choose an exact running time for the Zap.
- RSS from Zapier
- For those who don’t know what is a RSS feed, click to open the toggle:
- RSS is an online file that contains details about every piece of content a site has published.
- RSS feeds are typically coded in XML format. To turn an RSS feed into something readable, you need an RSS reader.
- RSS reader turns the codes into what you’d see on a website.
- Benefits of using RSS:
- Rather than having to visit each site individually to see if new content has been published, you can see all of the new content from all of the sites you’re interested within a single interface. And guarantee no repeats of old content!
- You can push those details via RSS to your email newsletter tool so you don’t have to copy and paste those details in manually
- Add new RSS items to a spreadsheet – a convenient way to track anything
- Post new RSS items on social media – automate schedule for posting our company’s expertise
- Get daily blog posts delivered to you in Gmail
- Create your own RSS feed when there’re updates in a site – make this Zap when the site you’re interested don’t publish their updates in RSS feedsClick to find out more on customizing your own RSS super-feed 😎
- Choose RSS by Zapier as your trigger or action app.
- Select an event, it can either be when there is a new item in your RSS feed or new items in multiple feeds. Then click
continue. - Set up the trigger by filling in the required fields as listed below:
- Feed URL: this is the URL that you will use to subscribe to the RSS feed.
- Item Title: this is the name of the item added to the RSS feed.
- Source URL: this is the URL for the site that the RSS feed pulls new items from.
- Content: this is the body of the item.
- For those who don’t know what is a RSS feed, click to open the toggle:
- Webhooks from Zapier (only available on paid plans)
- For those who don’t know what are Webhooks, click to open the toggle
- Webhooks are are automated messages sent from your apps when something happened in your apps
- Example of how it works between two different applications:
- When an event happens on the trigger application, it serialises data about that event and sends it to a Webhook URL from the action application. The action application then send a callback message, often with an HTTP status code like 302 to let the trigger application know if the data was received successfully (or 404 if not).
- Webhooks can be used to sync customer data in other applications, e.g. when a user changes their email address, you can ensure that the change is reflected in your CRM system as well
- Send webhooks whenever RSS feeds are updated
- For those who don’t know what are Webhooks, click to open the toggle
- Paths (only available on professional plans or above)
- Allows you to run multiple branches of actions which leads to different outcomes
- Uses conditional ‘if… then…’ logic
- Format (only available on starter plans or above)
- To chance the formats of dates and times
- To find & replace, or capitalise texts
- Use numeric data to execute formulas and functions
Manage Zaps
Organise Zaps
Click Zaps on the sidebar of the main page, and you will be redirected to a subpage that shows your folders and the zaps in it in two side-by-side columns.
There are two types of folders – private and shared.
- Private folders are only visible to you, you can click on the
+button to create new folders to sort your zaps for different workflows. - Shared folders are used only when you have a Zapier for Teams account, to share folders with your team and collaborate on zaps.
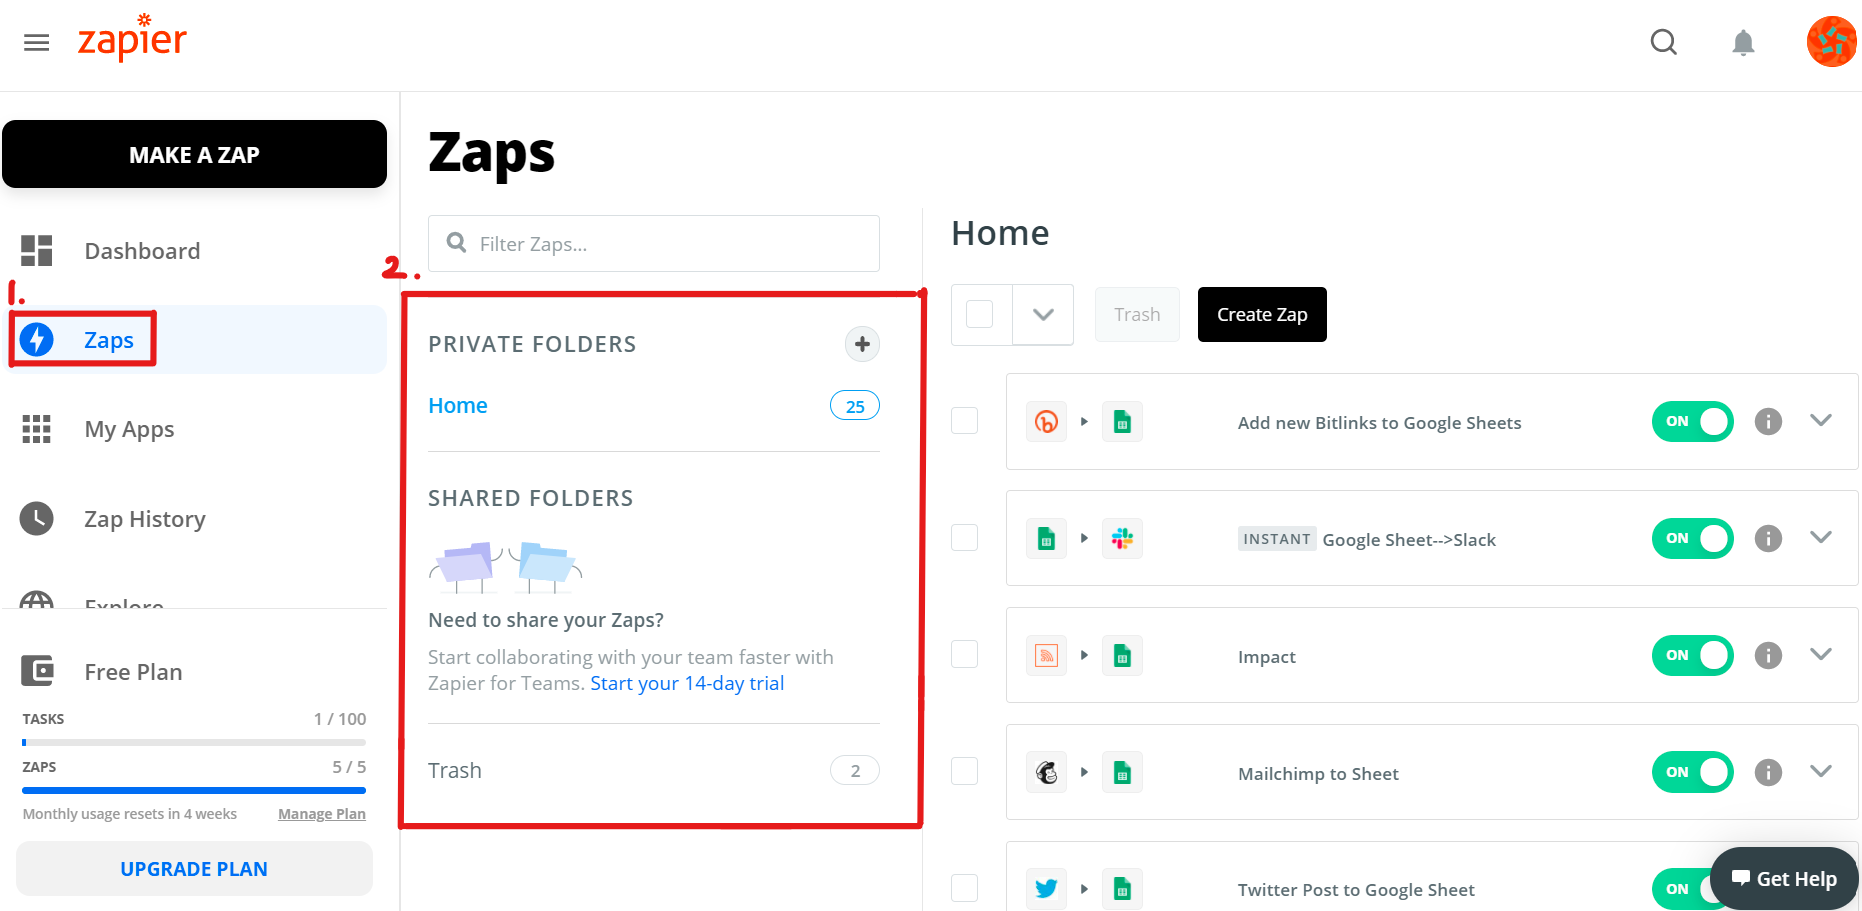
Figure 4: Organizing Zaps into folders
View Zap History
Zap history keeps a record of every automation, which is useful for troubleshooting Zaps.
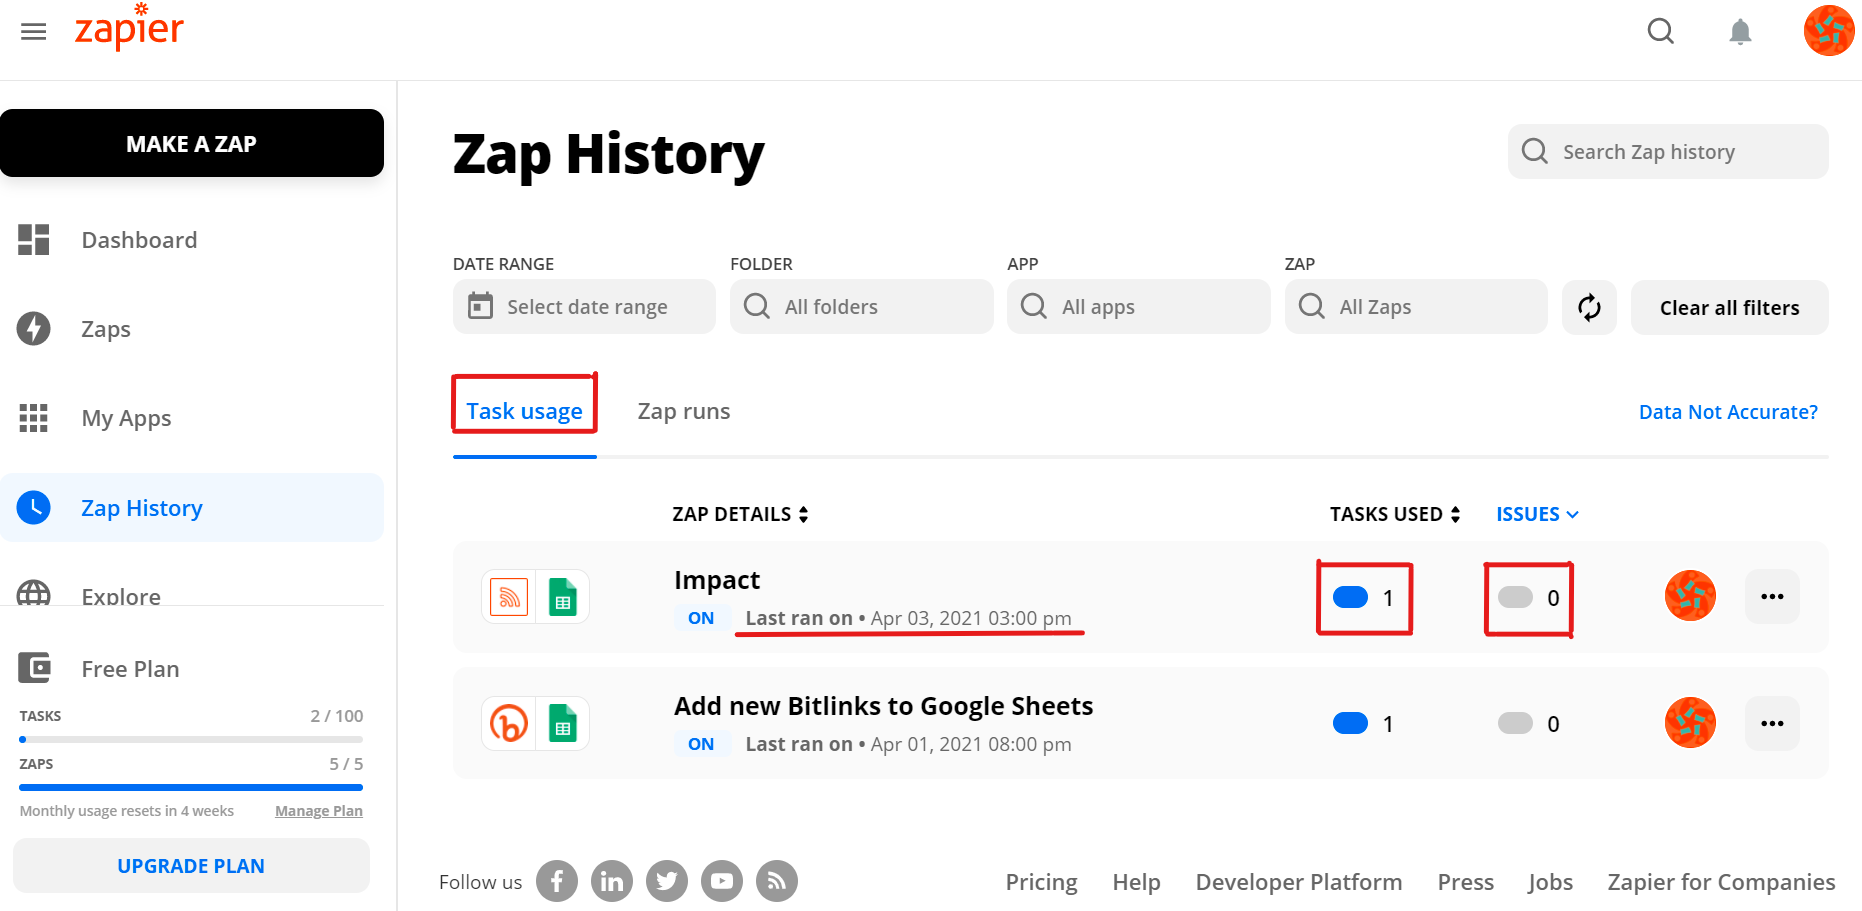
In the Task usage tab, you can see the total number of tasks used by each Zap, the time it has last ran, and the number of issues in the Zaps if there is any.
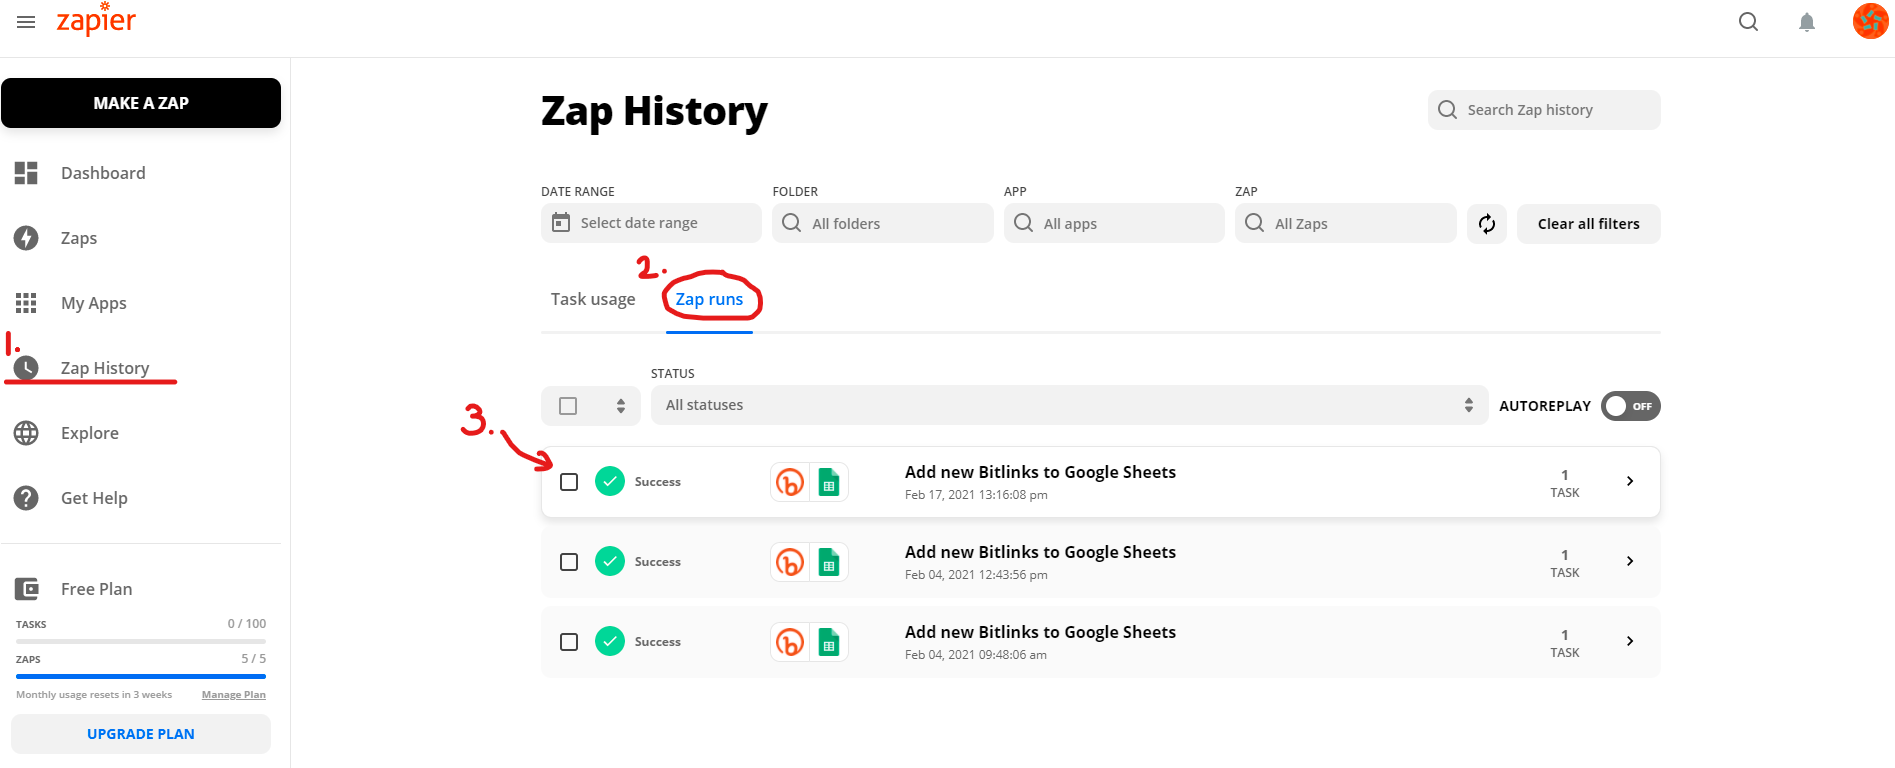
In the Zap runs tab, you can check the statuses when your Zaps run every time. In the example shown below, all three Zap runs have ‘Success‘ as their statuses, meaning that the Zaps ran and completed successfully. Other statuses include: filtered, stopped, waiting, playing, holding.
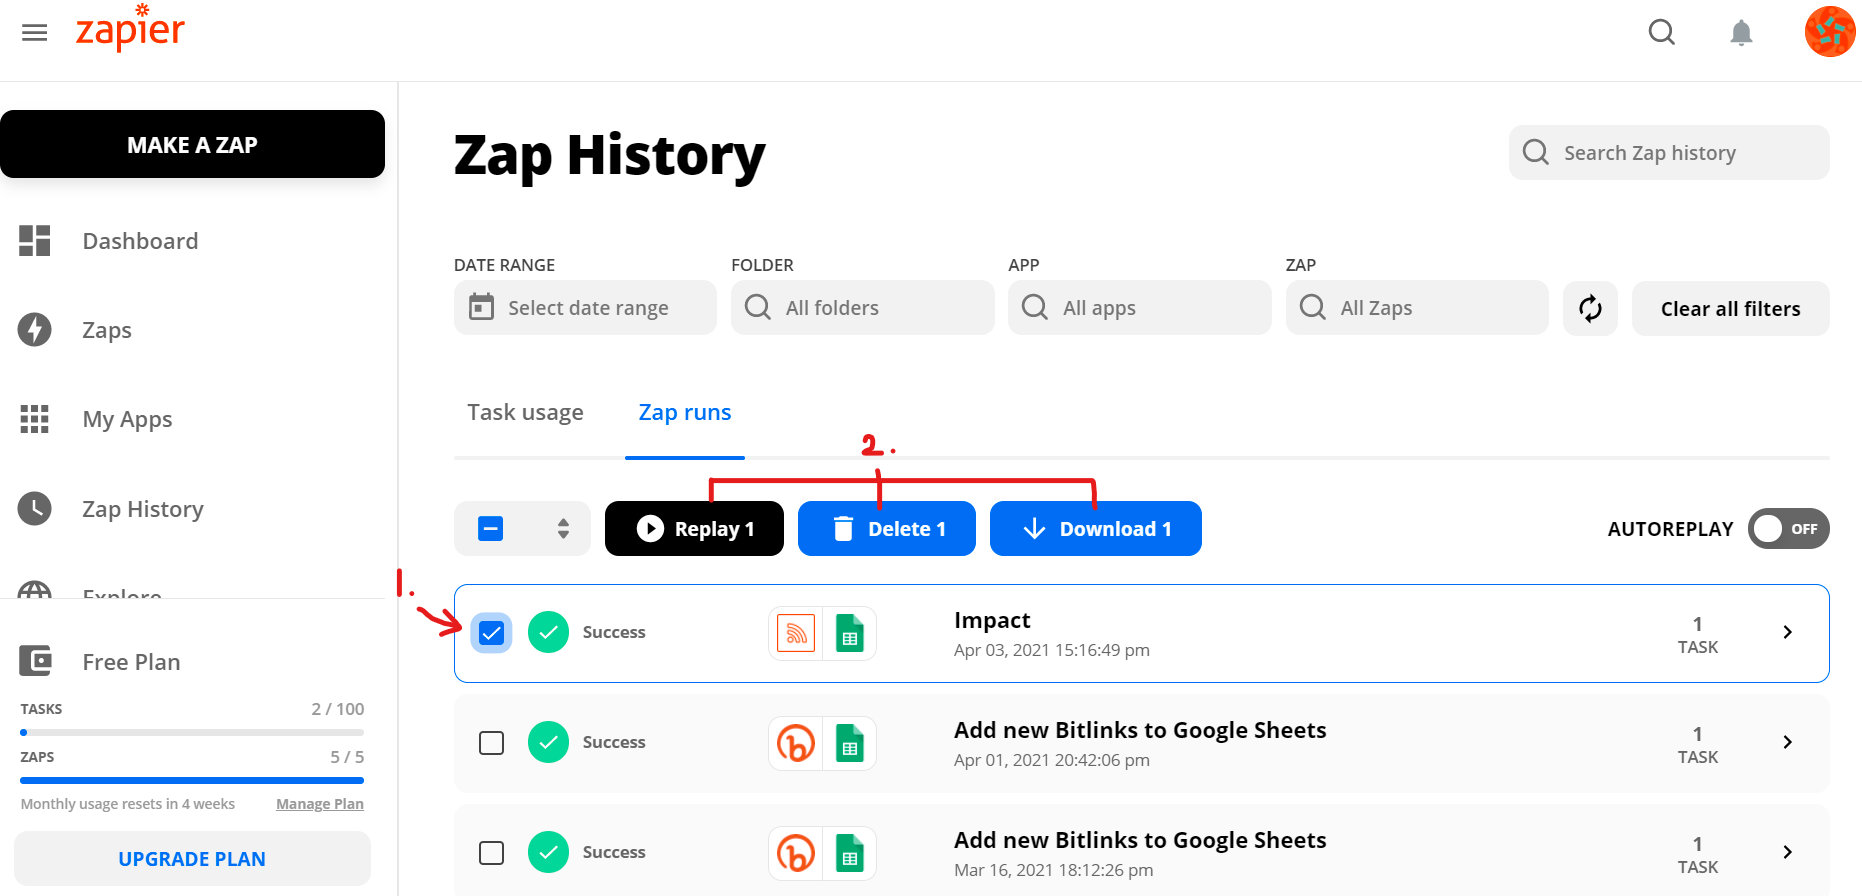
By clicking the checkbox on the leftmost of each row of zap run, you will be able to see the Replay, Delete, and Download options to deal with your zaps.
- Replaying Zaps
- When there are unsuccessful zap runs, we can replay zaps to retry the failed steps. You will also want to replay Zaps that are held when there are no task quotas left.
- Note: replays are only available in paid plans.
- Deleting Zap runs
- Note: deleting Zap runs will not deduct tasks that the zaps run has already automated, meaning that it will NOT help if you have reached your task limit already.
- Downloading Zap runs
- When do we want to download Zap runs?Zapier only stores a maximum of one month of Zap run data or the last 10,000 Zap runs, whichever comes first, in your account’s Zap history.To keep long-term records of your Zap data, you might prefer downloading your Zap history regularly for backup.
- After clicking
DownloadthenGenereate and email CSV, your Zapier account’s email address will receive a CSV file which is available for you to download
To view details of each individual Zap run, click on the individual Zap runs. You can see the data that has gone in and out of each step of the Zaps. The number of total tasks used will also be shown at the bottom of the page.
Note: the number of tasks that can be automated in a given billing cycle is limited. Once you’ve reached your full task limit, Zapier will hold new Zap runs.
To check the number of tasks you have left for the month, click your profile’s icon on the top right-hand corner of the page and select Settings, then go to the Billing and Usage subpage.

Troubleshooting Zaps
Things might not always work as expected, and your Zaps might run into problems sometimes, such as missing data, incorrect data, or maybe malfunctioning Zaps. If these things happen, do not panic, follow the instructions below to fix your Zaps!
If your Zap’s trigger test fails
When setting up a trigger step, you are required to test trigger data. However, sometimes it may show that no test data is found. There are 3 suggestions for you to follow to solve this problem:
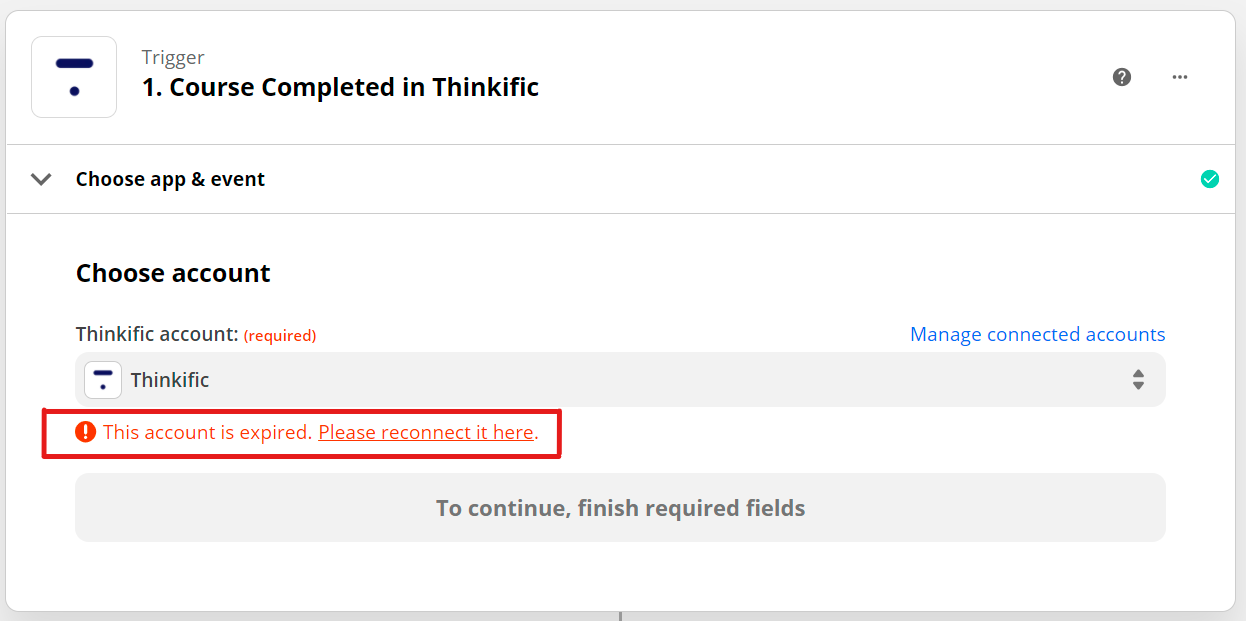
- Check if your app account is still connected to ZapierIt is possible that the connection is expired if your app hasn’t been used in ant Zaps for a while. Click on
Please reconnect it hereto enter your API keys.
- Check if your trigger options are valid
- It is important to make sure all the required fields in the set up trigger section are all filled.
- Note: if you have just added or renamed or deleted an field option in your trigger app, the changes might not be updated immediately. Reload fields options in the set up trigger section after a while.
- Check if your Zap is using an instant trigger
- For some triggers, Zapier can only identify data that is recently created. In this case, you will need to prepare a new set of refreshed data in your trigger app in another tab (without saving), go back to the Zapier page to test the trigger, then immediately switch to the tab you’ve just opened to save the data.
If there is missing data in your action app
There are many causes for this problem, but the most common reason is that your Zap trigger is not sending data.
Two things to check:
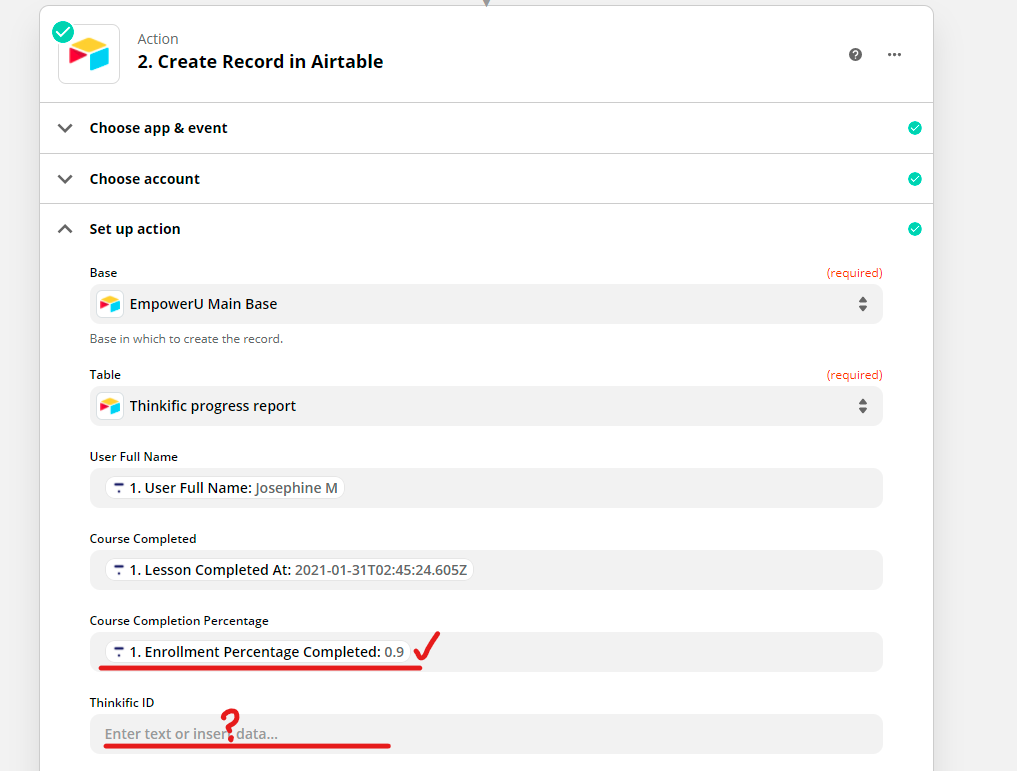
- Check if your fields are correctly mapped in the Zap
- Make sure you have indicated a specific value to be used in the fields, see the snapshot below for an example where a specific value ie. ‘Enrollment Percentage Completed’ is selected to be used in the ‘Course Completion Percentage’ field, this means this field is mapped. Comparatively, nothing is selected in the ‘Thinkific ID’ field, meaning that it is NOT mapped and no record will be created regarding this field.
- Check if your mapped fields are pulling empty data
- Go to
Zap Historyand click on the recent Zap run. Click into theData Insection, you should see a page as shown below:
- Go to
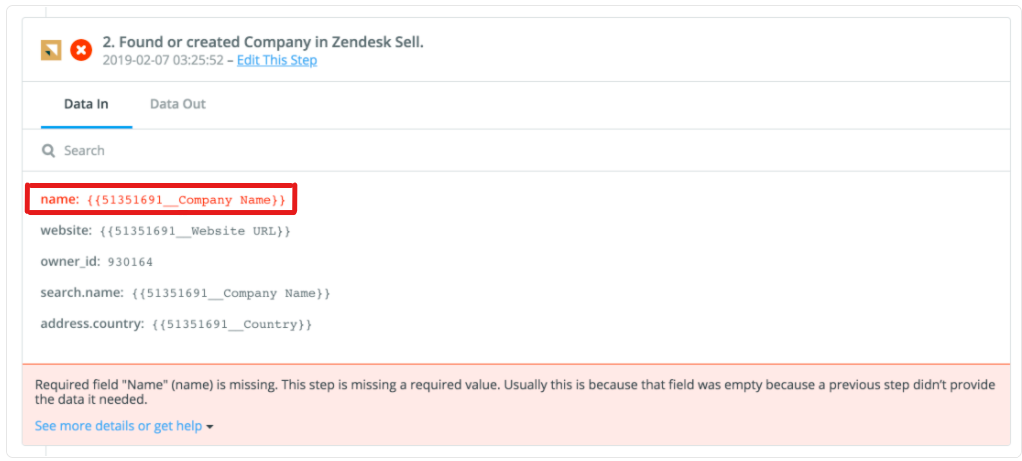
In this example, the red curly brackets around the data indicate that the ‘name’ field mapped over from the trigger was empty, or does not exist in the same it did when you set up the Zap. To resolve this, click into your Zap to edit it. Then retest the trigger by loading new test data in the Zap trigger, then by remapping the affected fields in the choose actionstep.
If your Zap is not running
Please check if you have reached your task limit for the billing period. You can wait until the next billing period for the task number to reset. Depending on which paid plan you have, by then, you can either manually or automatically replay the held Zap runs.
If all the above cannot solve your problem, click here to find other solutions from Zapier’s homepage.
Additional Resources
- Zapier’s intro guide (Youtube link)
- Zapier’s How-to & Templates
- Alternative solution that provides similar service – Automate.io
PS!
At FSI we’re always seeking to improve, so if you have any feedback on this guide/template, please do not hesitate to let us know.