Introduction to Zoom
Post the outbreak of Covid-19, almost every organisation encompassing companies, schools, and governmental bodies, adopted flexible working environments whereby the workers are given a choice to work remotely. Virtual communications have become the key to effective team/project management, and there is no doubt that Zoom can be a significant solution to communications problems.
Major functions on Zoom
The major features of Zoom are:
- One-on-one meetings
- Host unlimited one-on-one meetings.
- Group video conferences
- Host up to 500 participants (if you purchase the “large meeting” add-on). The free plan, however, allows you to host video conferences of up to 40 minutes and up to 100 participants.
- Screen sharing
- Meet one-on-one or with large groups and share your screen with them so they can see what you see.
- Recording
- You can record your meetings or events too.
- Breakout Rooms
- You can create multiple smaller meeting rooms in a large meeting for smaller group exercises.
Starting a Meeting or Joining a Room
(1) Start a new Meeting
A new meeting room will open immediately if you click on the ‘New Meeting’ icon

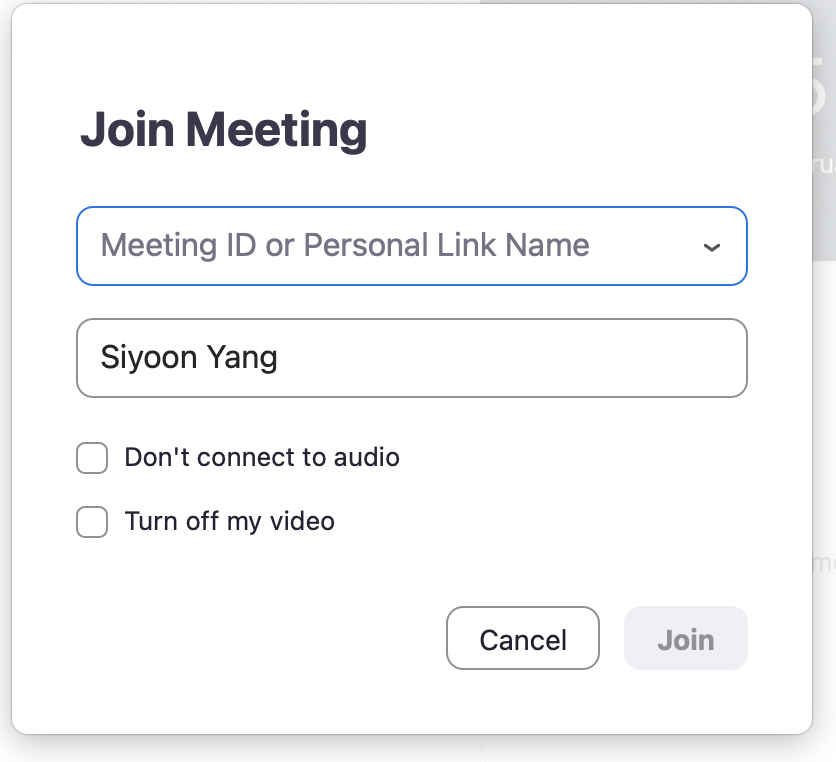
(2) Join a meeting via ‘Meeting ID’ or ‘Personal Link Name’
The host(s) would have sent you the invitation that includes either ‘Meeting ID’ or ‘Personal Link Name’. Join the meeting by clicking ‘Join’ after adding the meeting information.
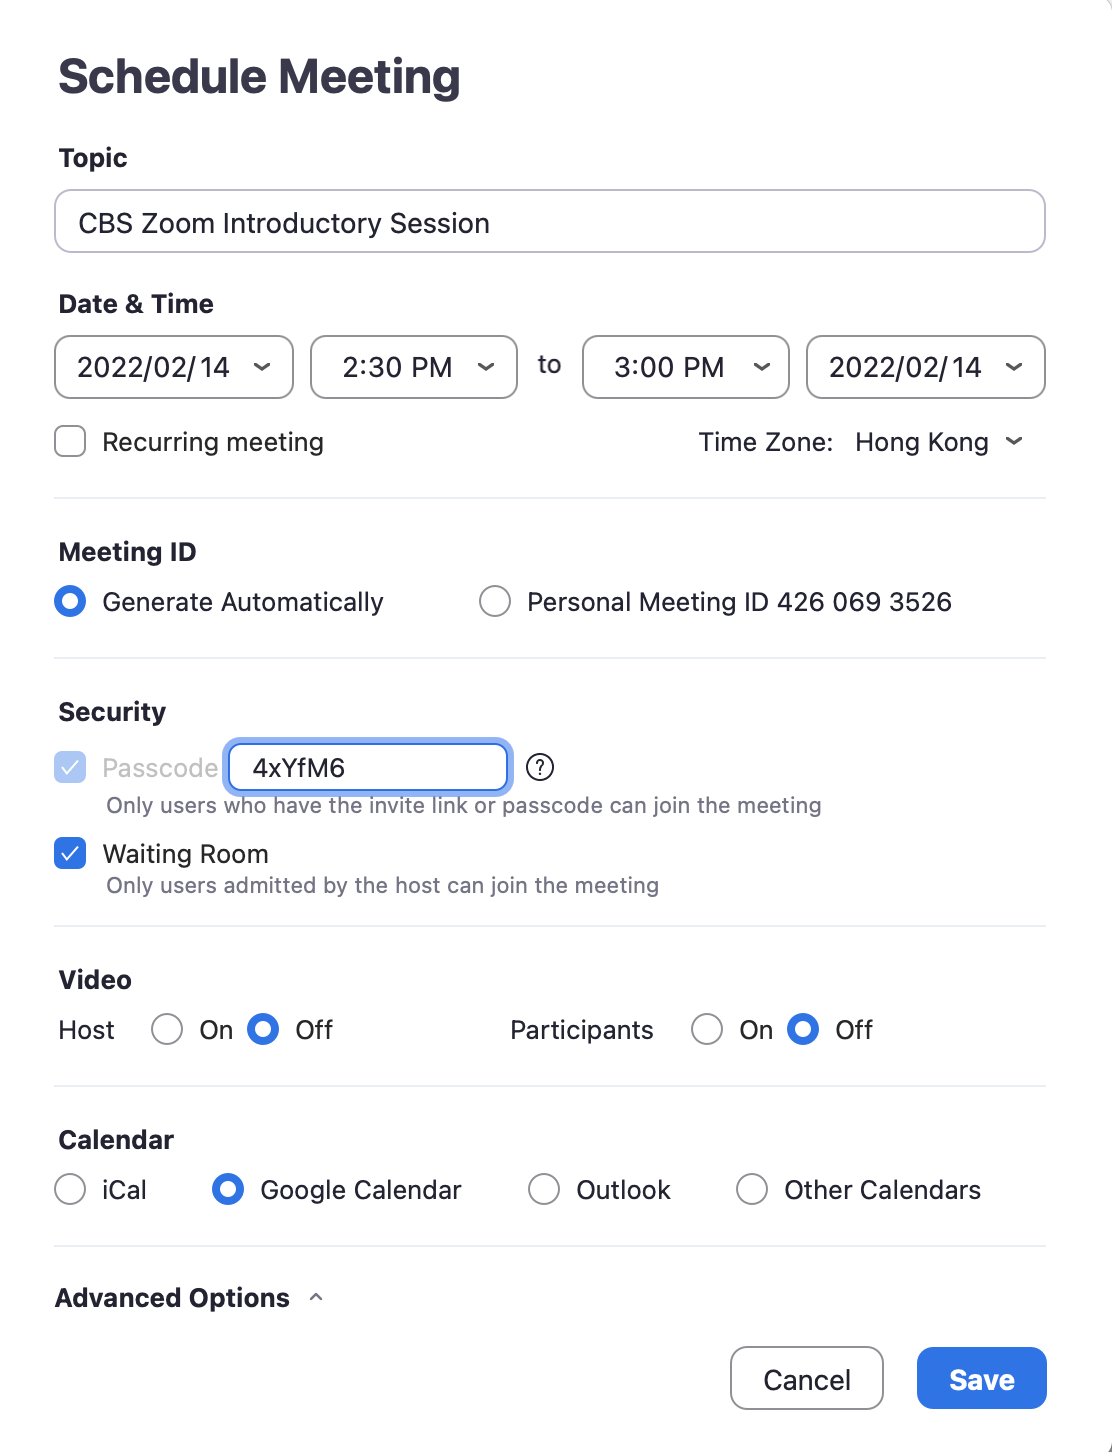
(3) Schedule Meetings in advance
When you schedule a meeting, you can automatically sync your linked calendar (e.g. Google Calendar) to show the meeting.
Zoom User Guide and Features Inside the Meeting Room
Now let’s explore what you can do once you are in the meeting room!
(1) Settings
- Video Settings
Click on the arrow beside the video icon → Press ‘Video Settings’ to see a number of adjustments you can make!
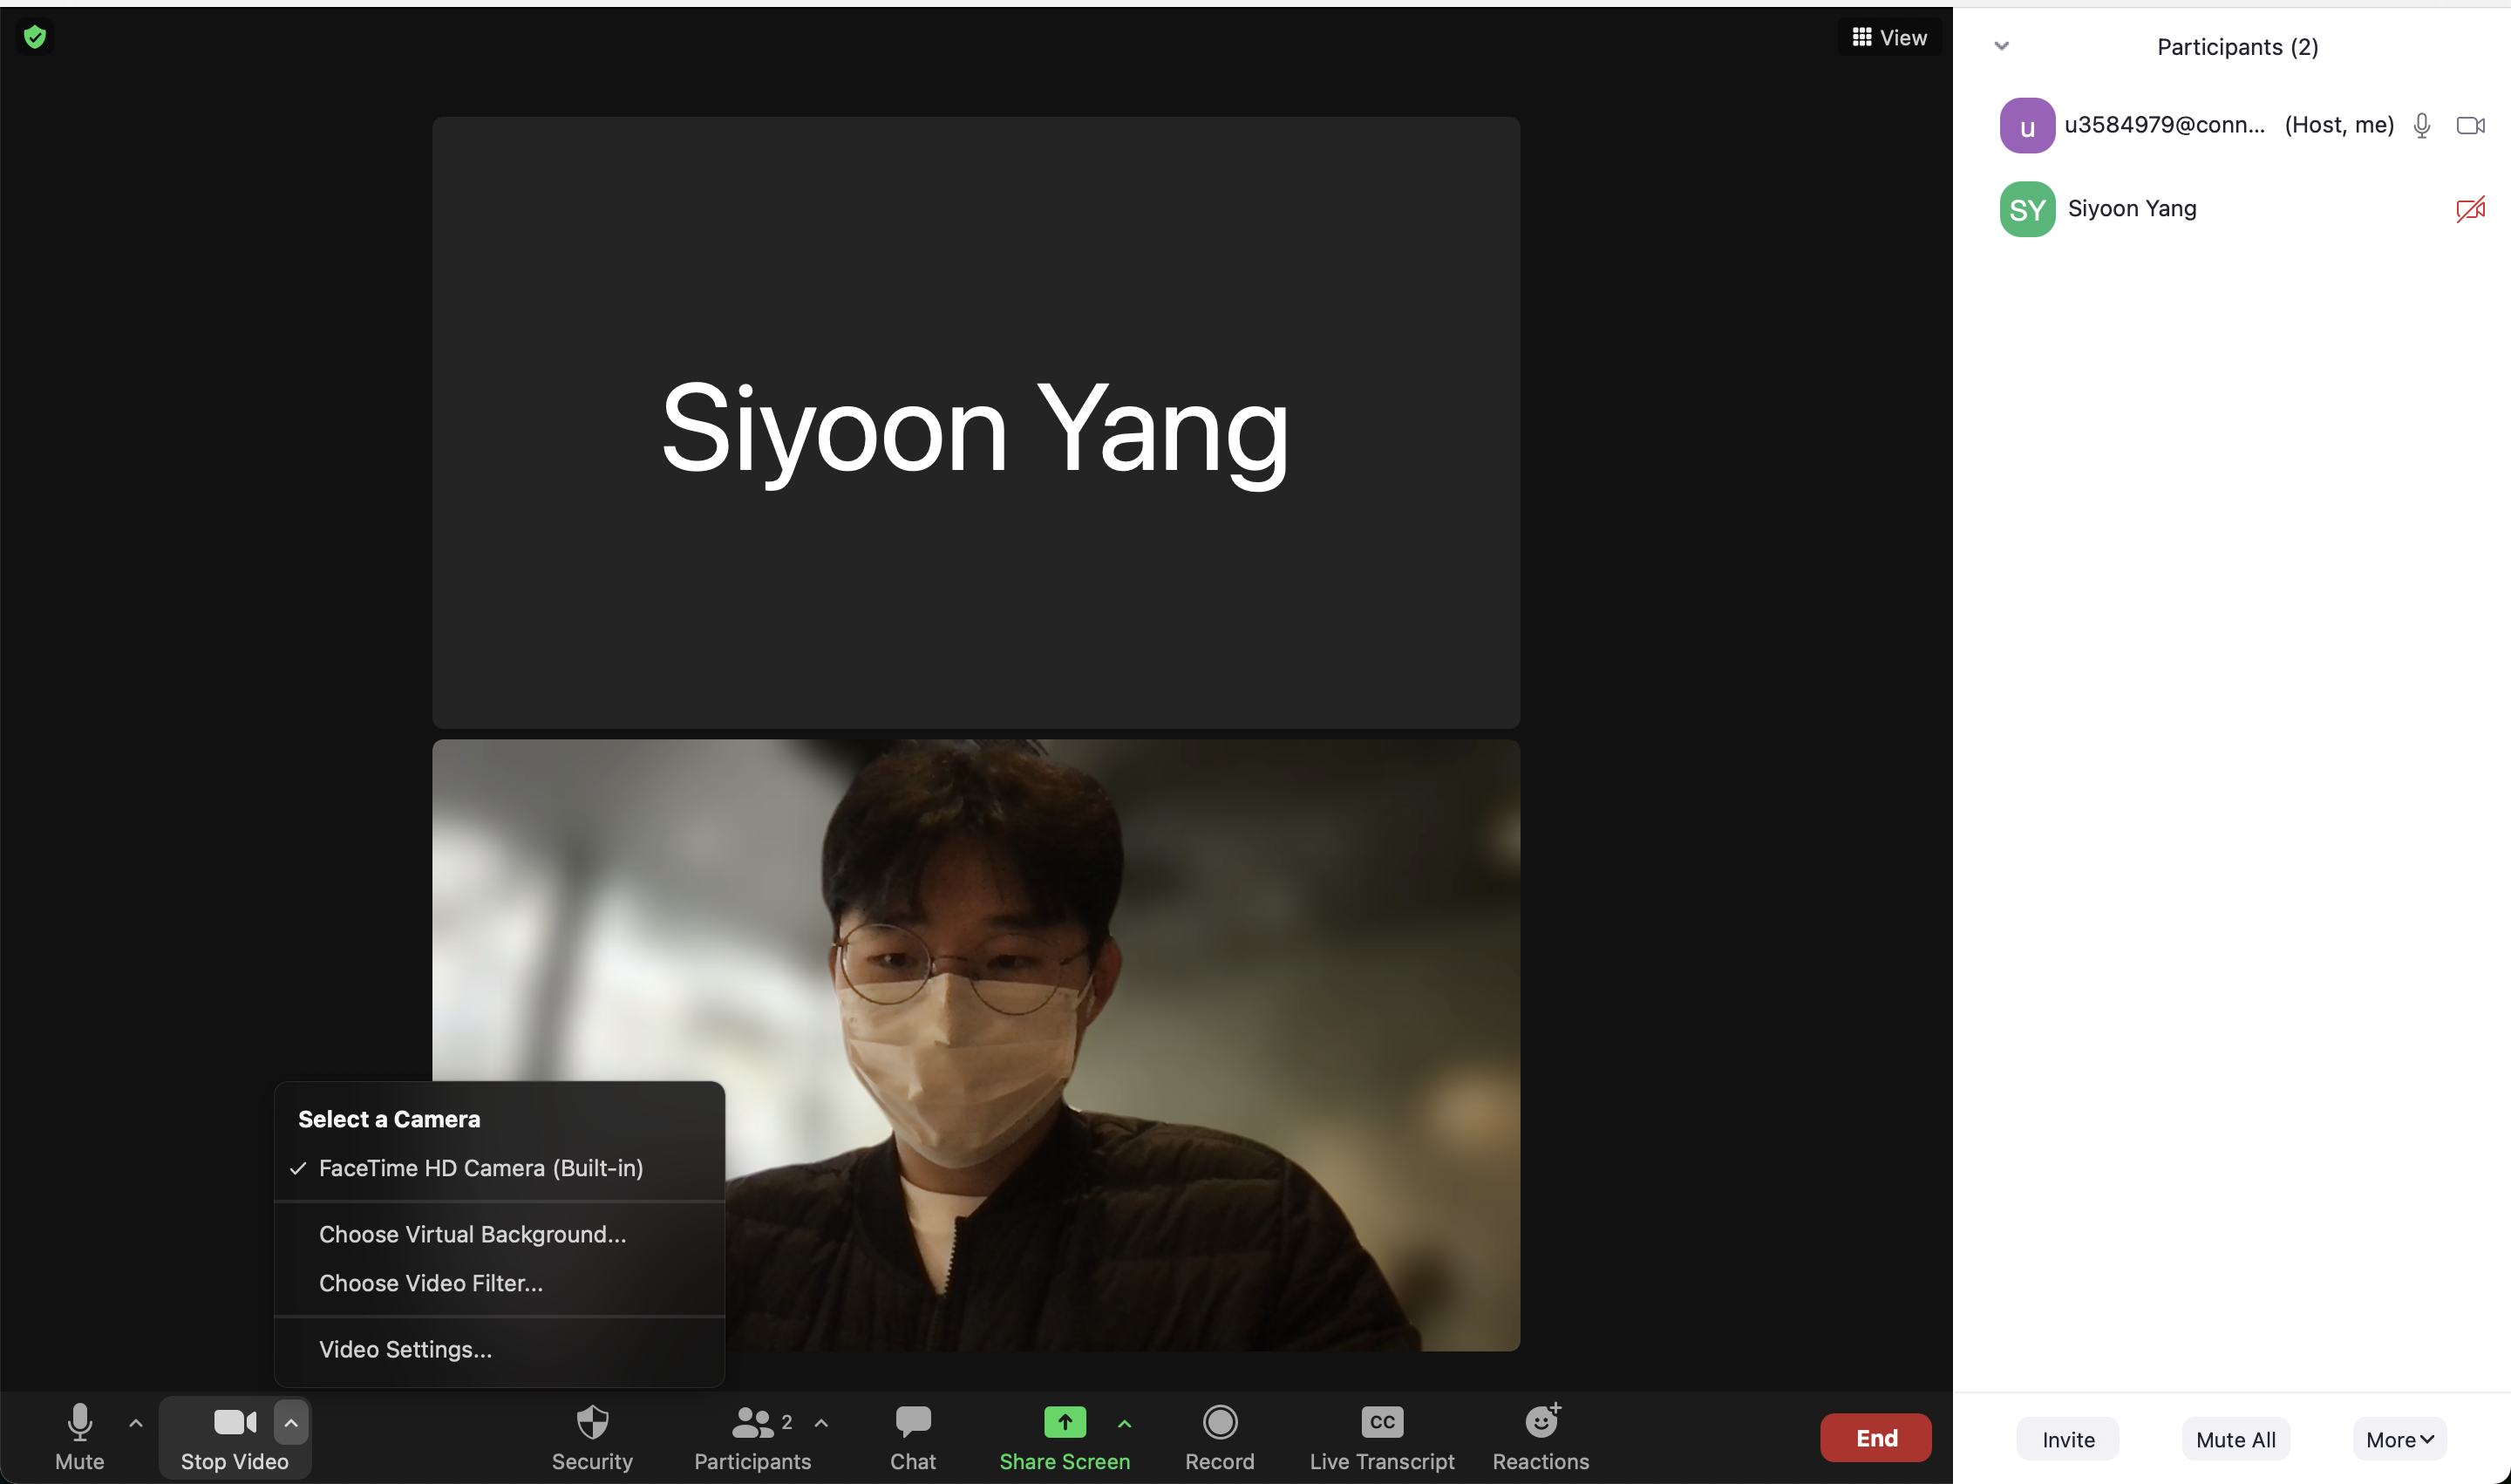
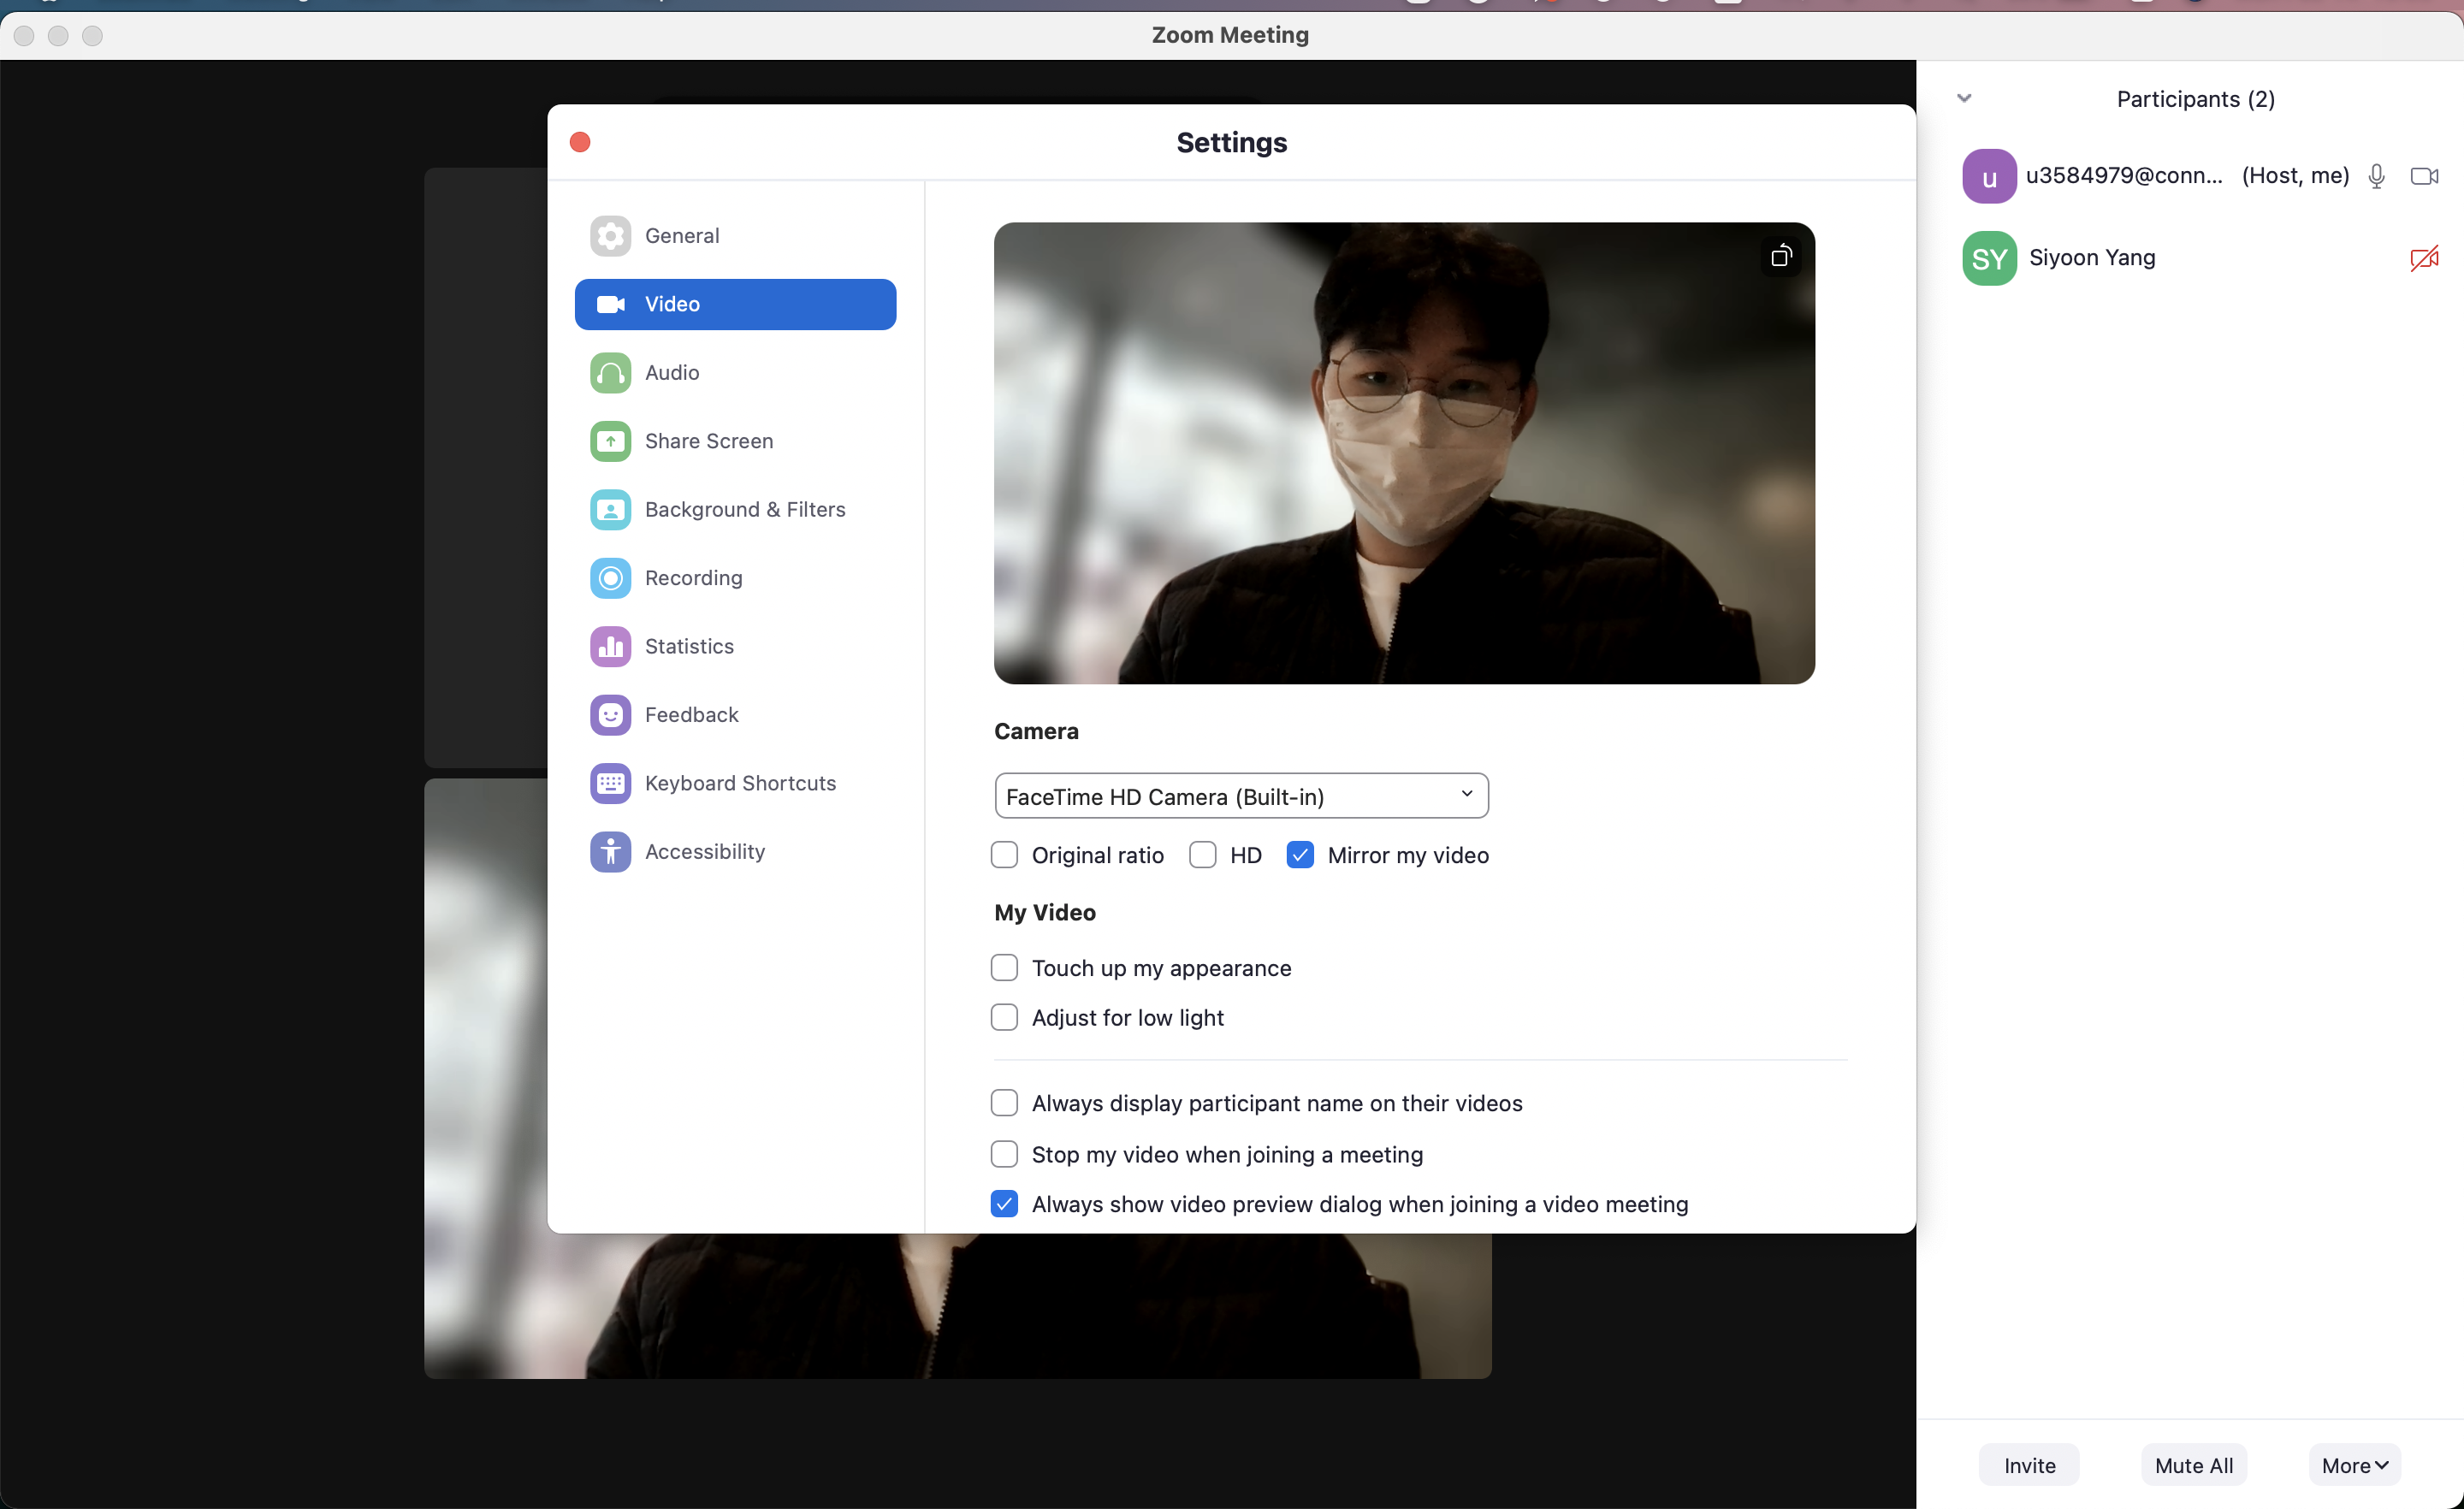
Here, you can:
- Adjust camera settings
- Change the name displayed on participants’ videos
- Change the maximum number of participants displayed per screen in ‘Gallery View’: 25 or 49
- General Settings
Once you have opened the video settings, you can see that there are several other tabs on the left-hand side. Click on ‘General’:
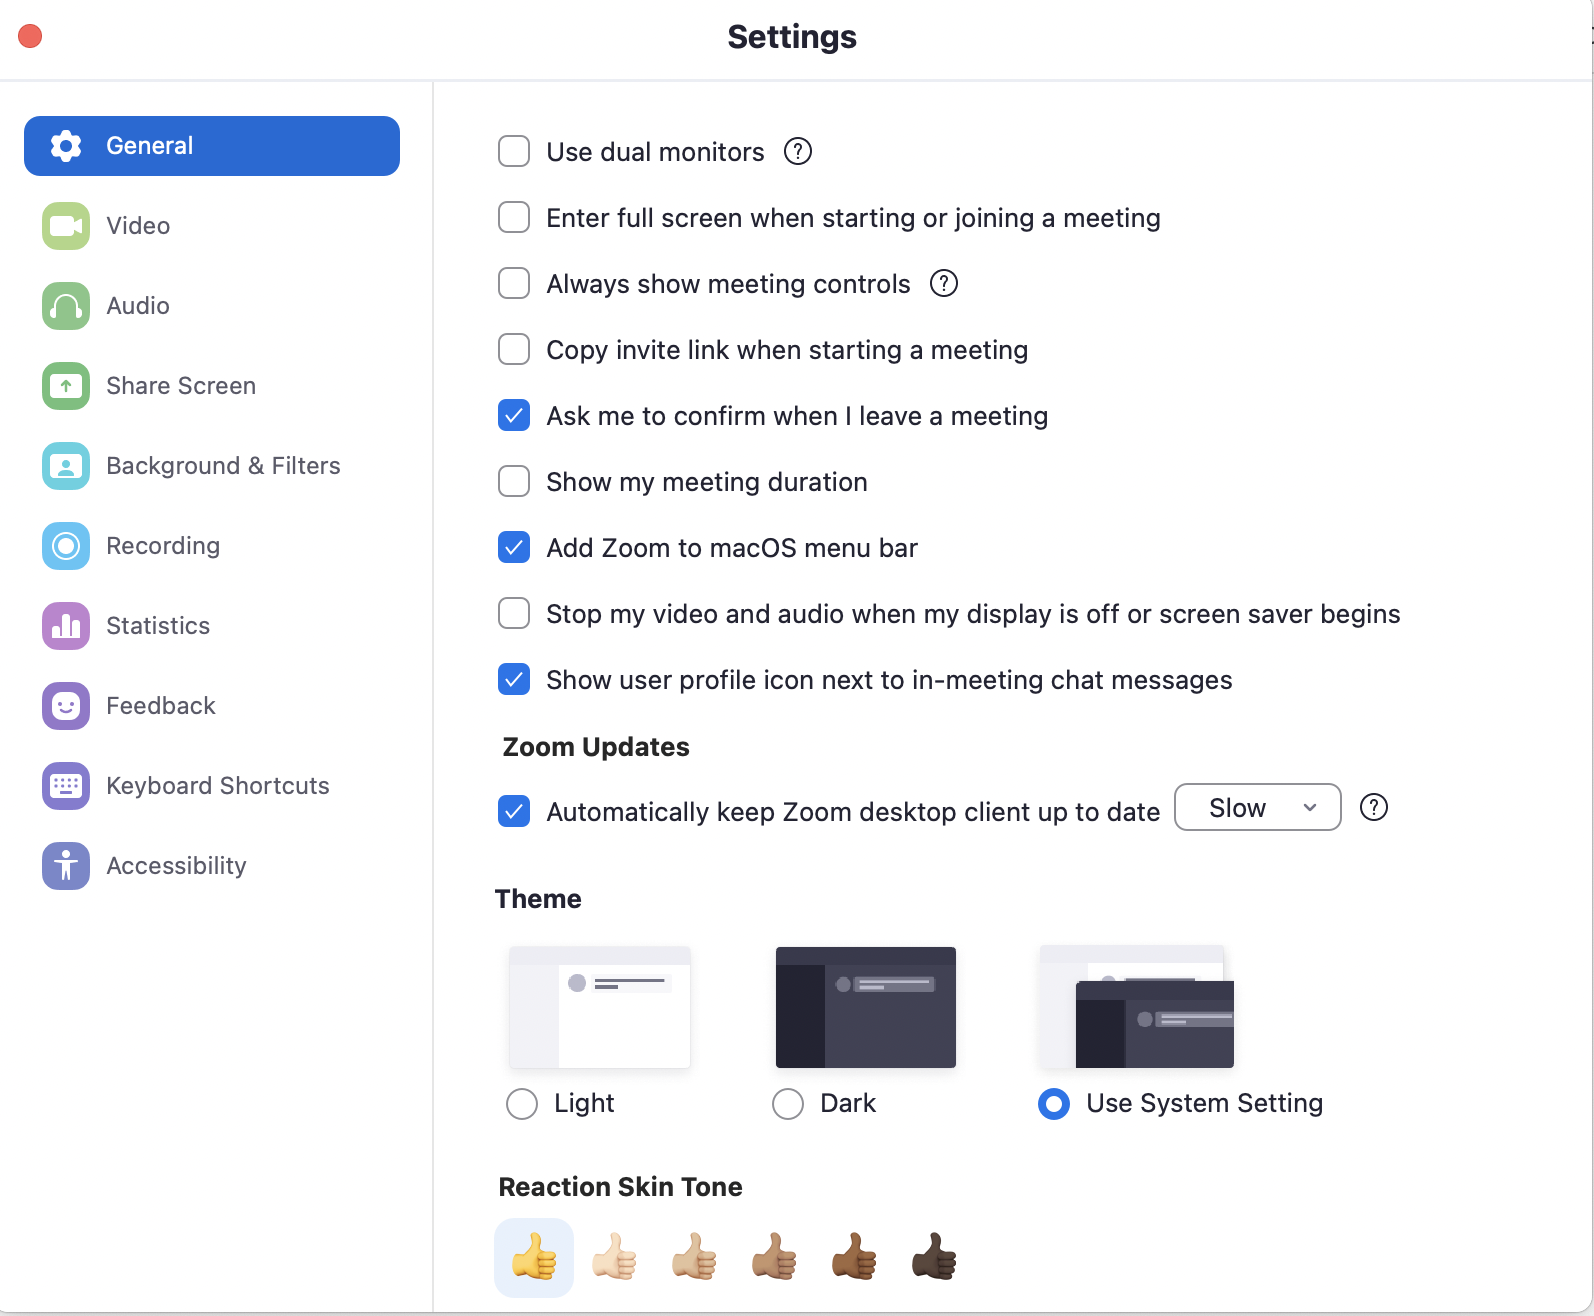
Here, you can choose:
- Whether you want to use dual monitors
- Adjust and choose the screen theme and modes
- To display your meeting duration
- Etc.
- Audio Settings
You may want to check your audio settings before you start the meeting to ensure audibility.
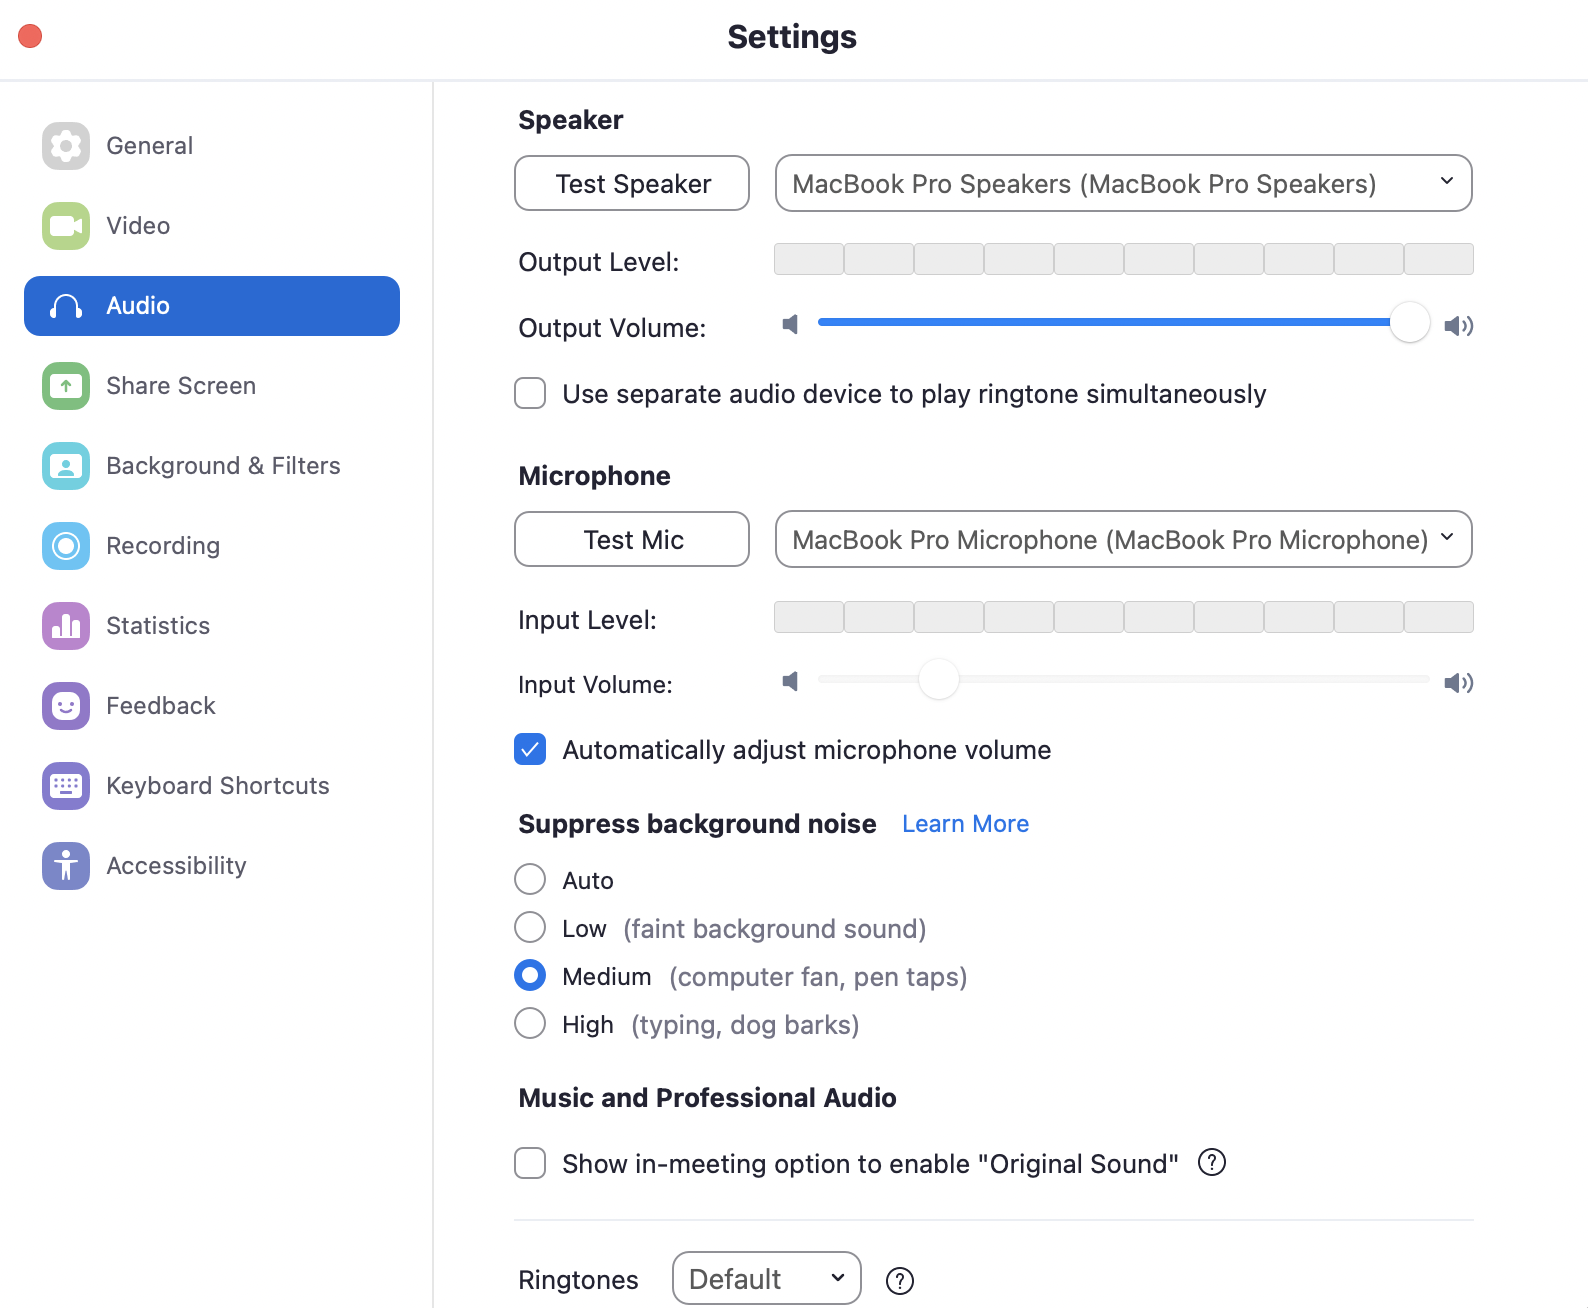
Here, you can:
- Adjust Speaker and Microphone volumes
- Test your Speaker and Mic
- Choose the level of suppression of background noise
- Etc.
- Share Screen Settings
Share screen is one of the best features on Zoom that you are highly encouraged to use in order to make sure you are on the same page with other people in the meeting.
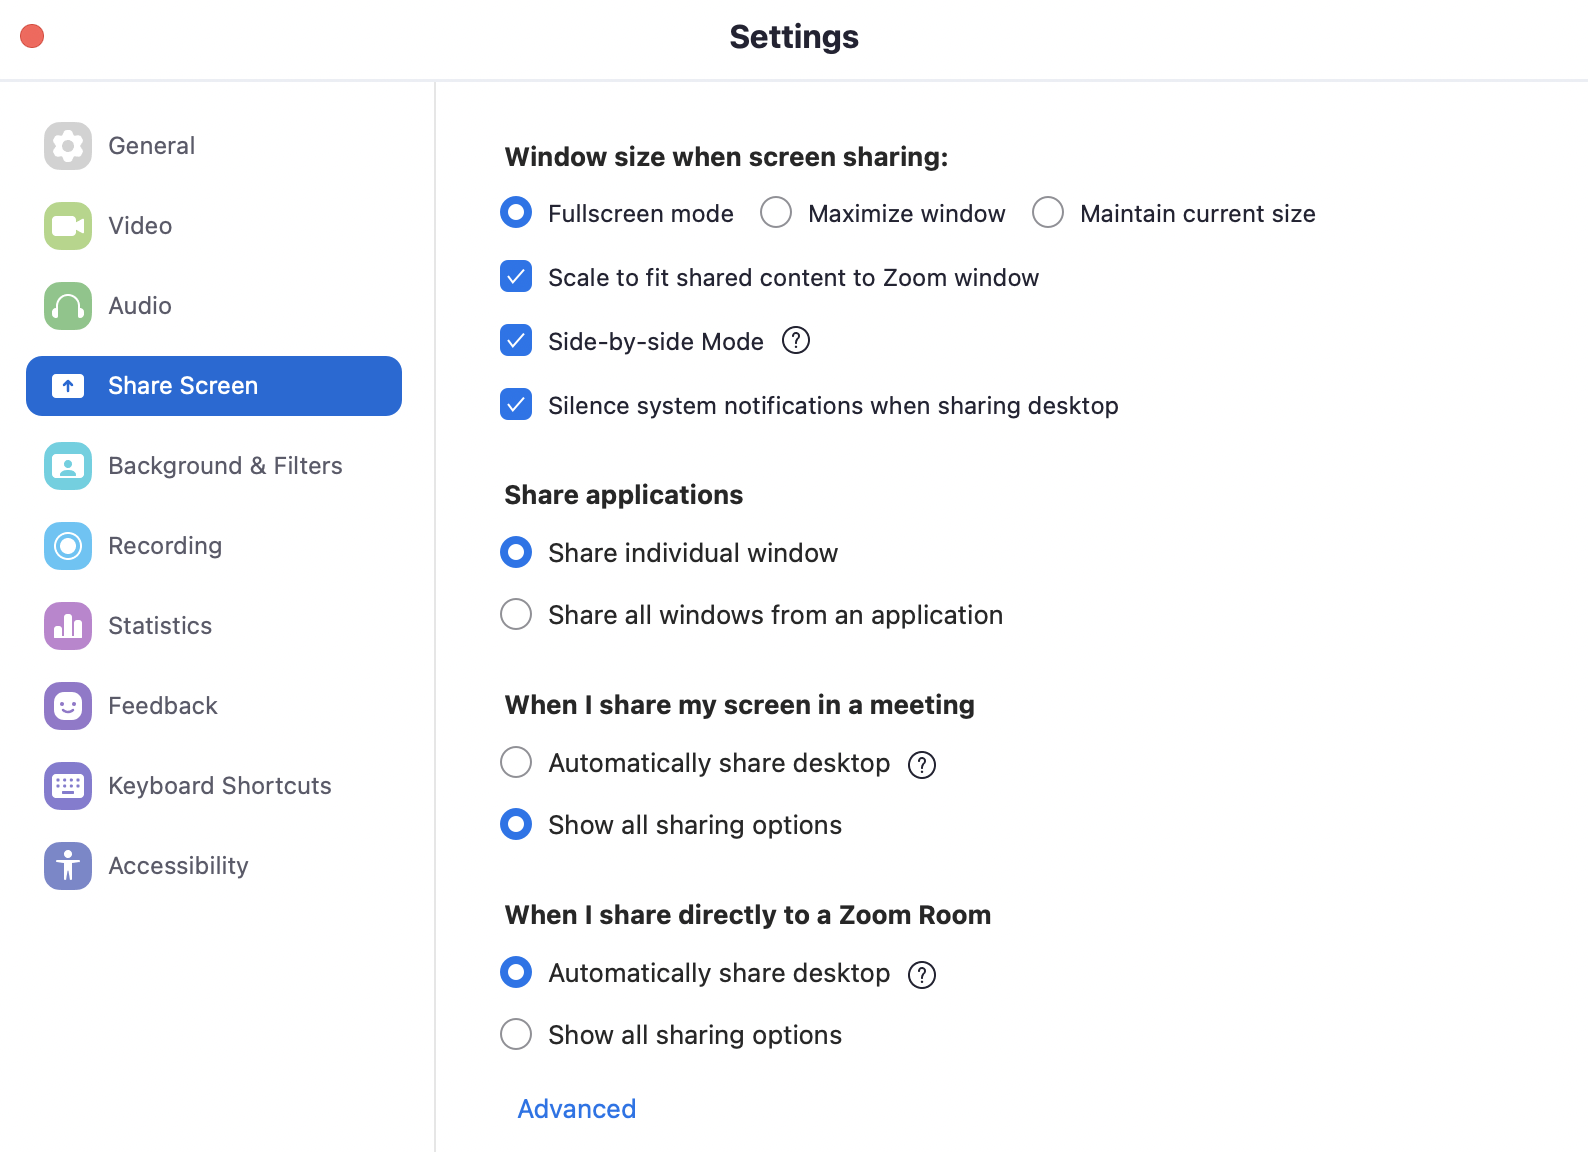
Here you can:
- Adjust your window size when screen sharing
- Mode of sharing when sharing applications
- Whether you want to see sharing options every time you start screen share
- Etc.
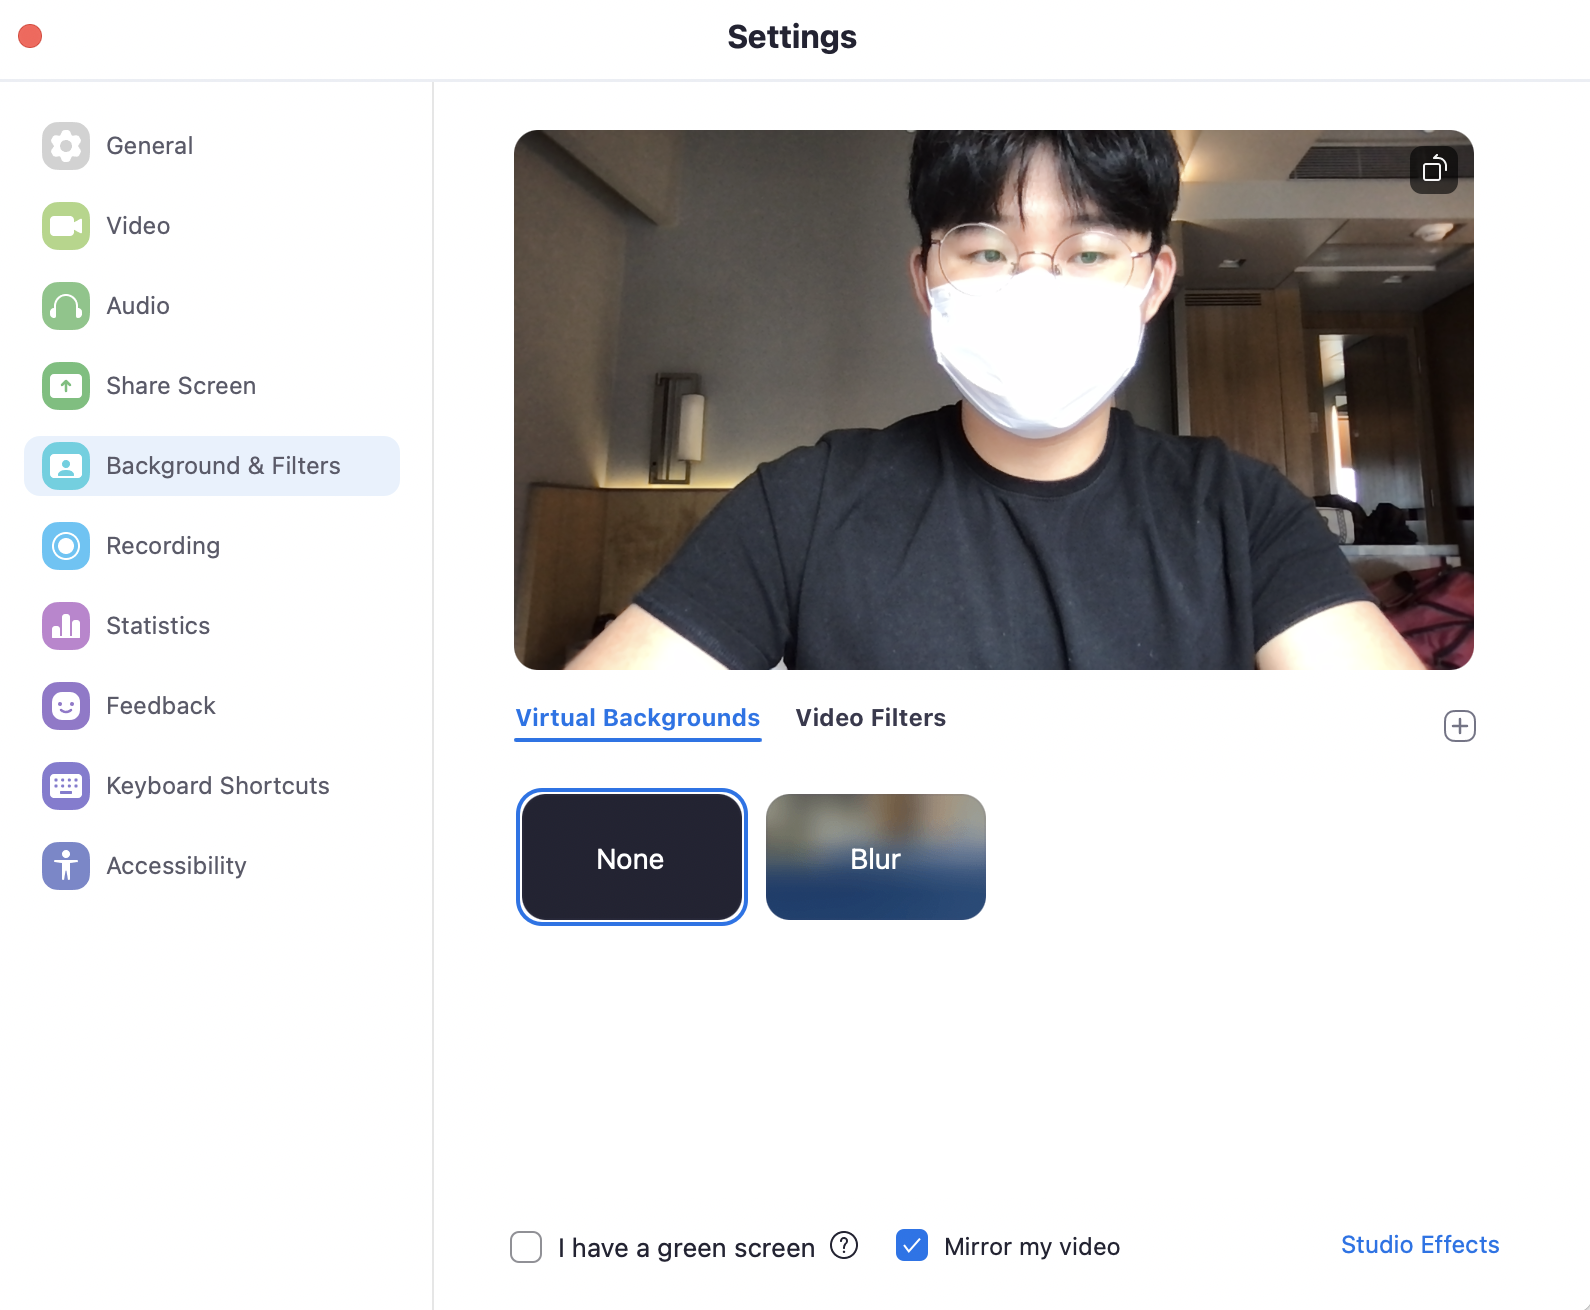
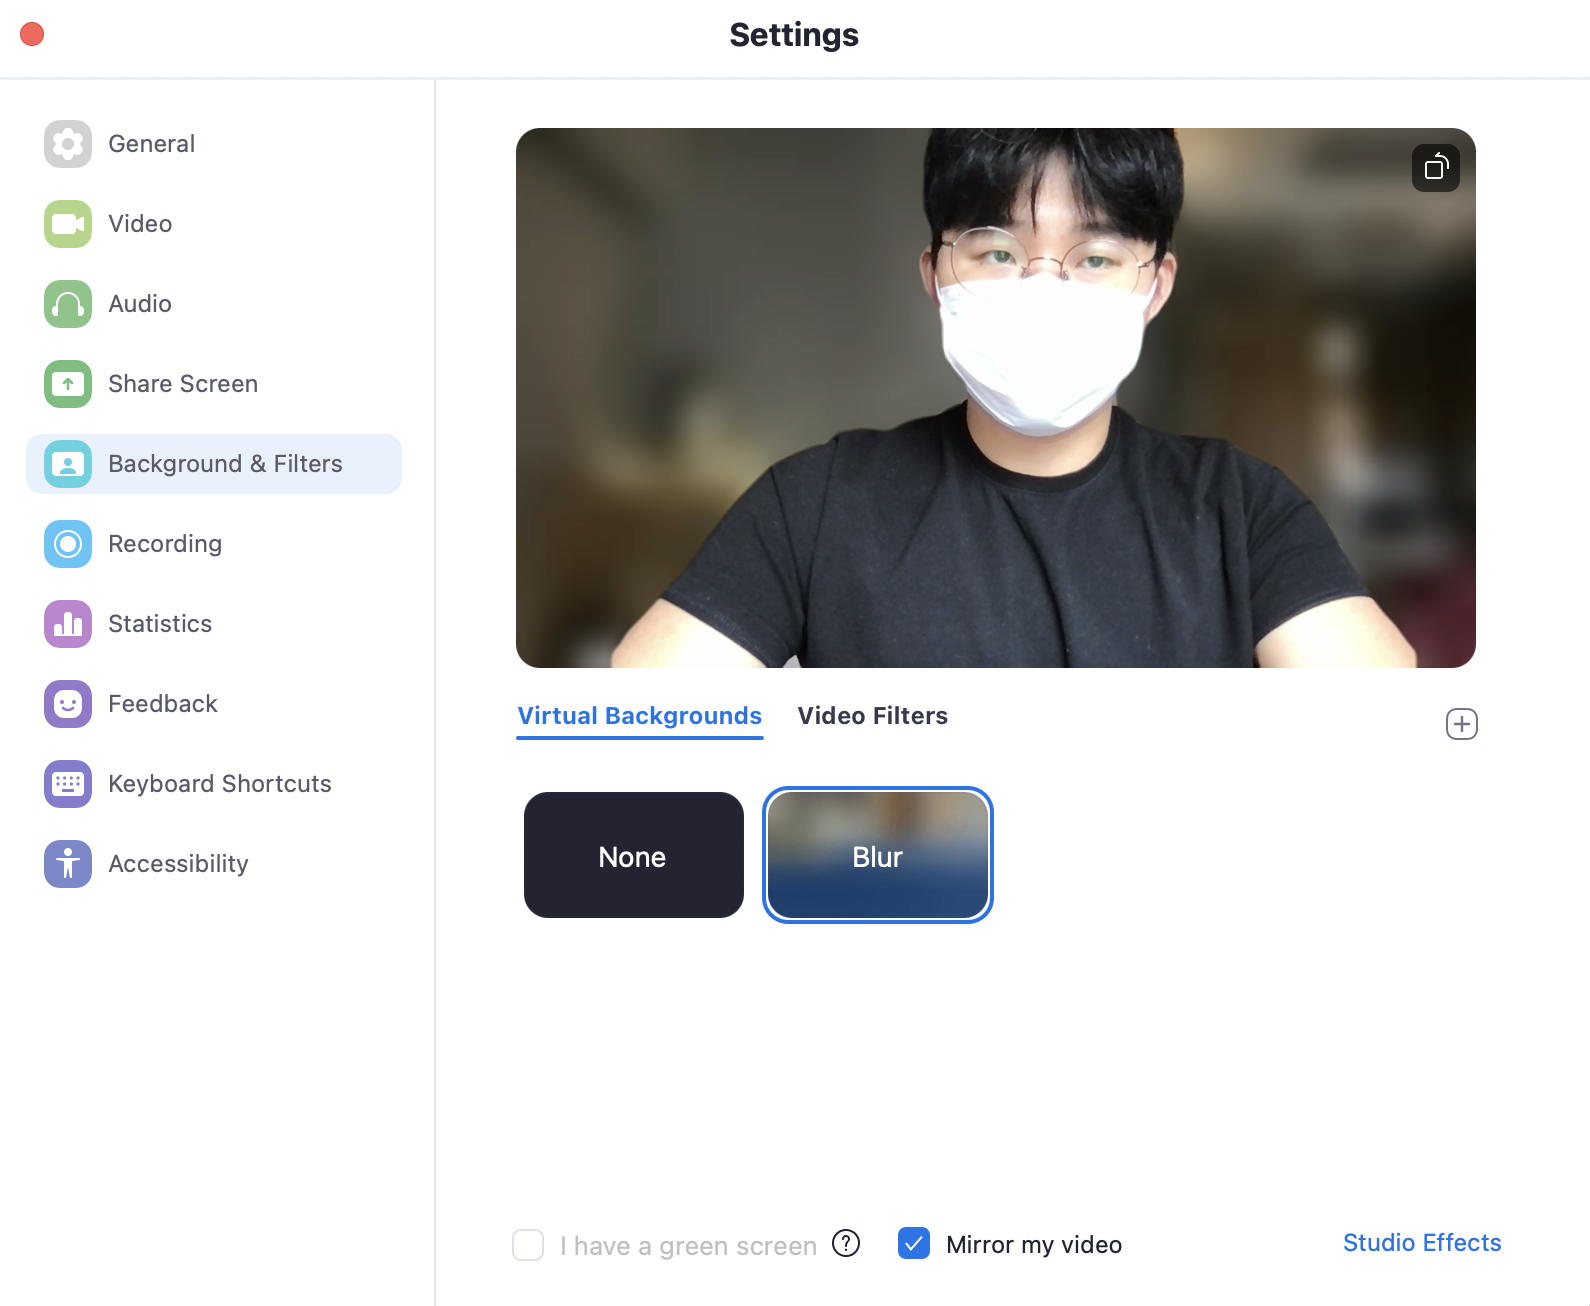
- Background & Filters Settings
Remote working allows you to work wherever you are, but you or your team members might not want others to know where they are or what their home looks like! So Zoom offers various options for ‘virtual backgrounds’ where you can either blur your background as seen below or completely personalise it by uploading your own images!
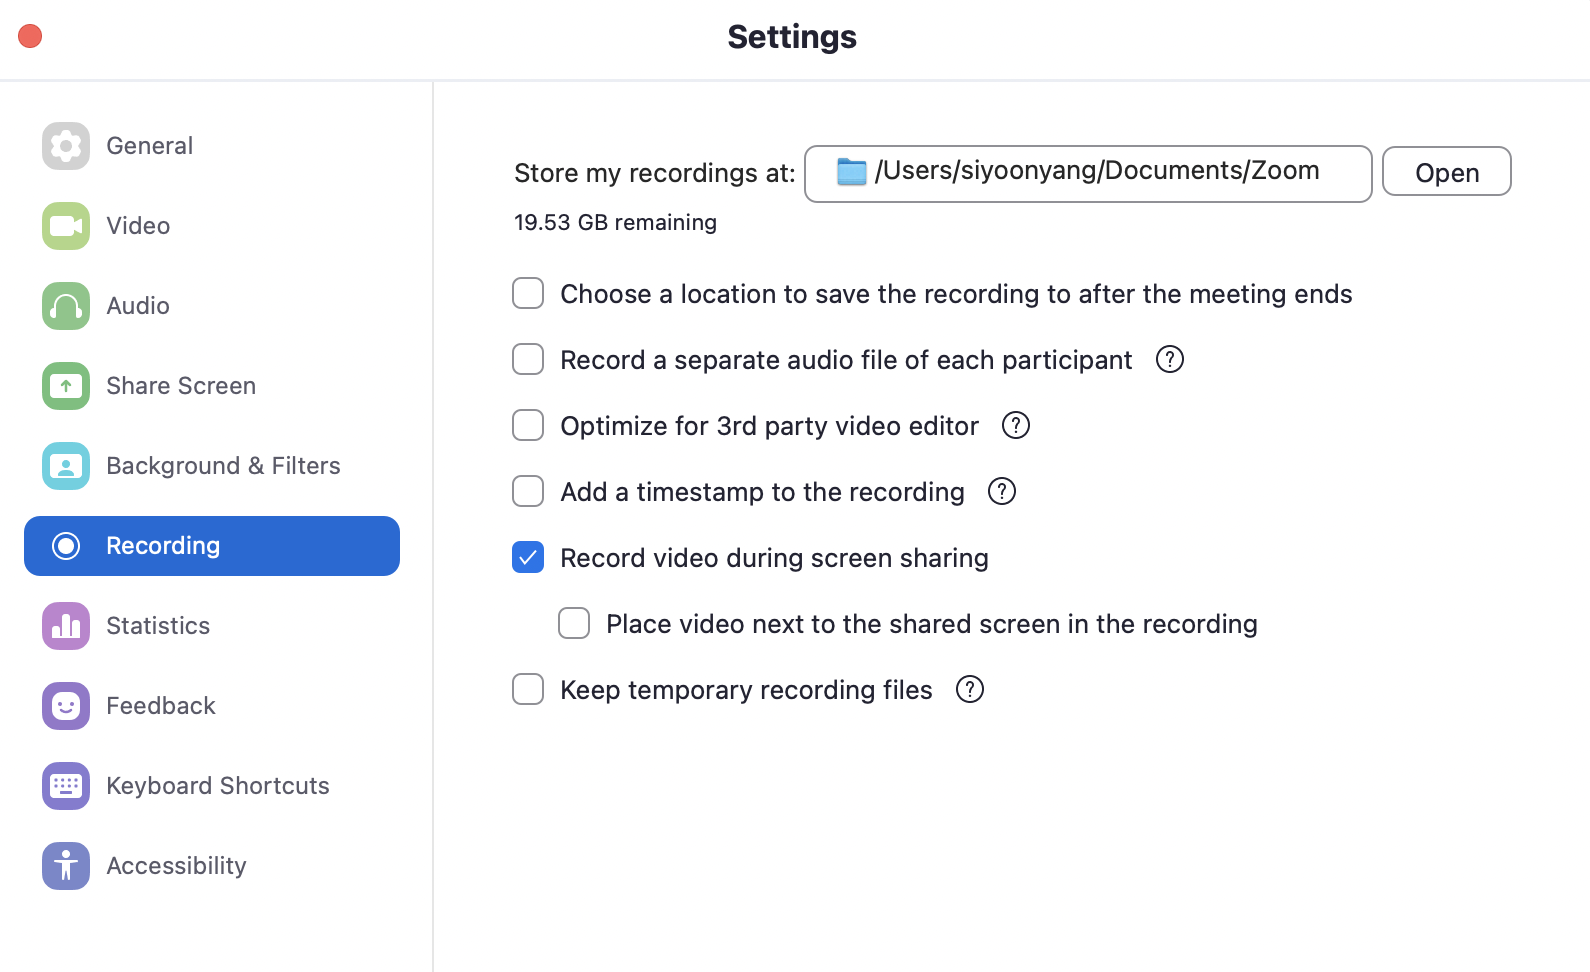
- Recording Settings
You might want to record the meeting for future use, and Zoom provides you with various options here too! Major change that you are most likely to make in this setting is regarding the save location of the recording files.
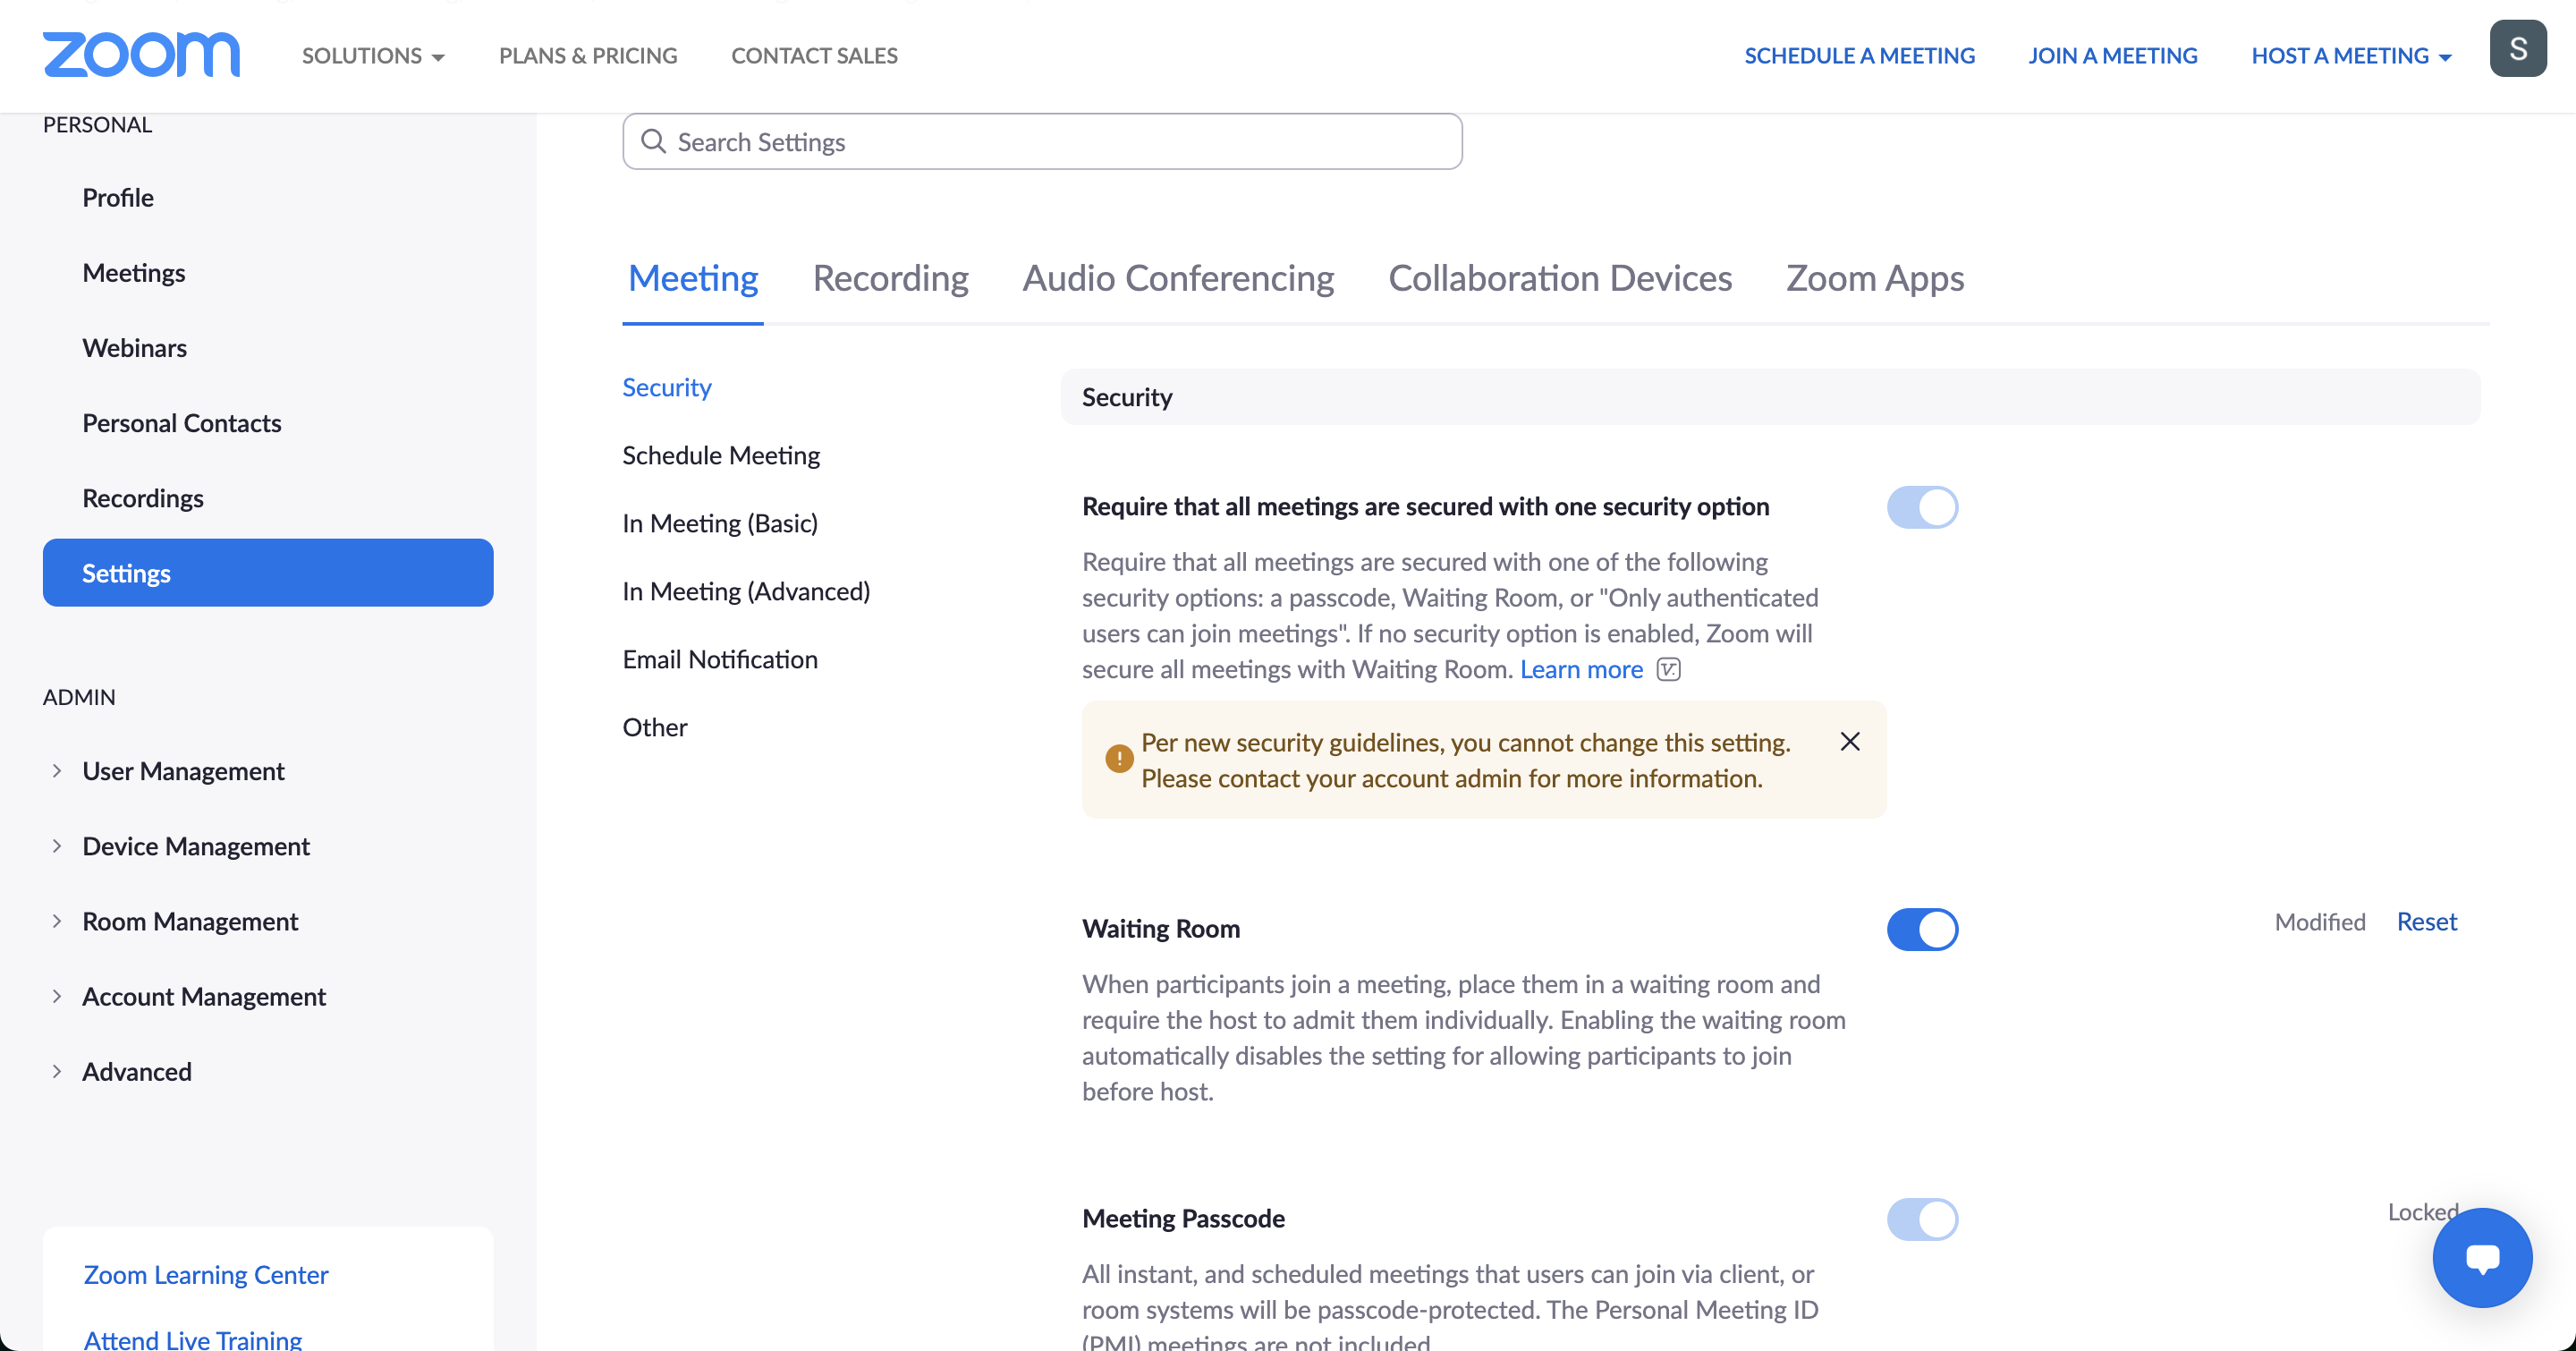
- Security Settings as a Host
If you are a host, then you will see the ‘Security’ button at the bottom.
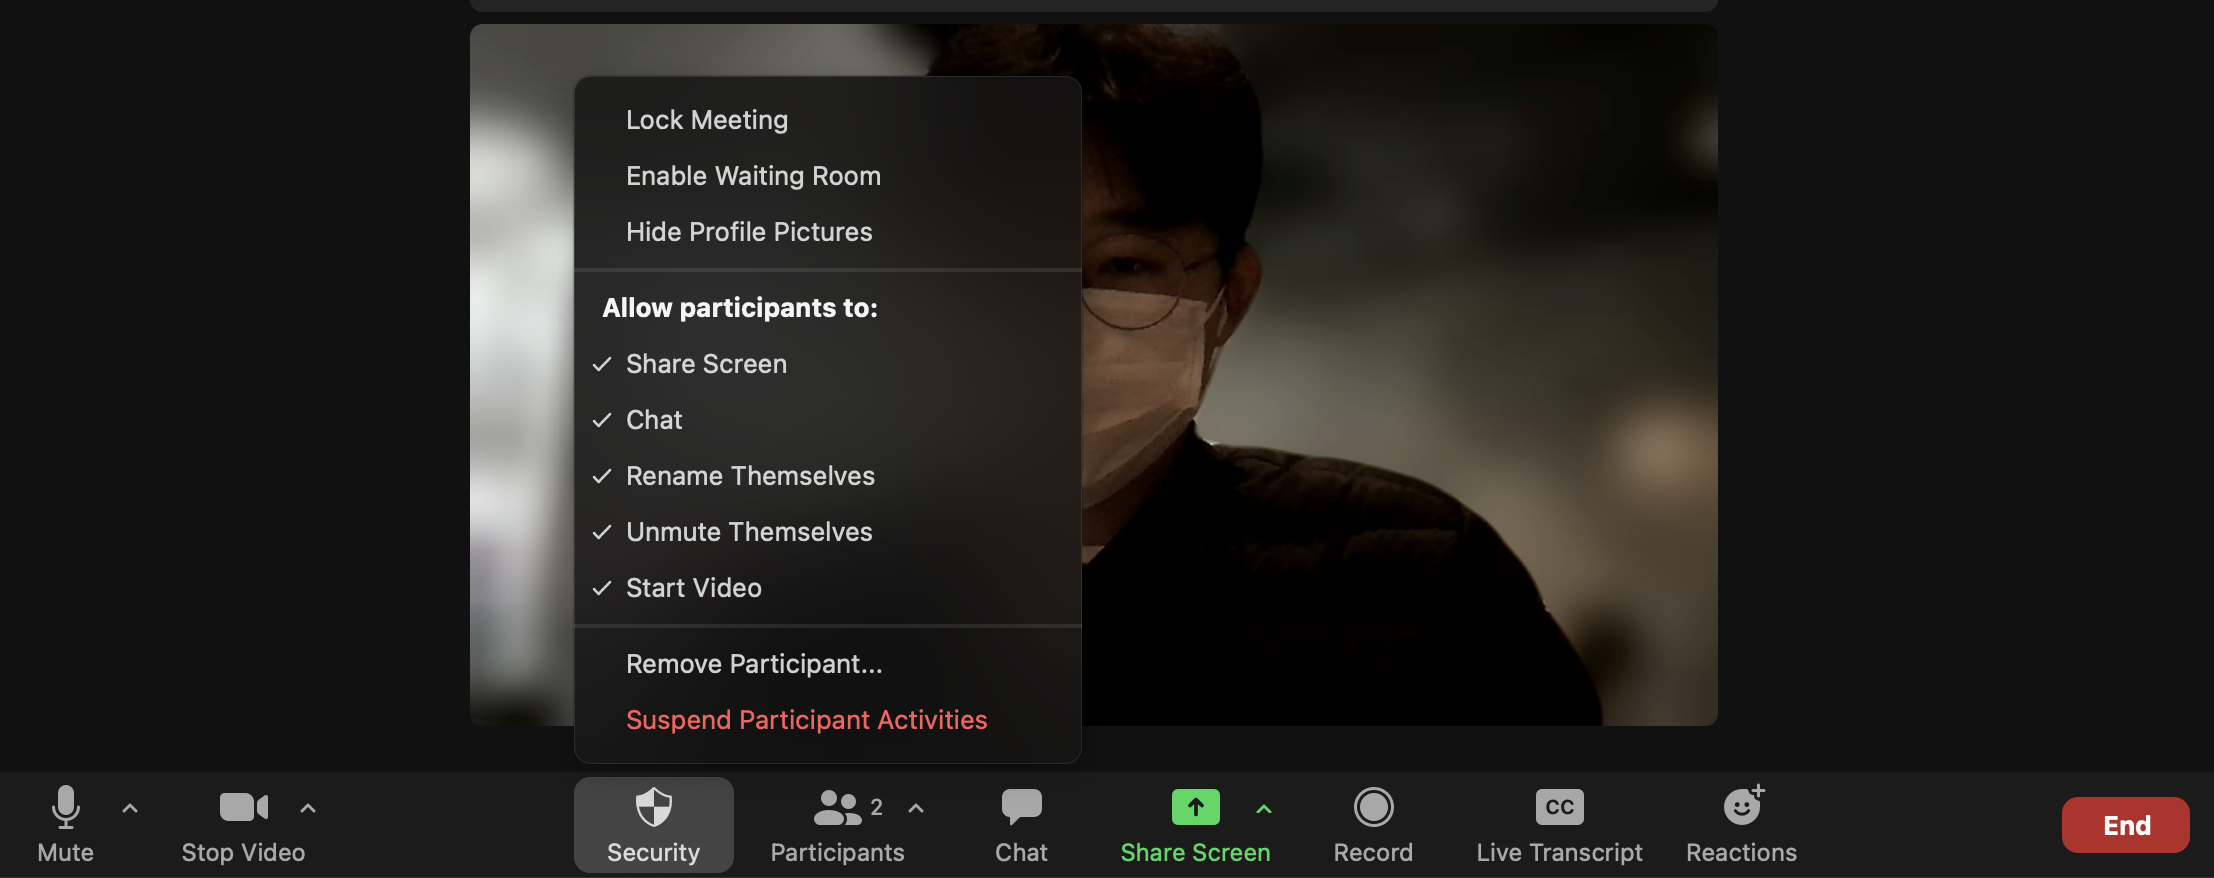
Here, you can:
- Lock the meeting so no one can enter afterward
- Enable waiting room where new participants will not be allowed in the meeting until you or another host allow
- Allow or ban Participants’ options such as share screen, chat, renaming, start the video, unmute, etc.
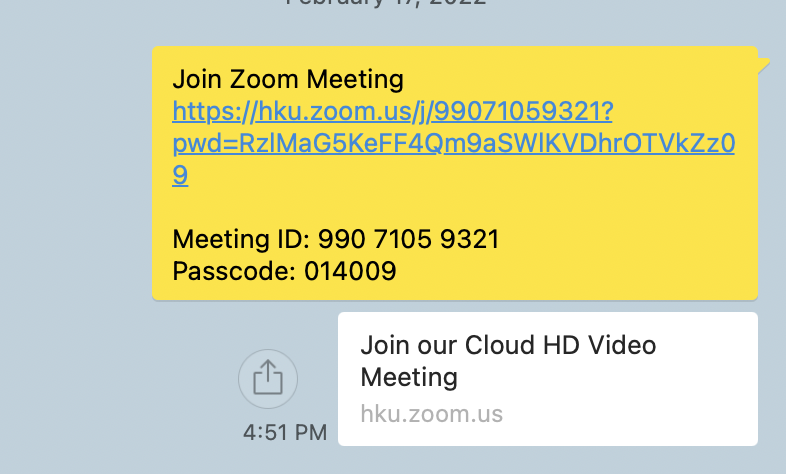
(2) Send invitations to others to join you in the meeting room
Once you host a meeting, you can invite your team members/attendees to the meeting.

Click invite on the bottom right → You can either send them invitation emails or simply through any other messenger applications by copying the invite link or invitation.
(3) Recording
Recording the meeting is very important for future use and reference, yet super easy, just click on the ‘Record’ icon next to ‘share screen’ in the meeting room.
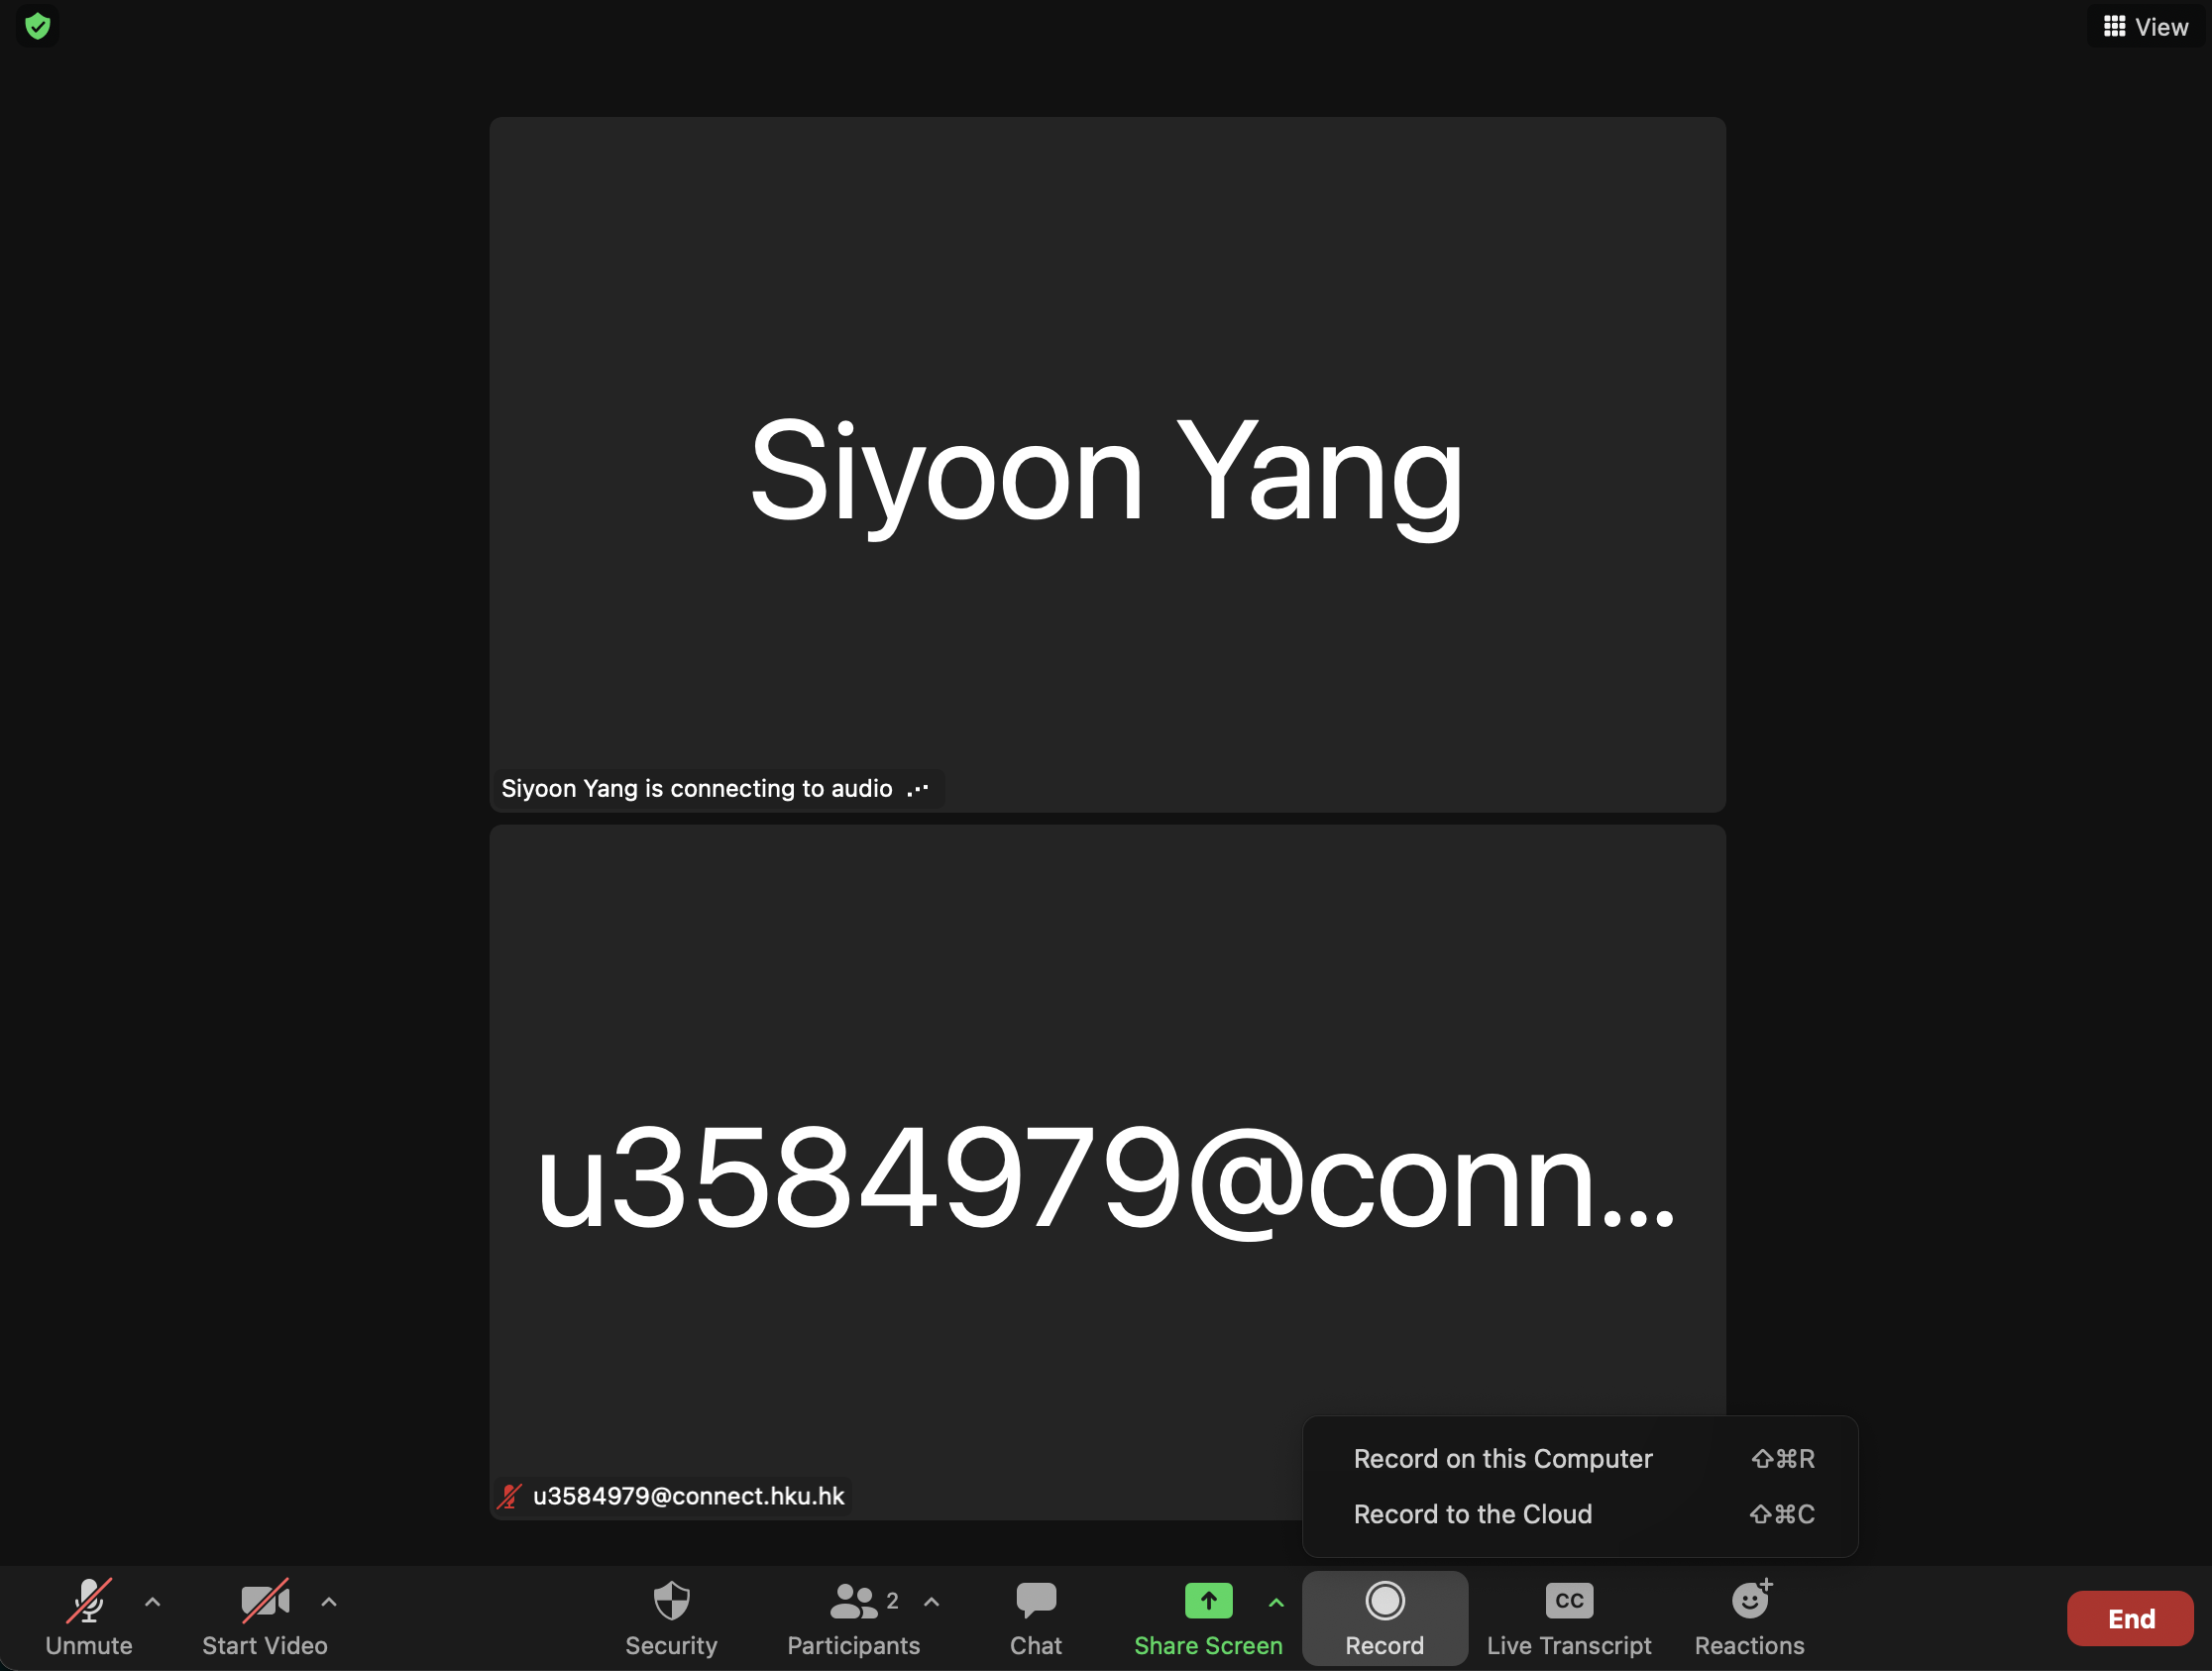
3.1 “Record on this Computer”
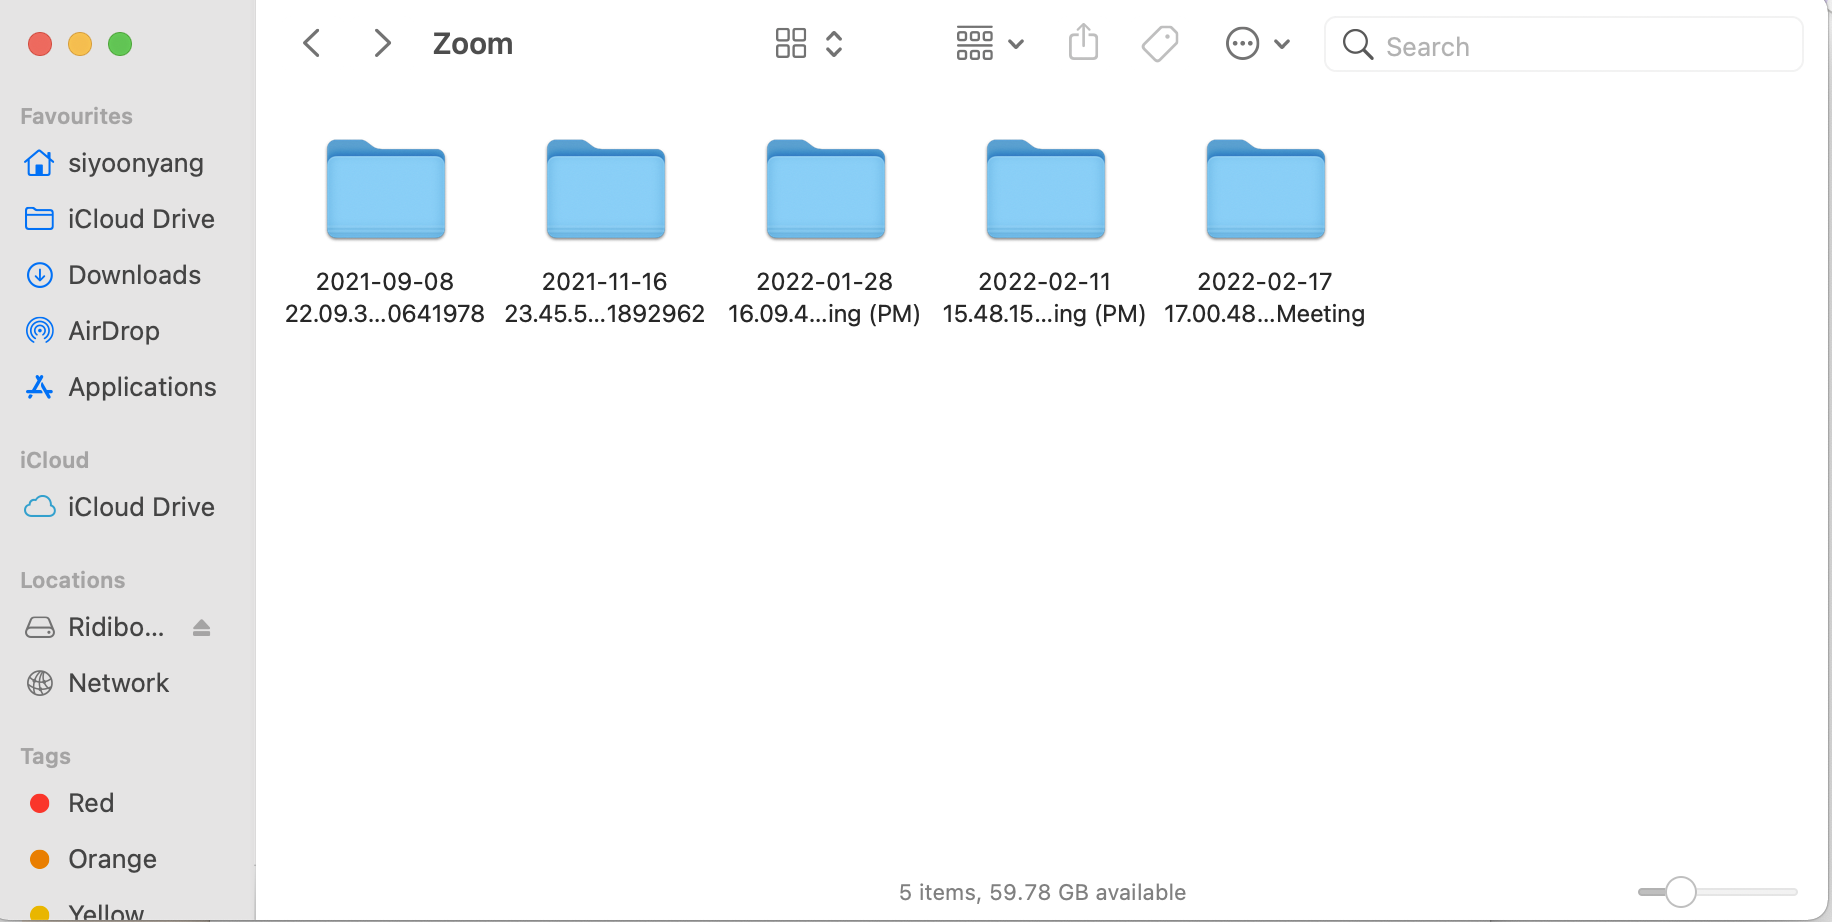
This option is called ‘Local Recording’ and is available for both free and paid users.
However, the following features are not available in the local recording:
- Display timestamp in the recording
- Display participants’ names in the recording
- Record Active Speaker, Gallery View, and shared screen separately
- Audio transcription
- Shared screen recording layout with active speaker thumbnail or without any thumbnails (local recordings will always show a thumbnail gallery view with the shared screen)
- Record using the iOS or Android app
3.2 “Record to the Cloud”
If you are a paid user, then you can use ‘Zoom Cloud Recording’!
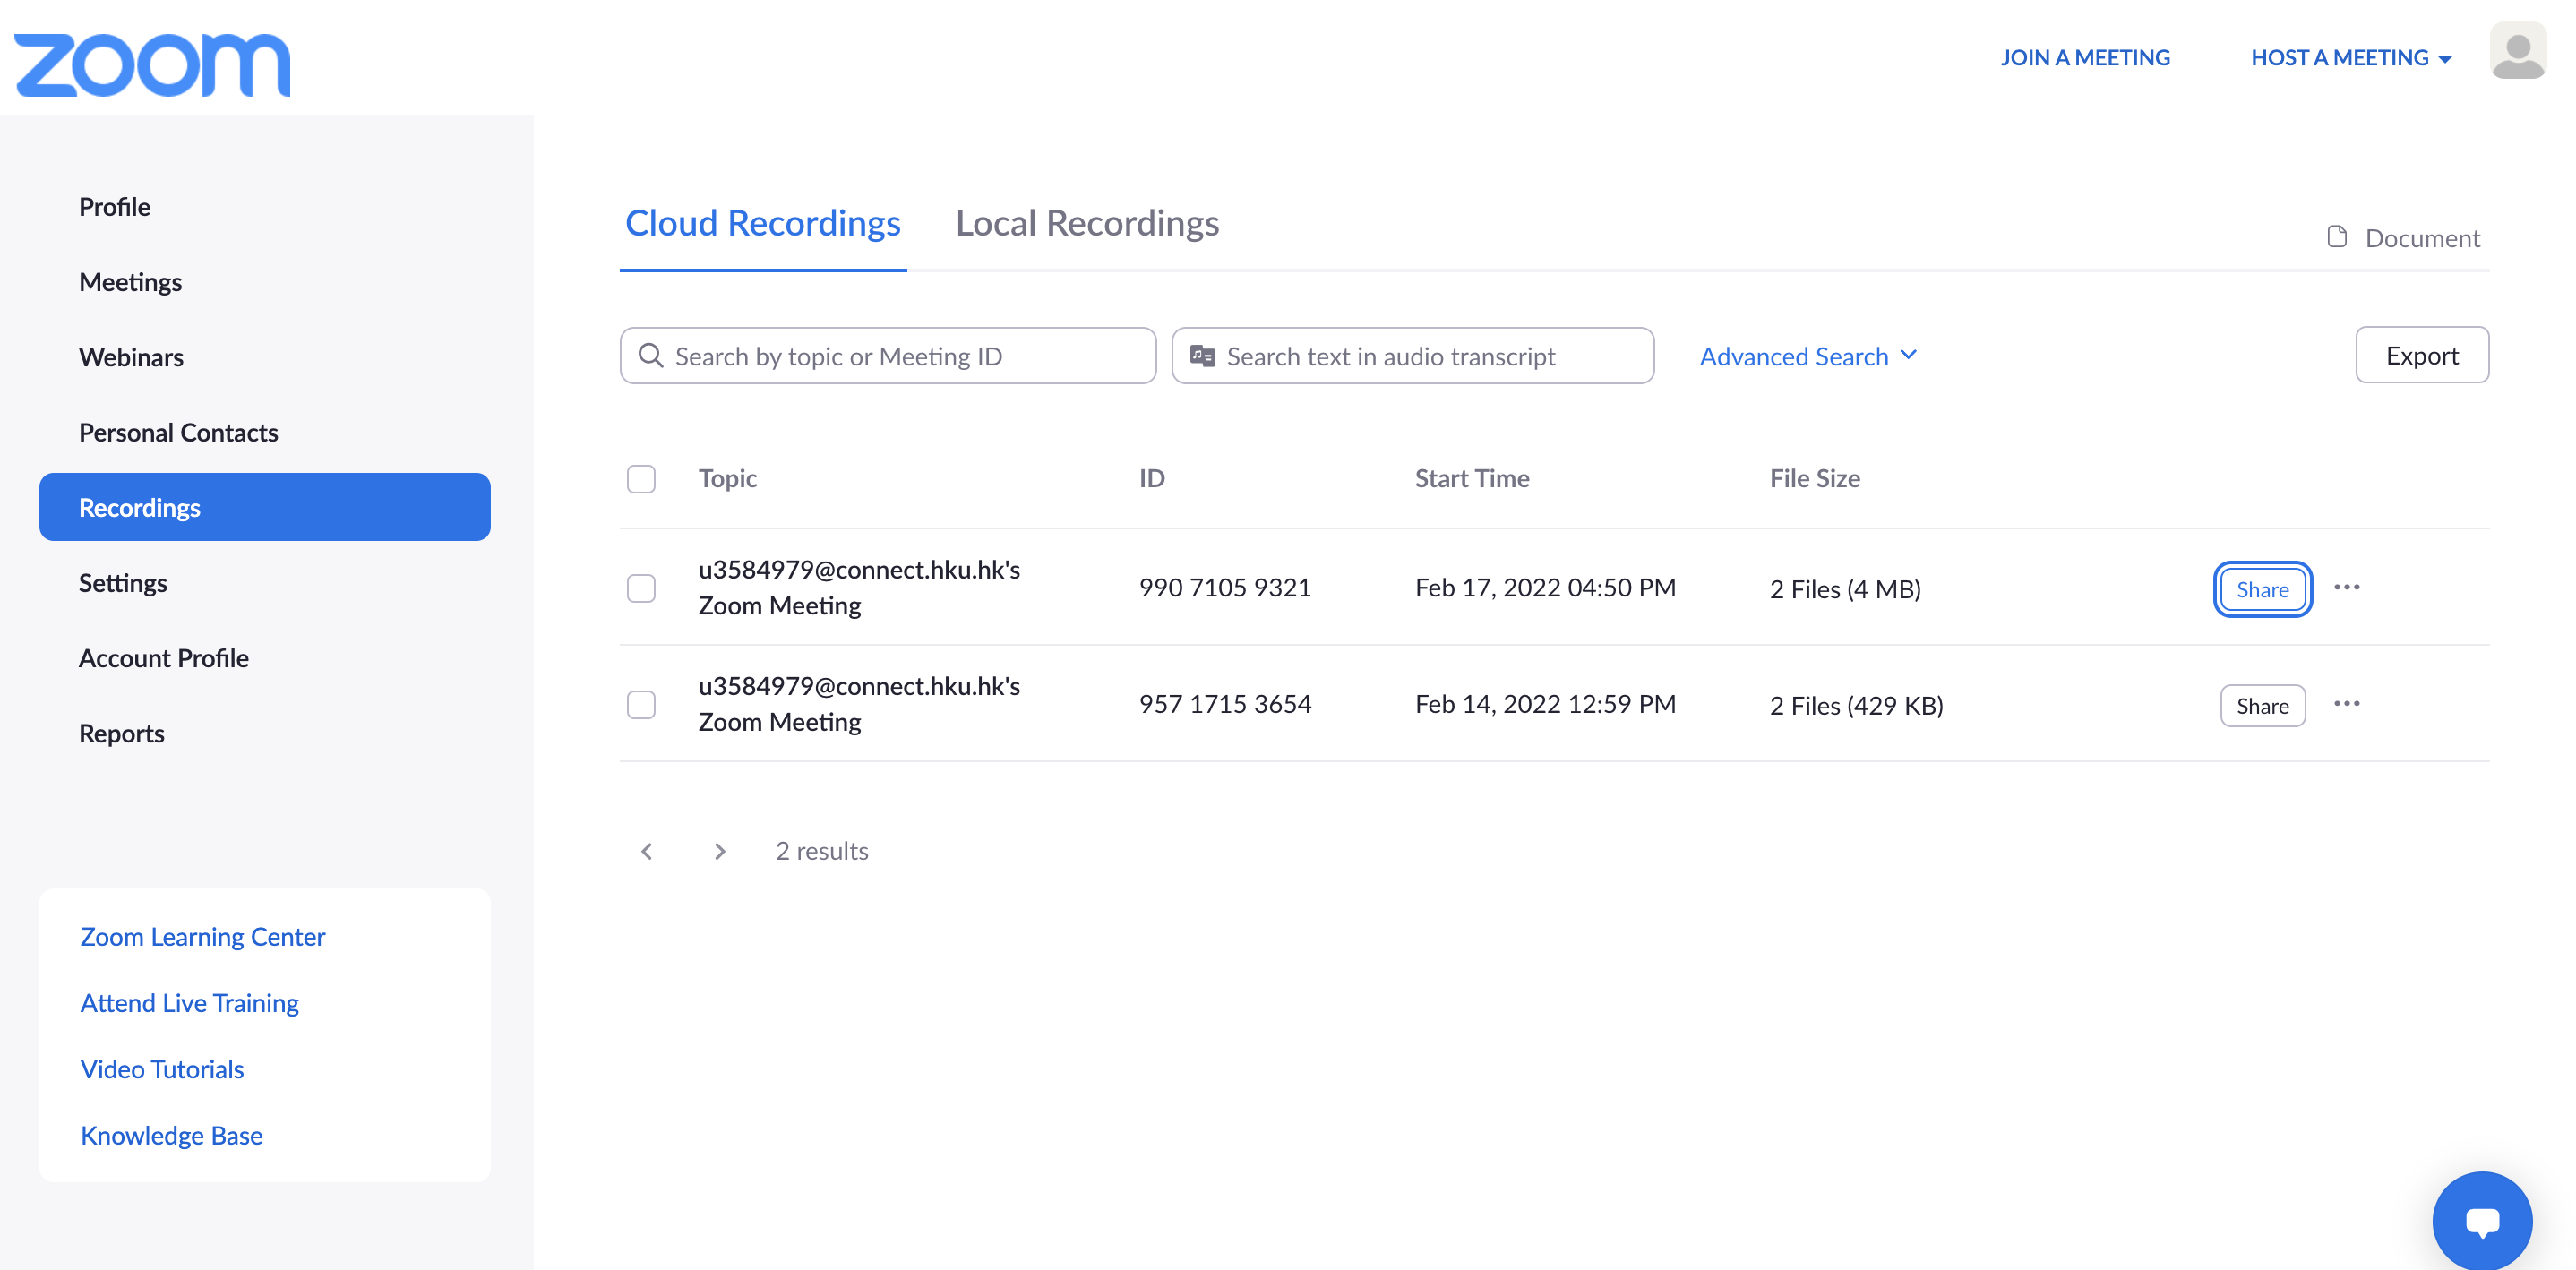
The recorded meeting will be saved in your account’s cloud storage, and you can easily find it on the web.
→ You can share it with others by clicking ‘share’ on the right-hand side of each recording!
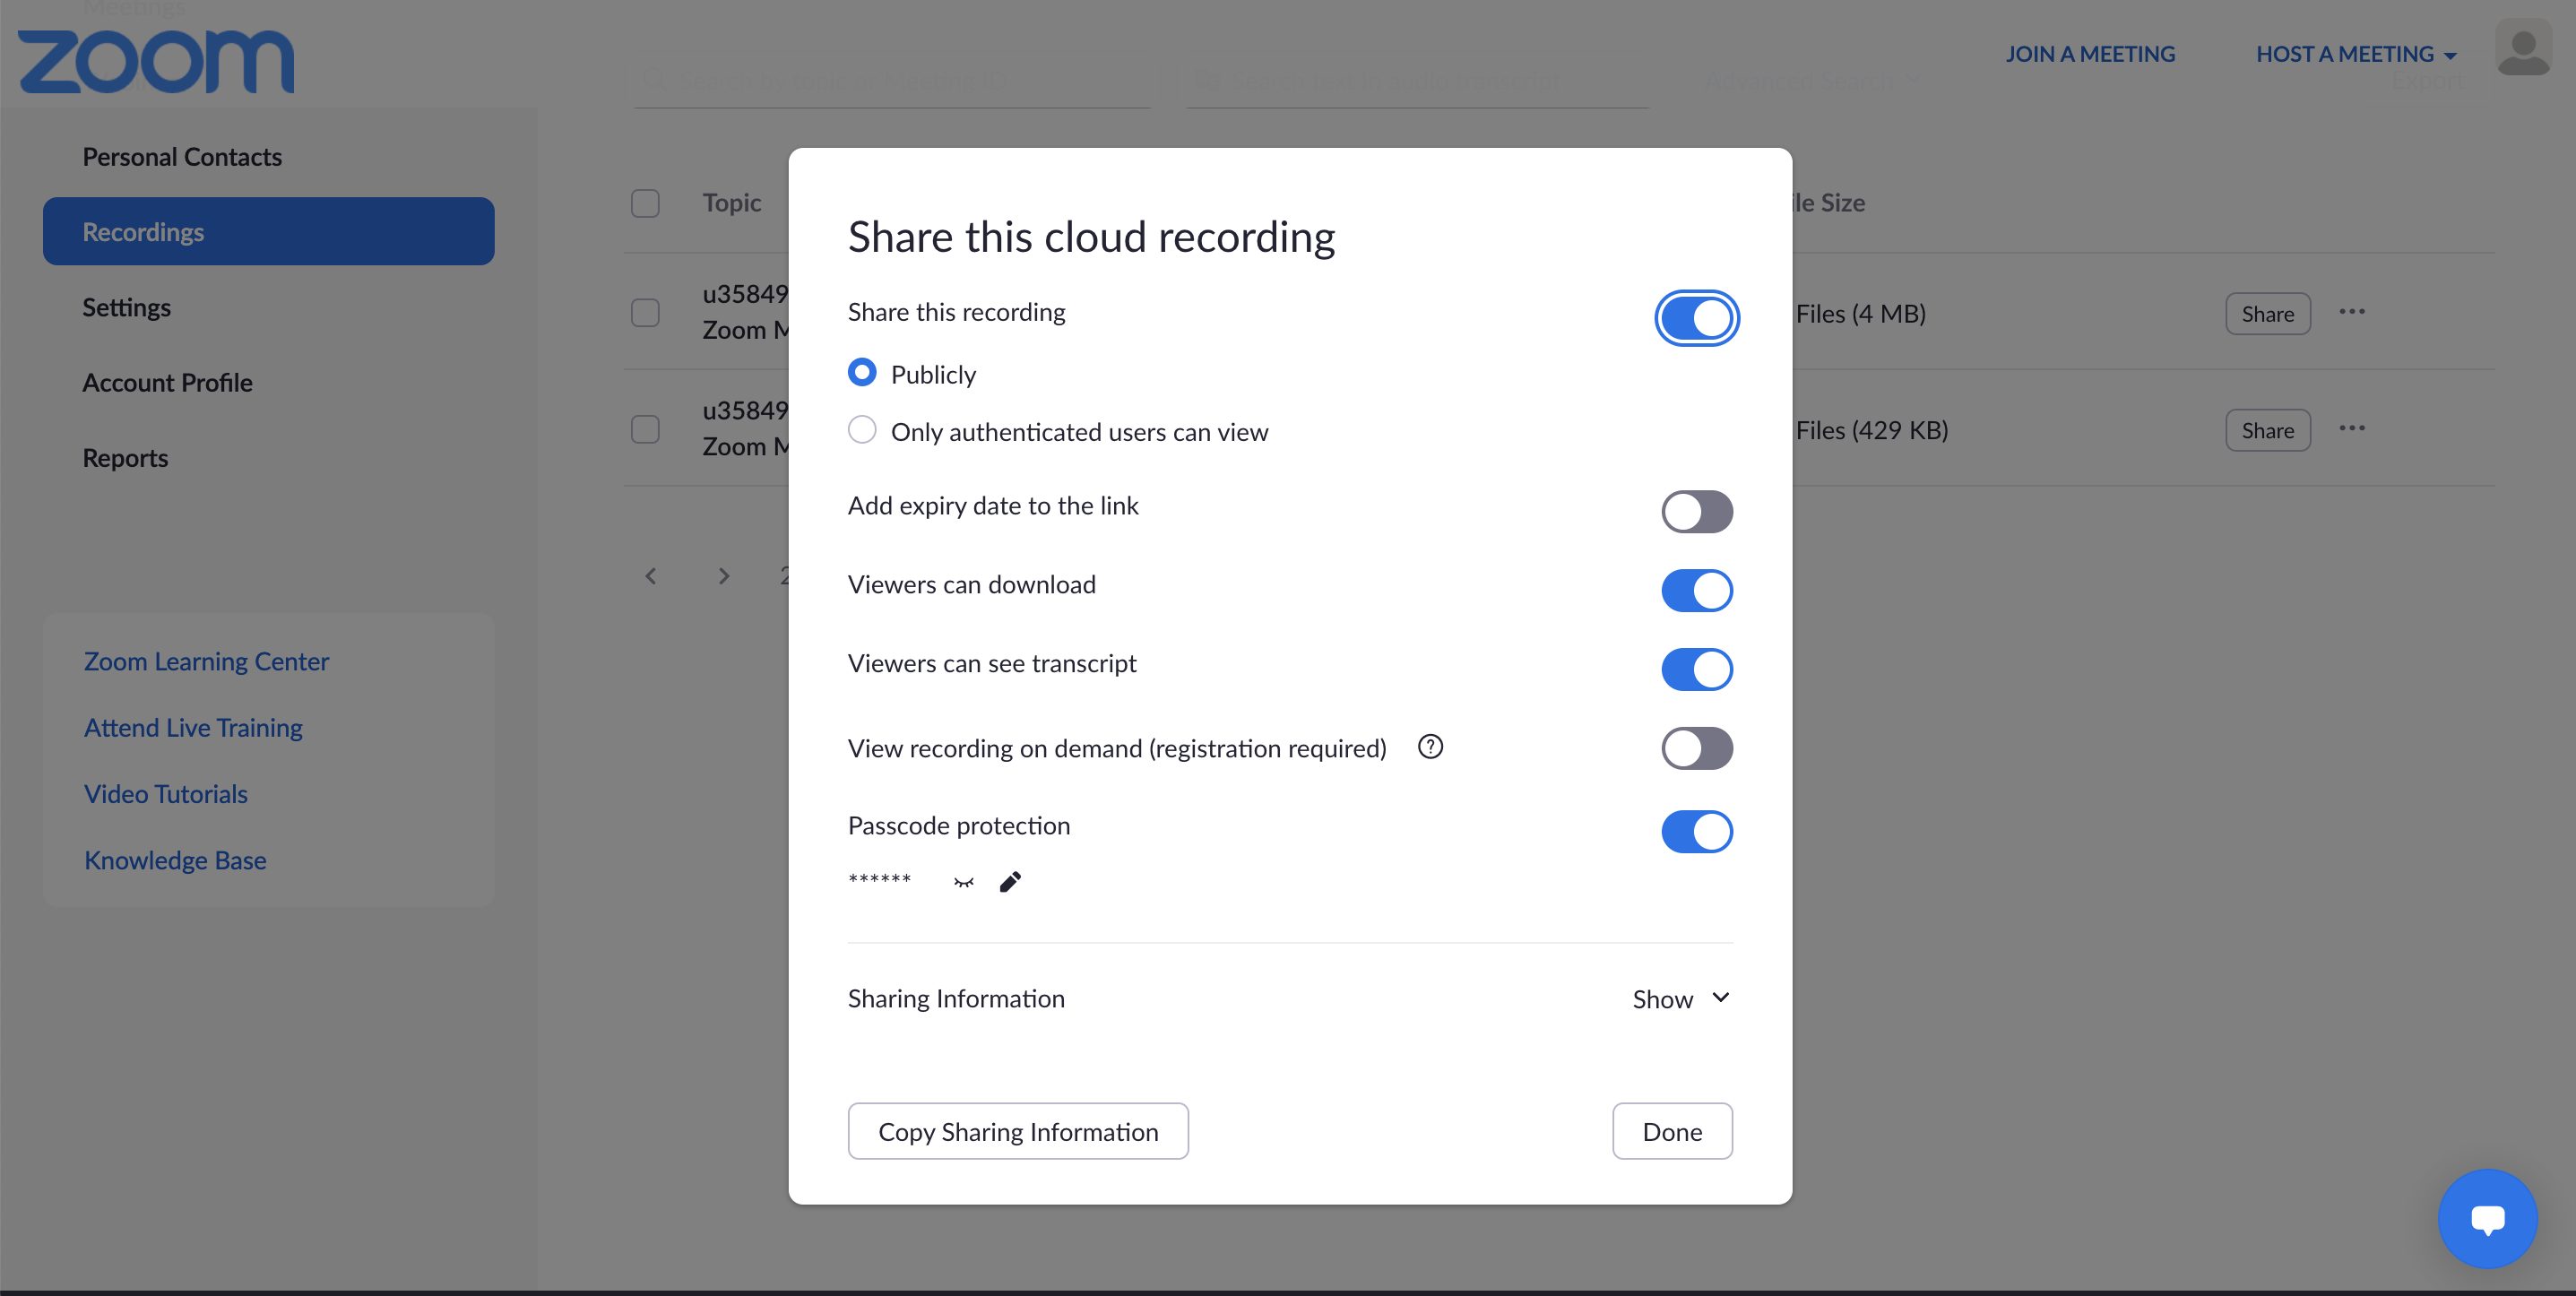
Click ‘Copy Sharing Information’ on the bottom left, and send it to whoever you would like to share it with!
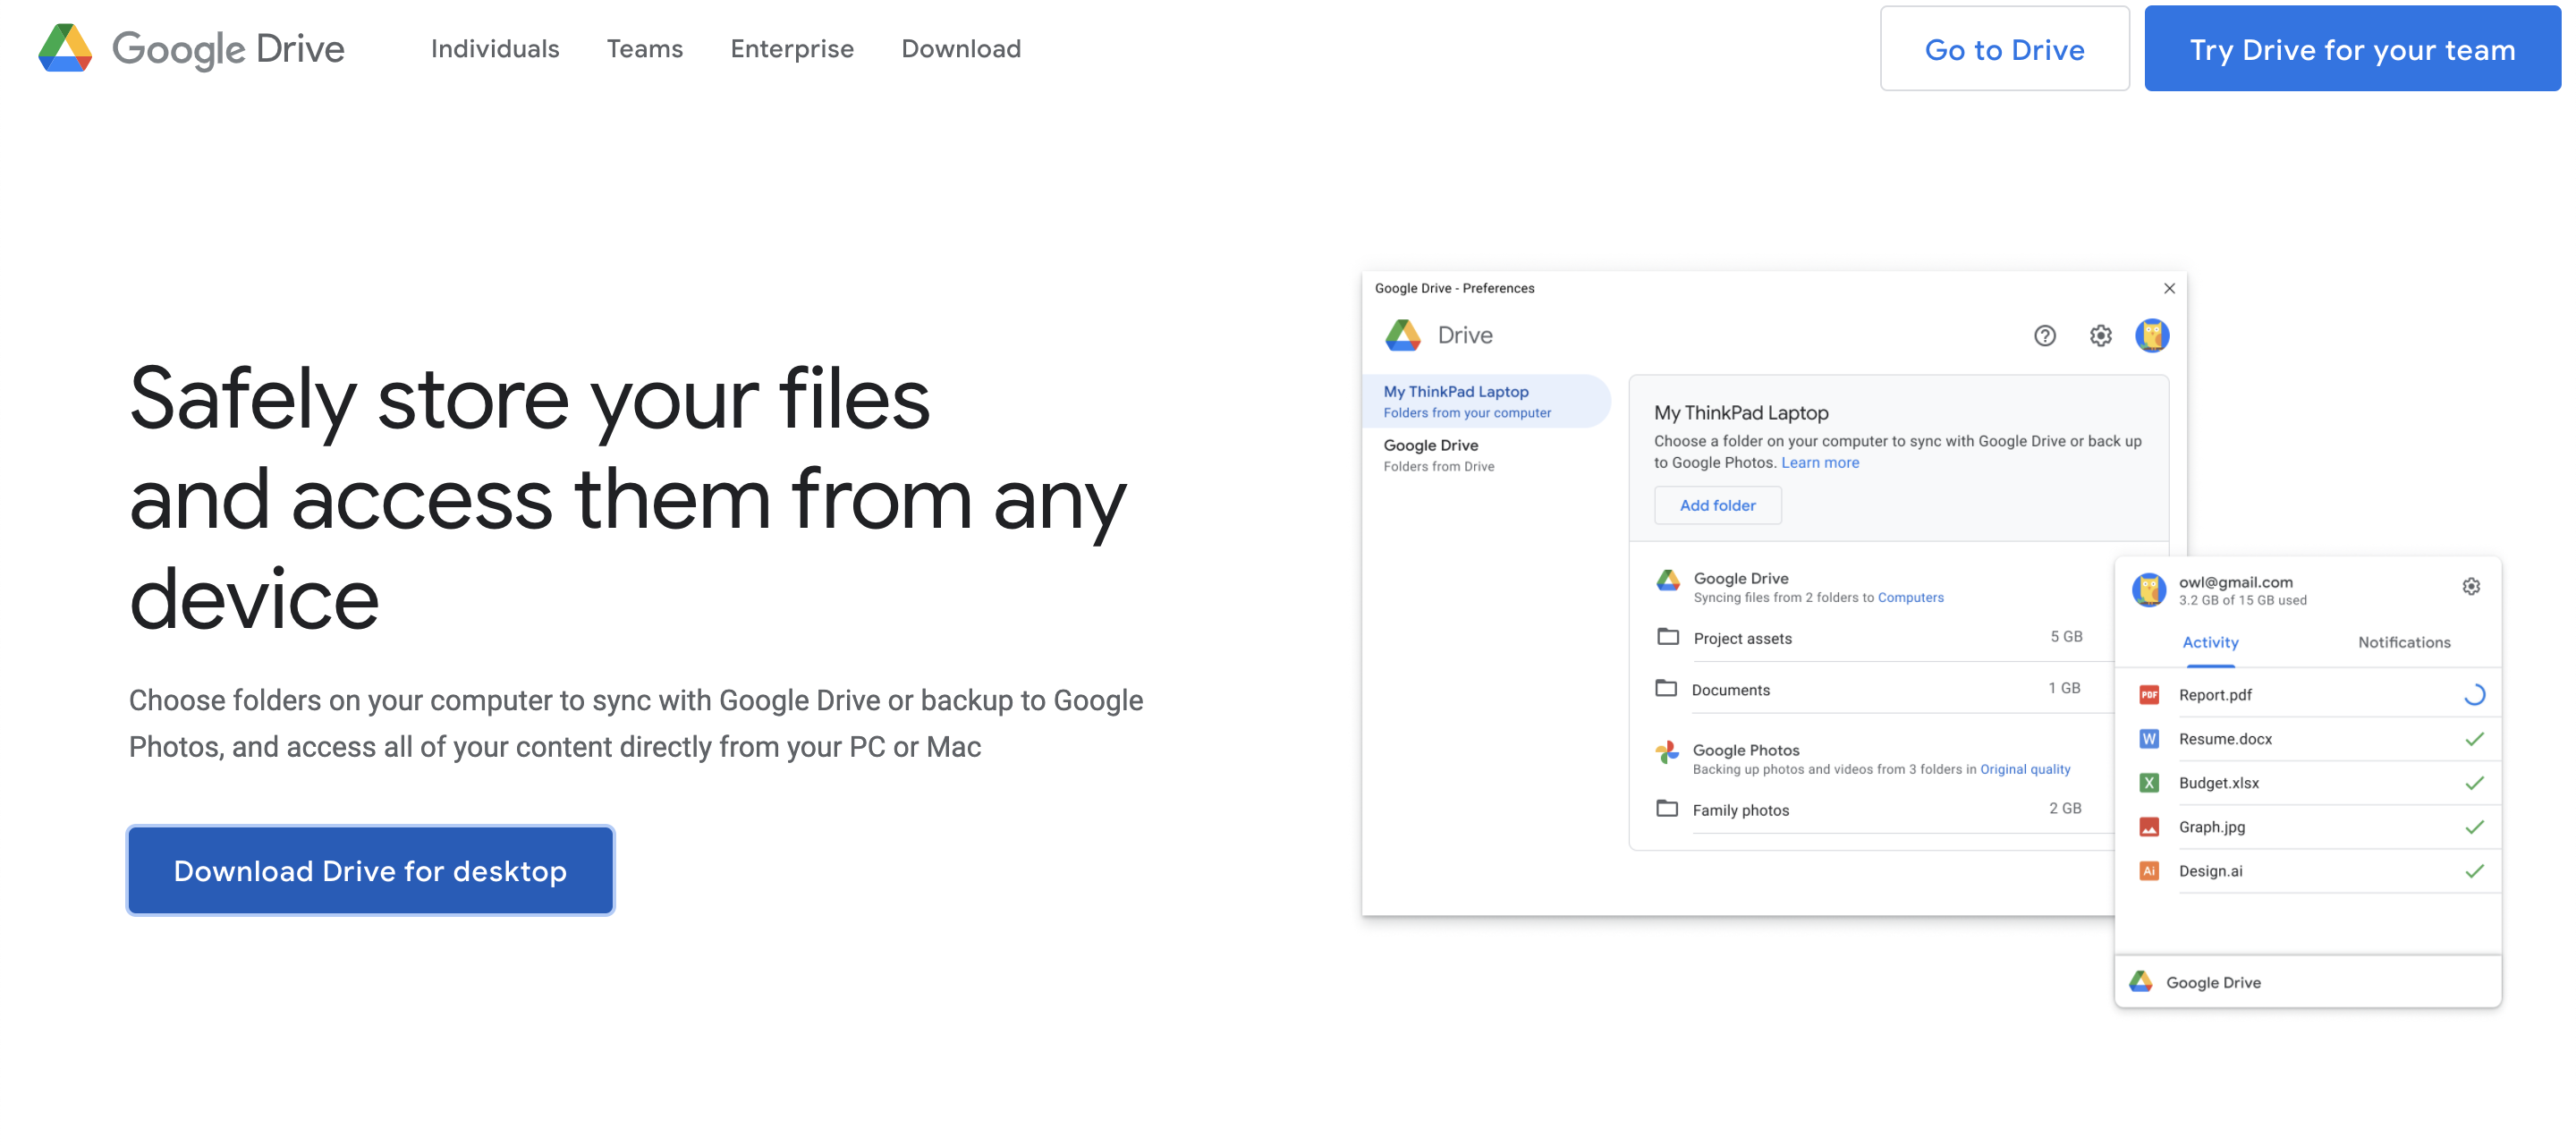
3.3 Syncing the Zoom Recordings with Google Drive
You can also automatically save your recordings to Google Drive using Google Drive Desktop and Zoom Local Recording.
(1) Install ‘Google Drive Desktop’
https://www.google.com/drive/download/
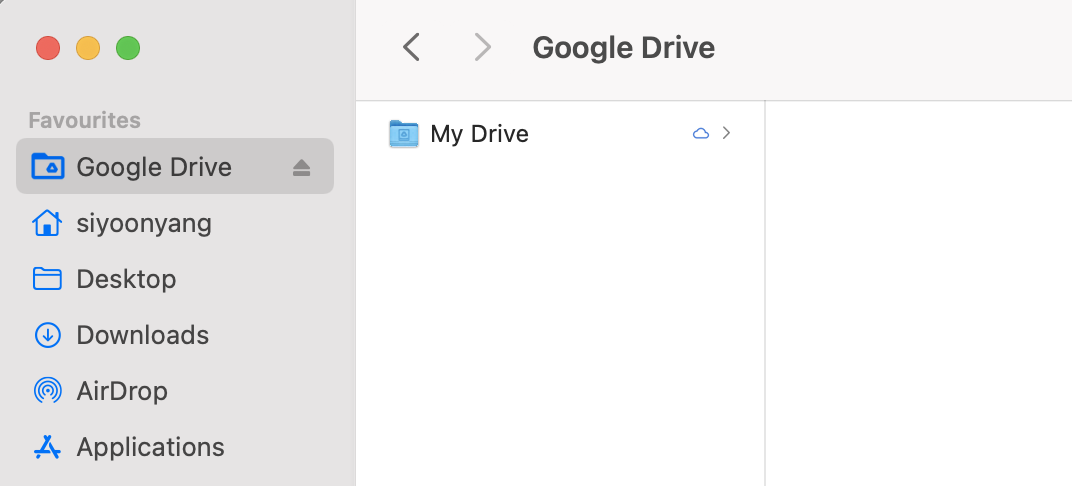
(2) You will be able to see that your Google Drive is synced with your Desktop
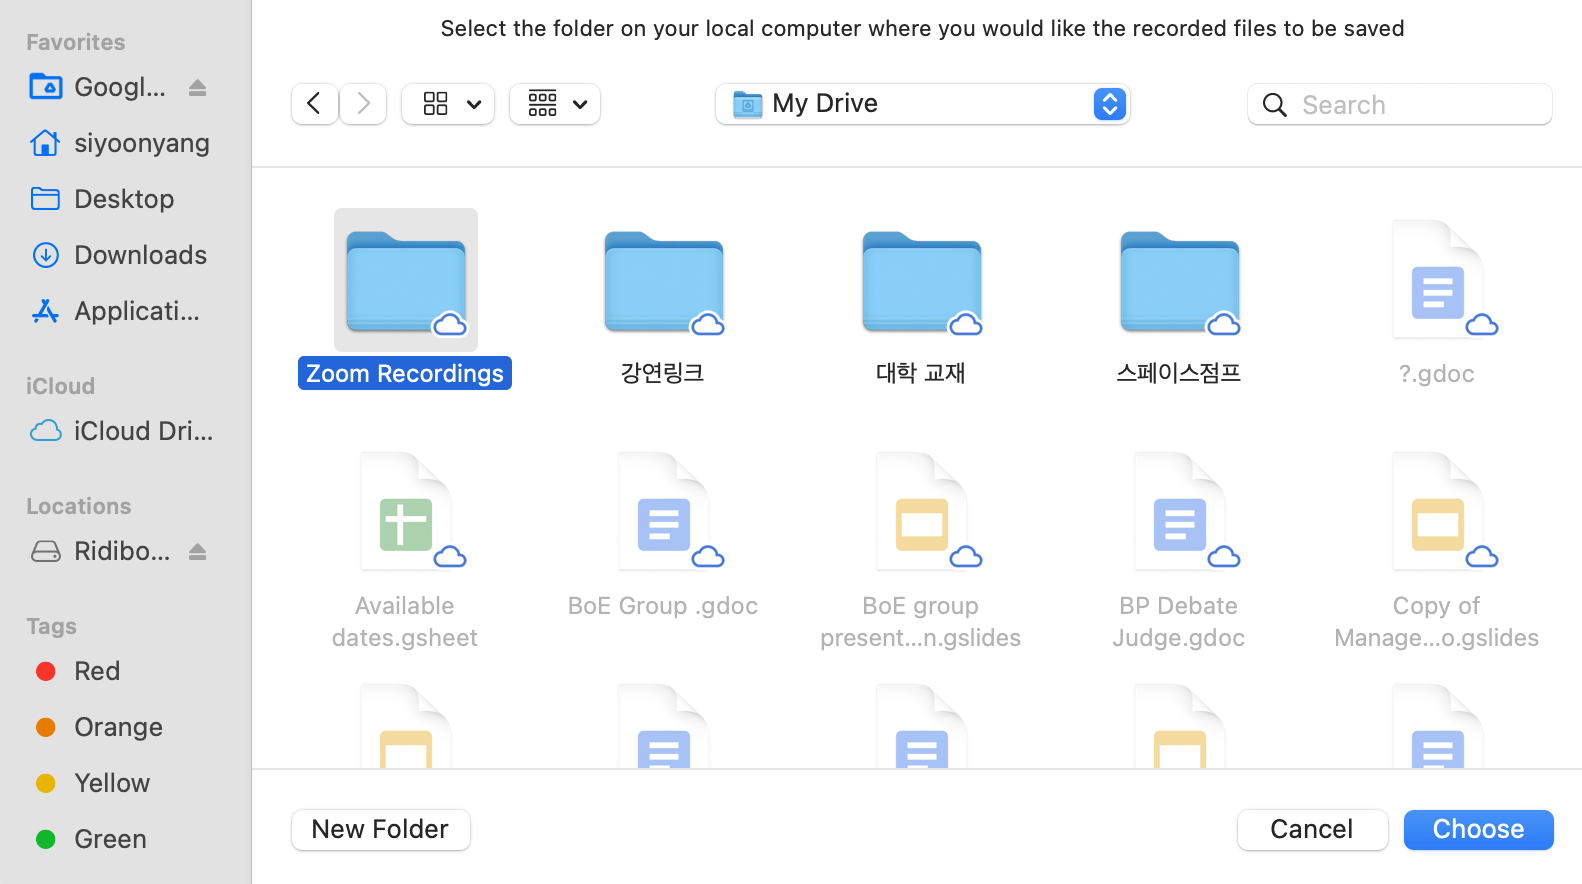
(3) Go on Zoom App → Recording Settings → Click on ‘Choose a new location’
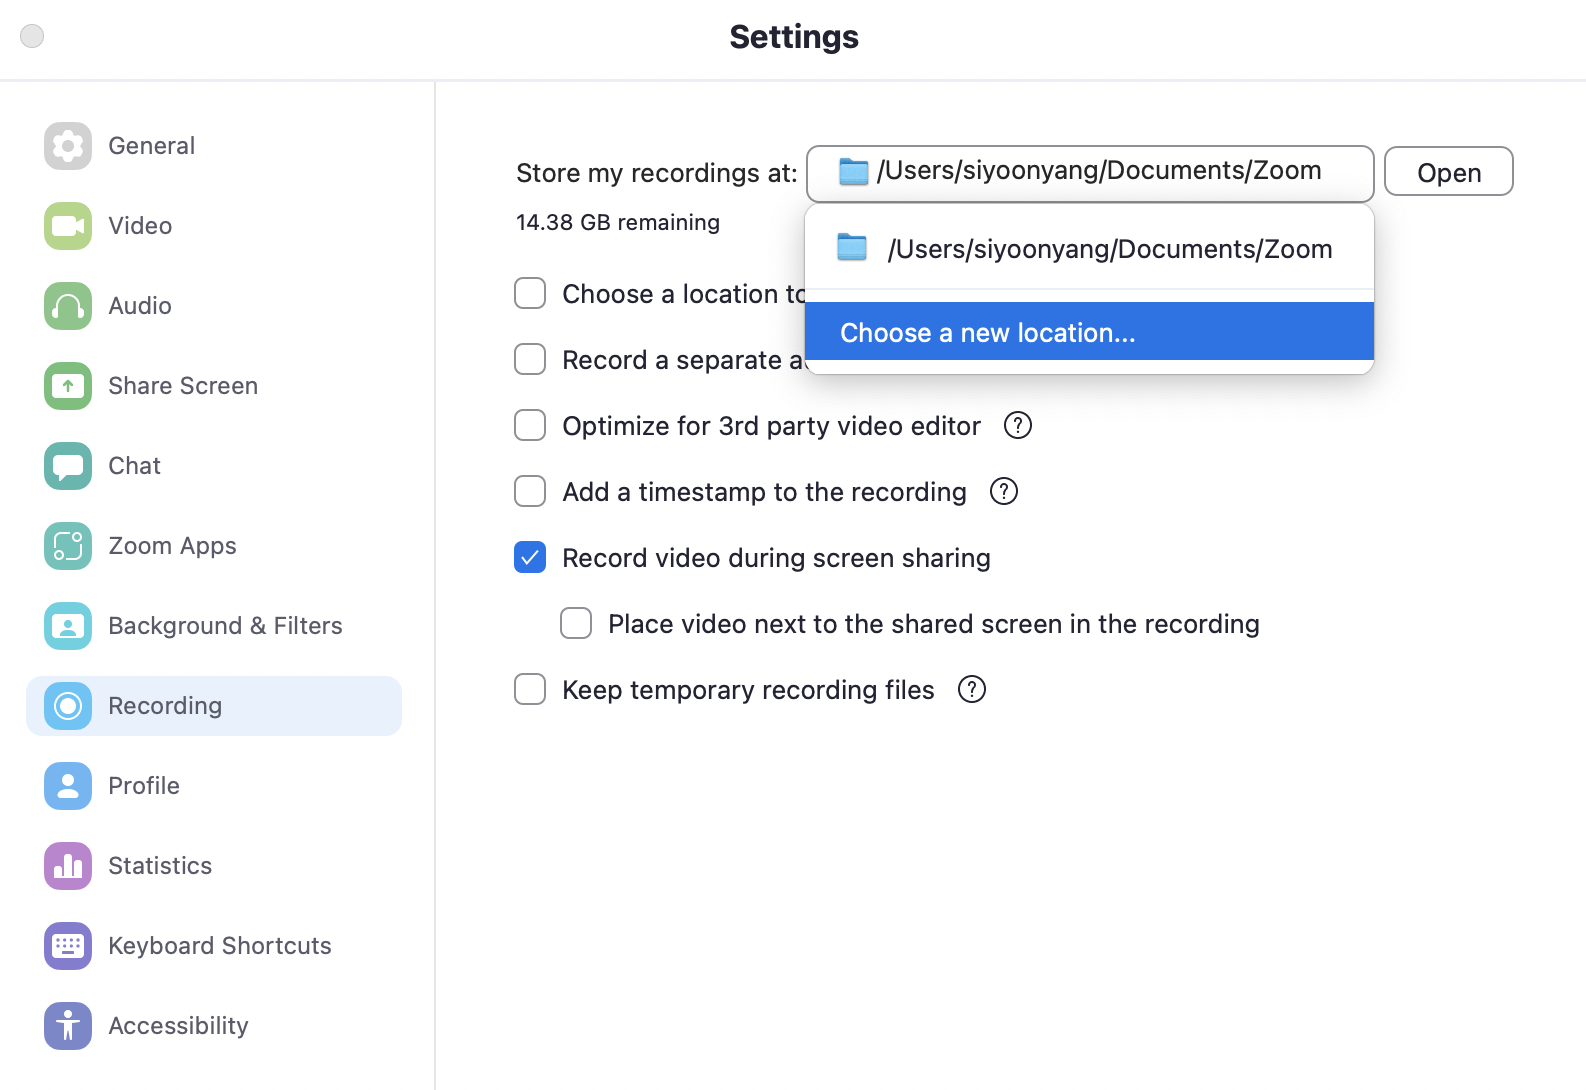
(4) Choose your Google Drive and a proposed folder you would like to save the recordings in
→ Click on ’Choose’
(5) Completed! Now your local recordings will be saved in the Google Drive

(4) Share Screen
Since you are in a virtual meeting, it is crucial to ensure that everyone in the meeting is on the same page! In this regard, Zoom offers an easy and reliable feature ‘share screen’ where all other participants will be seeing your real-time screen.
Click ‘Share Screen’ at the bottom
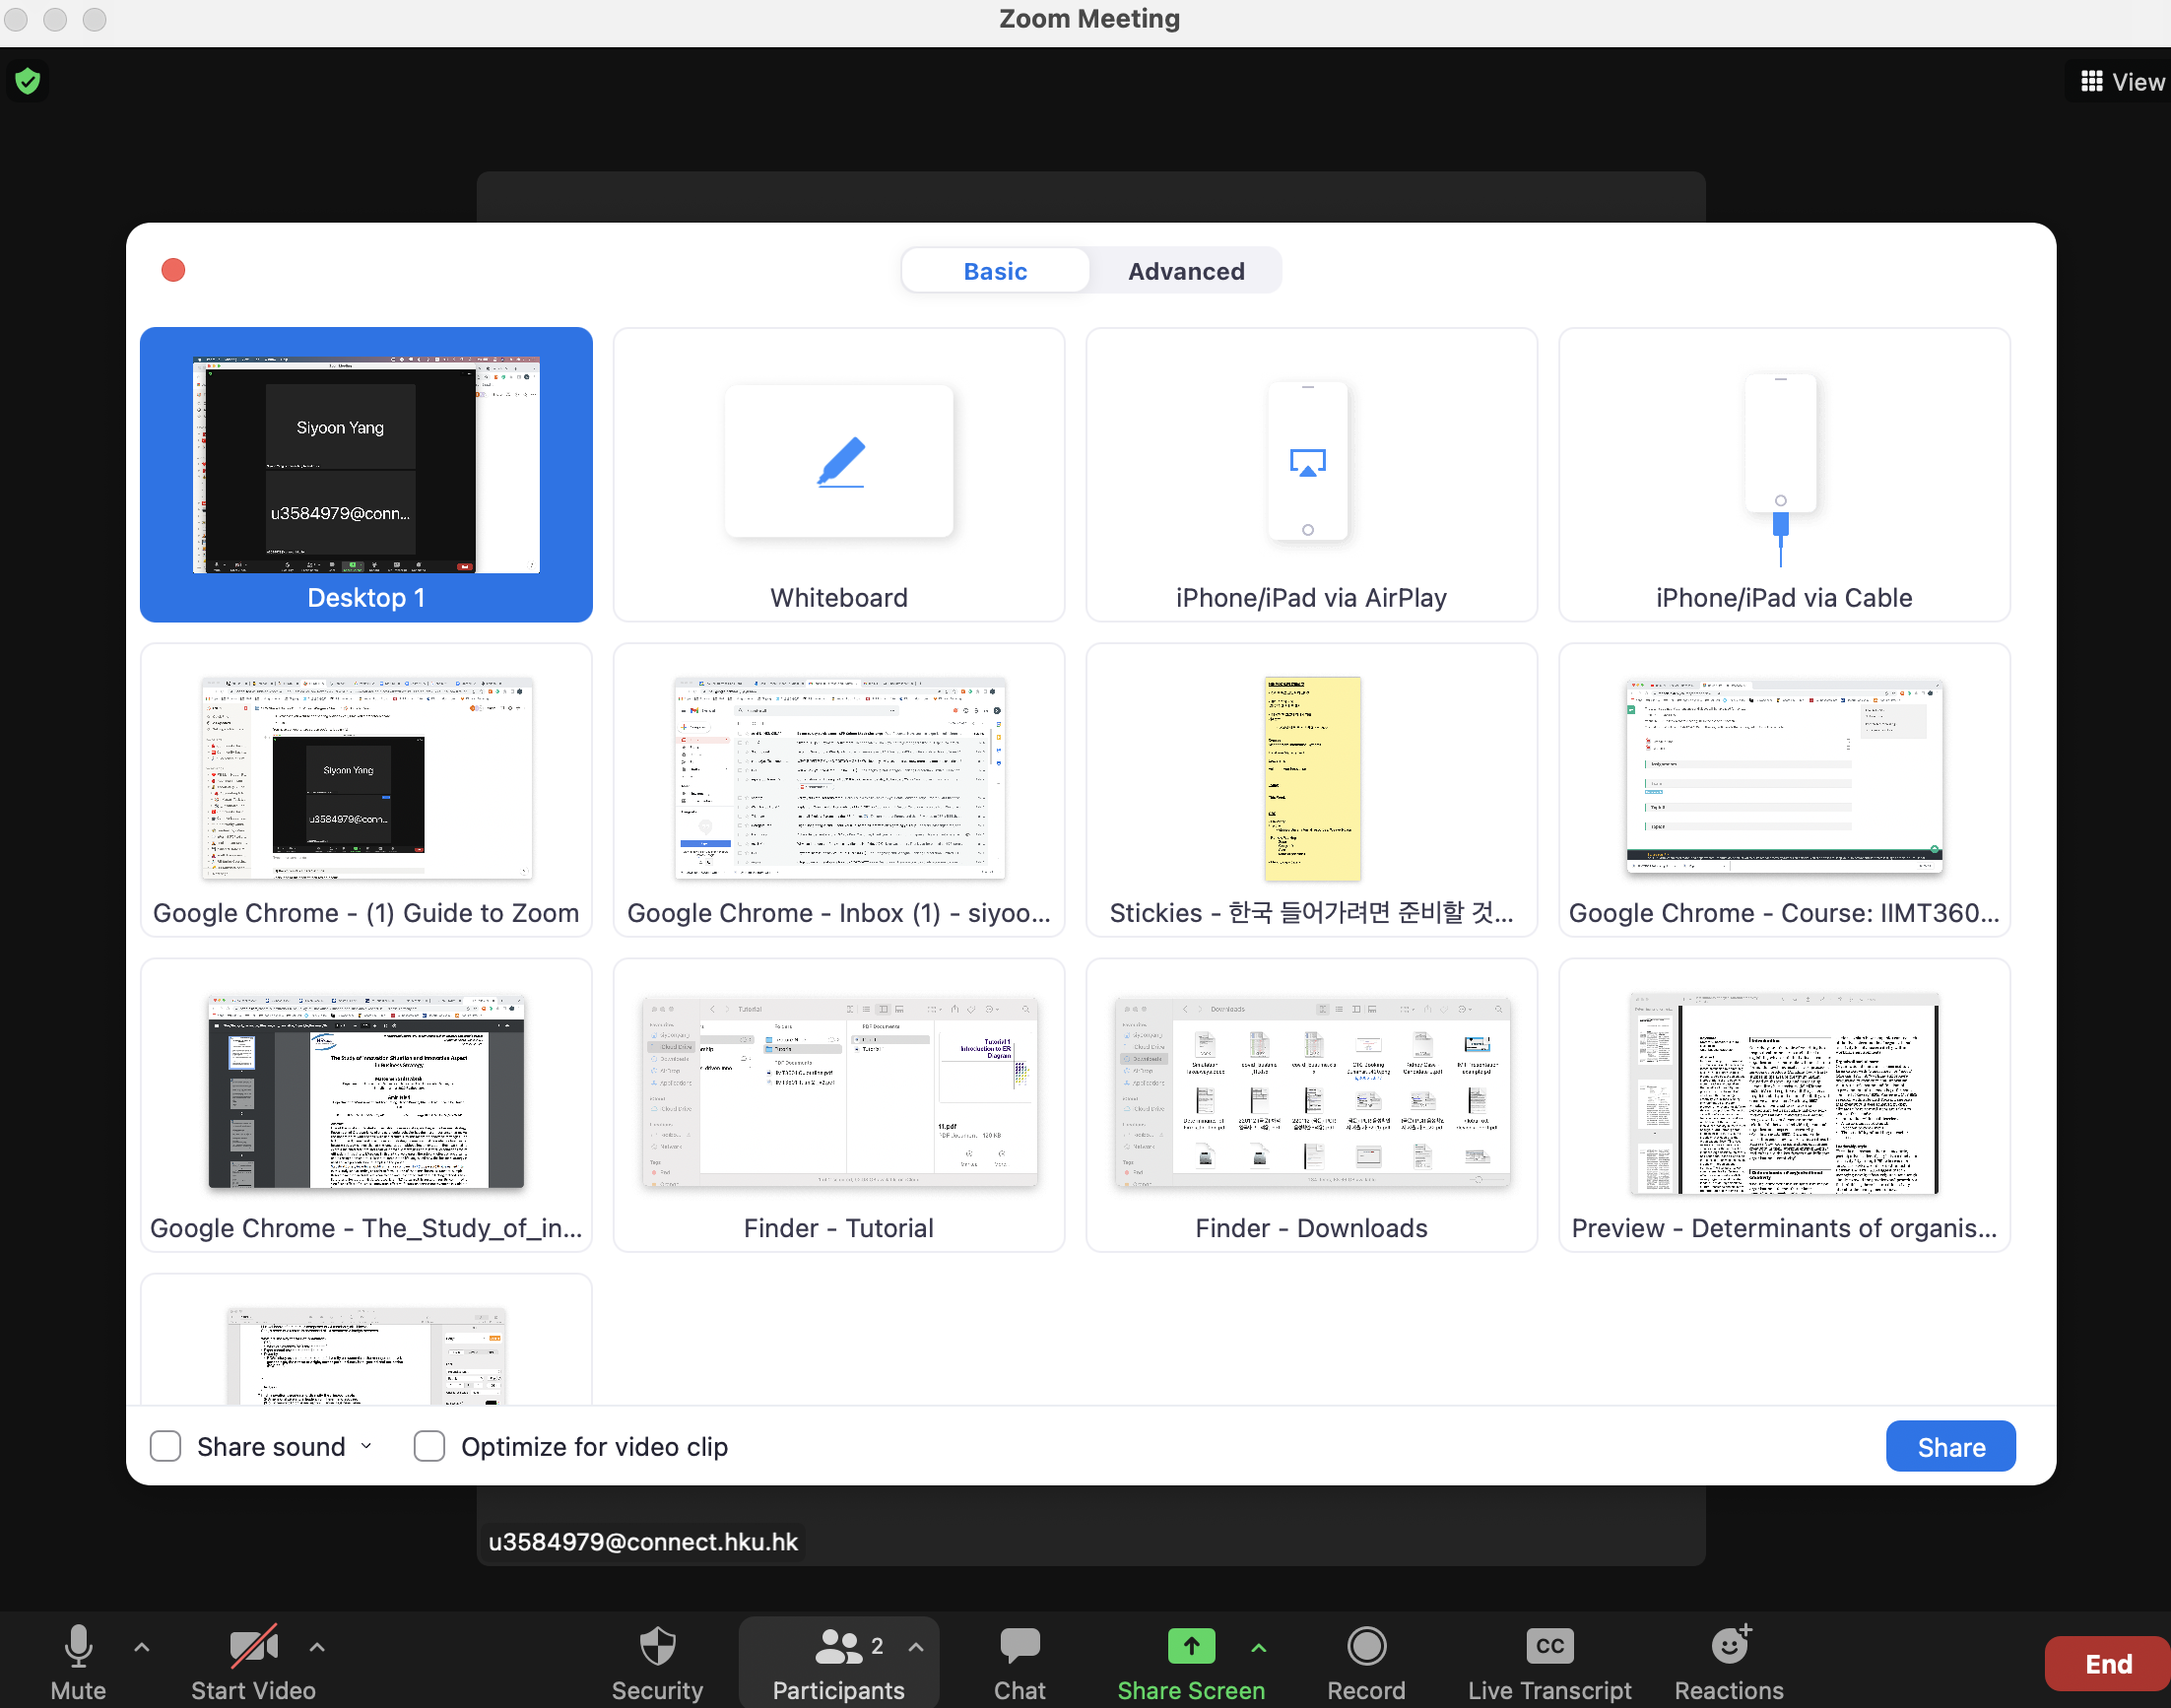
→ Choose a tab/page/application that you would like to share in the meeting.
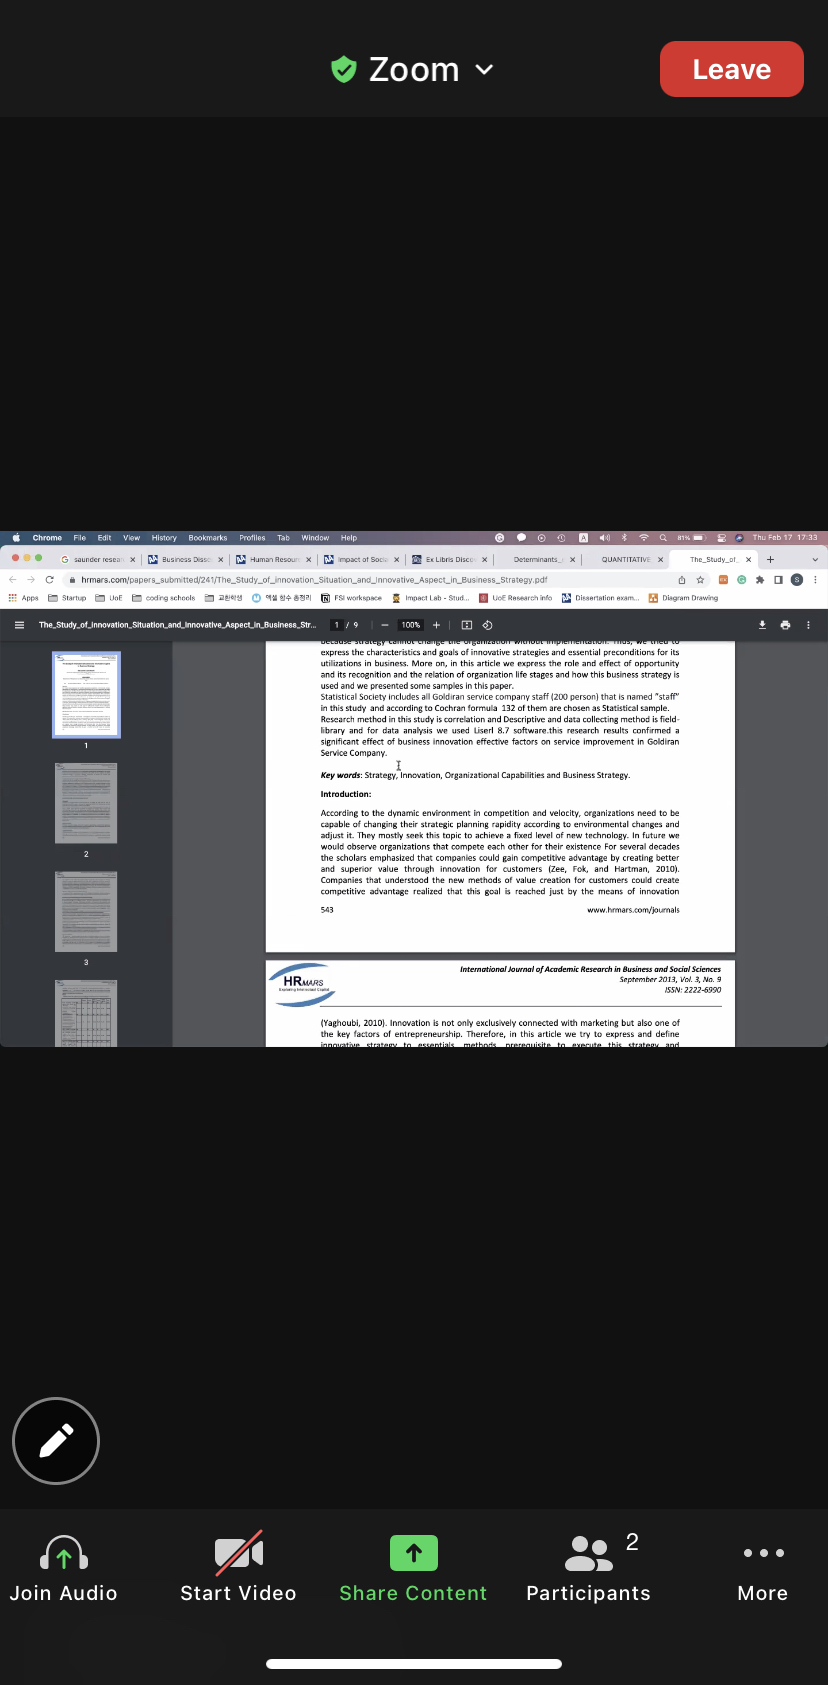
Now, other members in the room are seeing what you are seeing on your device!
5) Breakout Room
This is one of the best features of Zoom. When you are in a large meeting but want to have smaller team exercises/meetings/discussions, you can create multiple breakout rooms and assign participants.
*Breakout Rooms are available for (unpaid) Zoom Basic Users too!
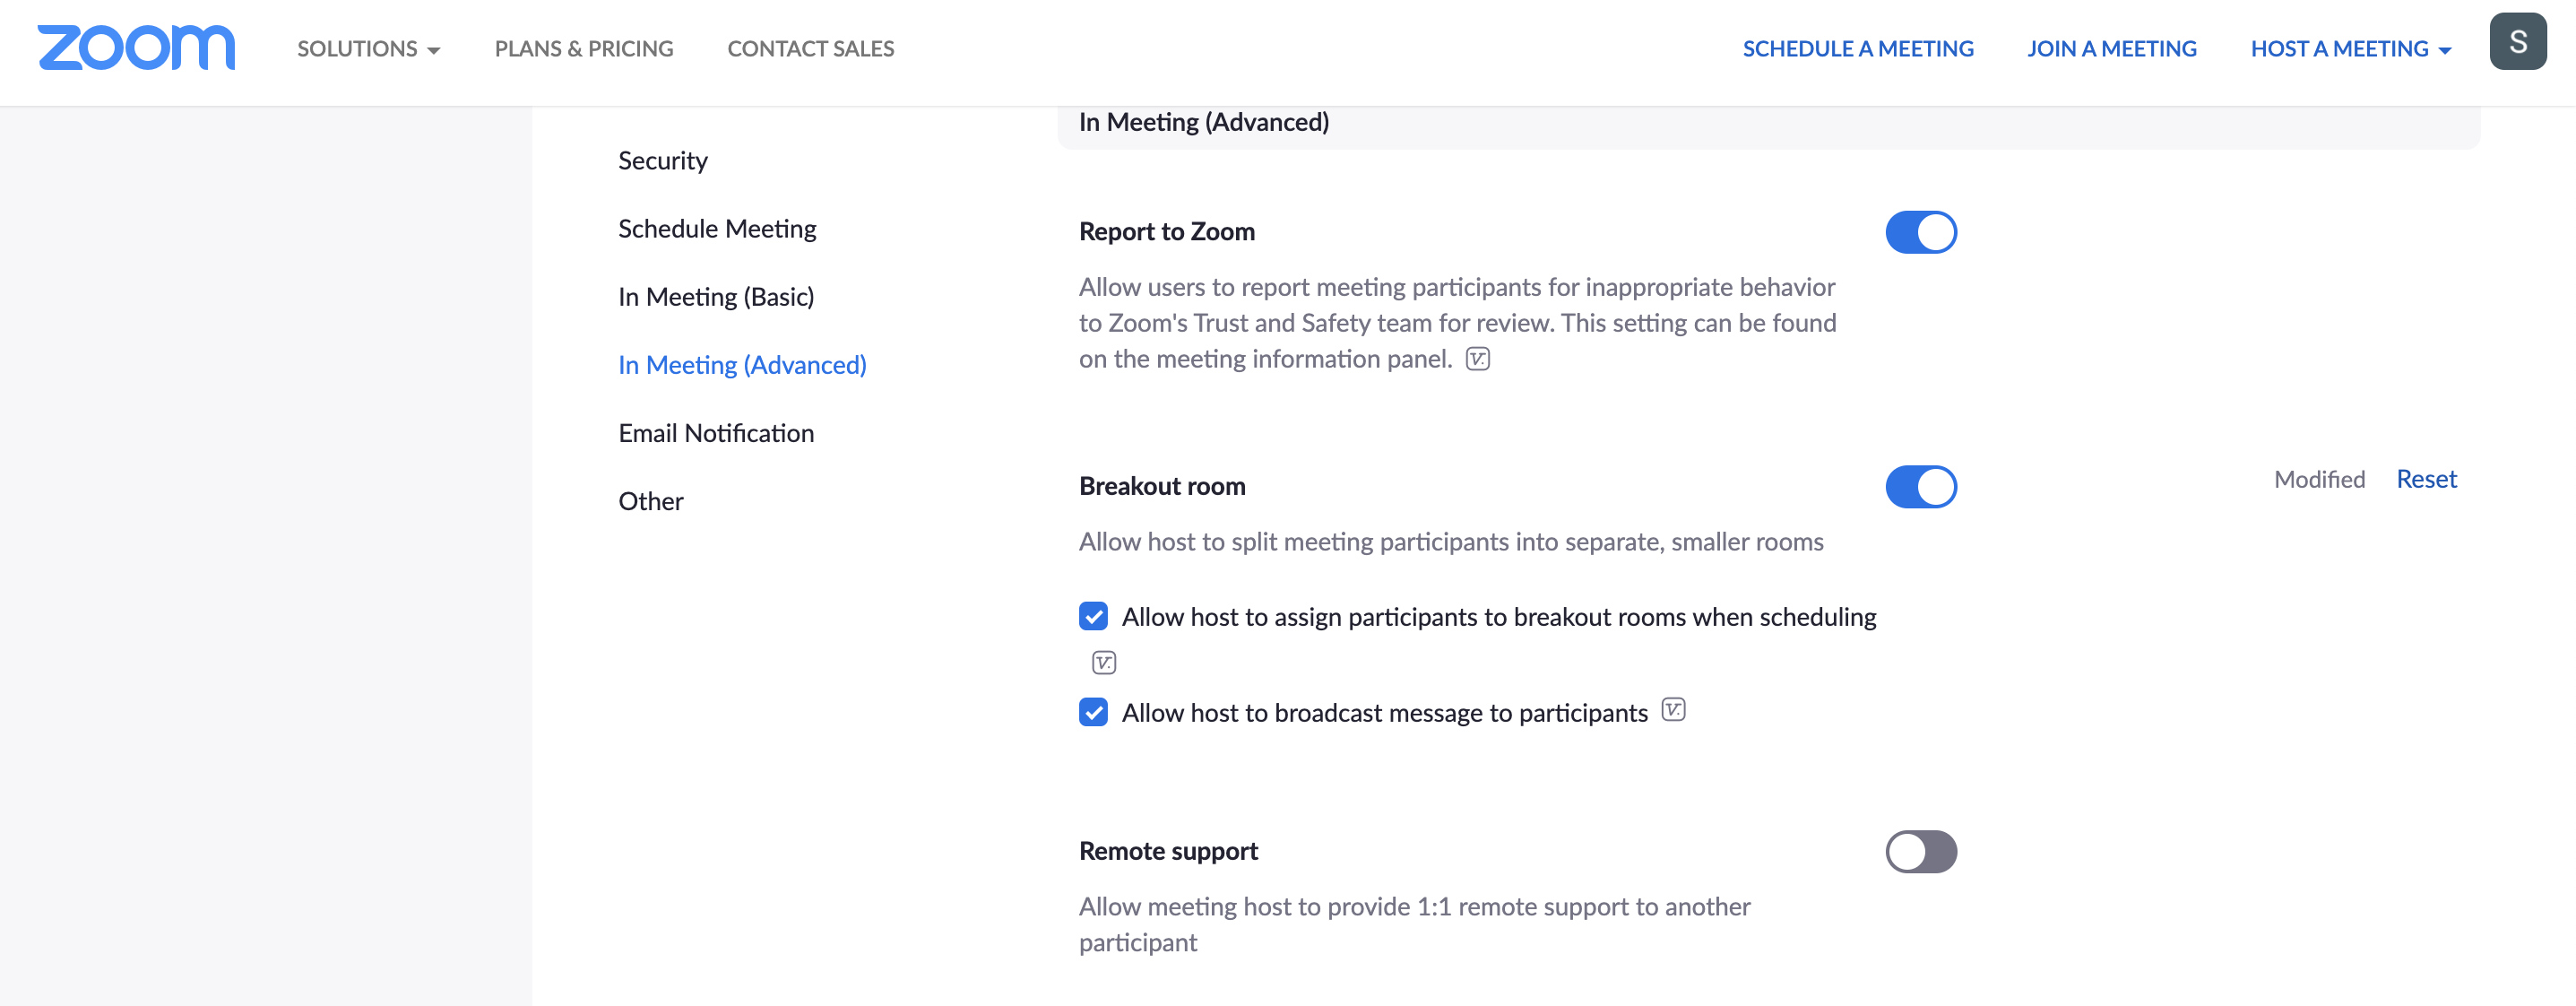
5.1 Enabling Breakout rooms in the settings on Zoom Desktop
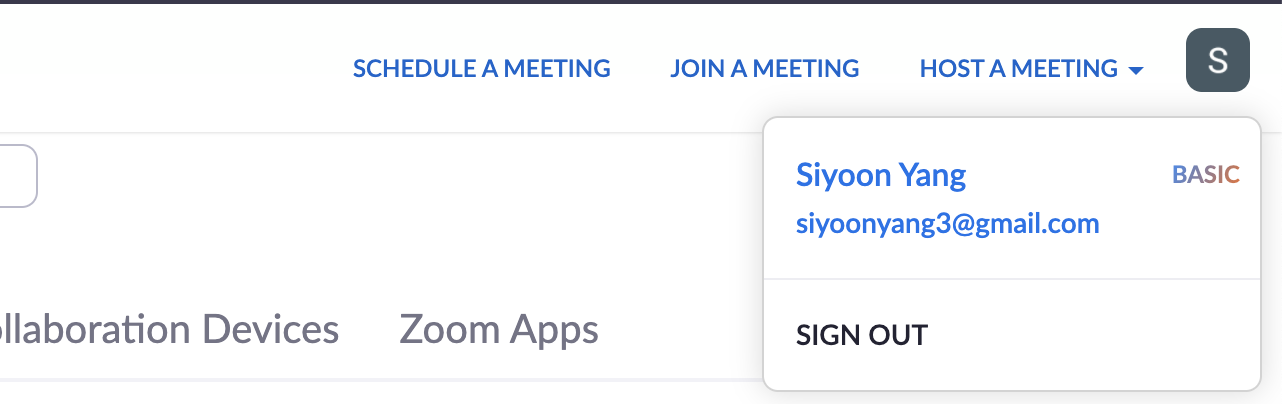
(1) Sign in to Zoom Desktop and Press your account icon on the top right
→ Click on the account (highlighted in blue below)
(2) Click on ‘Settings’ under the ‘Personal’ Tab on the bar on the left-hand side
(3) Find the ‘Breakout Room’ feature under ‘In Meeting(Advanced)’ options, and enable it
5.2 Breakout Room in the Meeting Room
Once you have enabled the Breakout Room feature on Zoom Desktop, it will automatically show up on your tap bar in the meeting.
*if it doesn’t appear, check the ‘More’ option on the ribbon.

Click on the ‘Breakout Rooms’ icon and create breakout rooms with your proposed options.
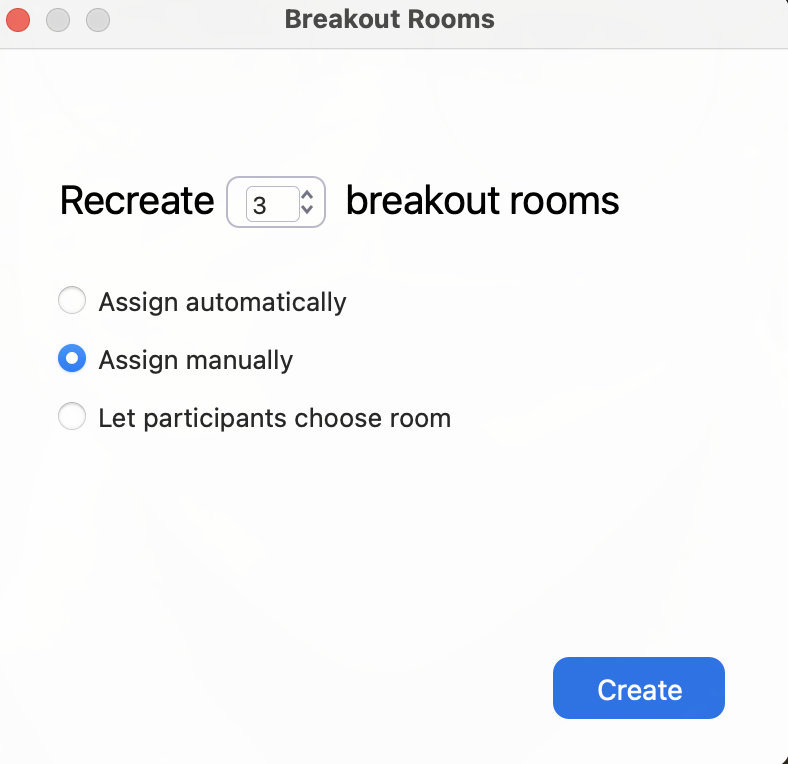
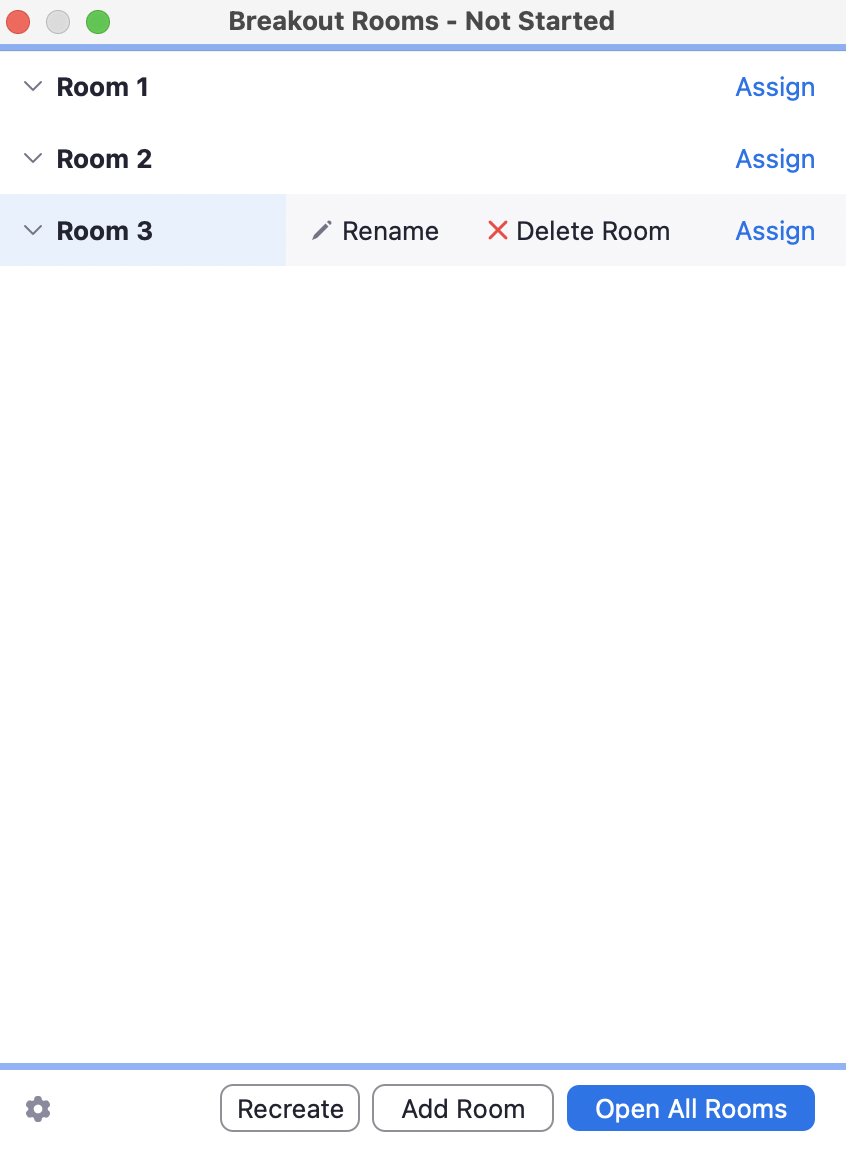
→ You can edit each room’s name, and assign participants to the rooms
- As a host, you can join the rooms to see how your members are progressing!
→ You need to ‘Open All Rooms’ when you first create the breakout rooms → it will turn into ‘Close All Rooms’
→ If you click on ‘Close All Rooms’, it will stop all breakout rooms after a 60-second countdown, and returns all participants back to the main meeting room.
*If the meeting is being cloud recorded, it will only record the main meeting and none of the breakouts will be captured, regardless of what room, the meeting host is in. It is currently only possible to record in breakout rooms with local recording. The host must allow specific participants to record locally and it will only record the room the participant who is recording is in. Multiple participants can be given permission to record locally.
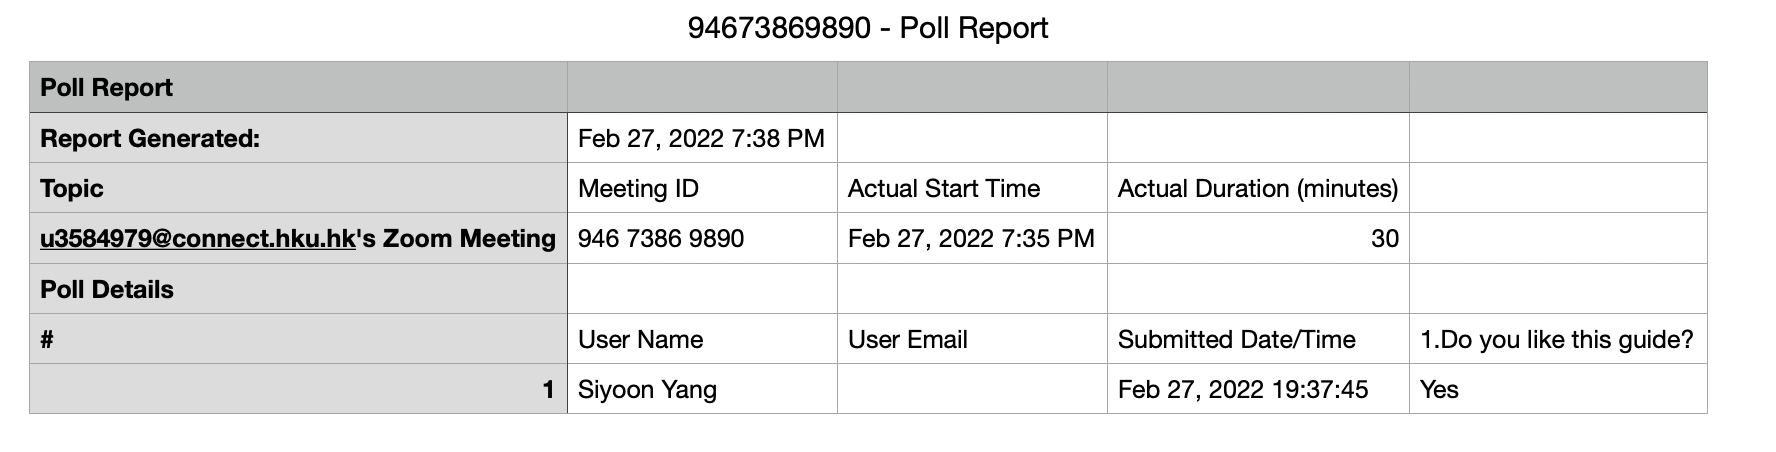
(6) Polling
Zoom also offers a polling function for the meetings/webinars for paid users!
You are very likely to use this function for votes or to acknowledge participants’ thoughts on whatever you’d like to know.
Enable polling in the settings on Zoom Web
- Go to settings on Zoom Web
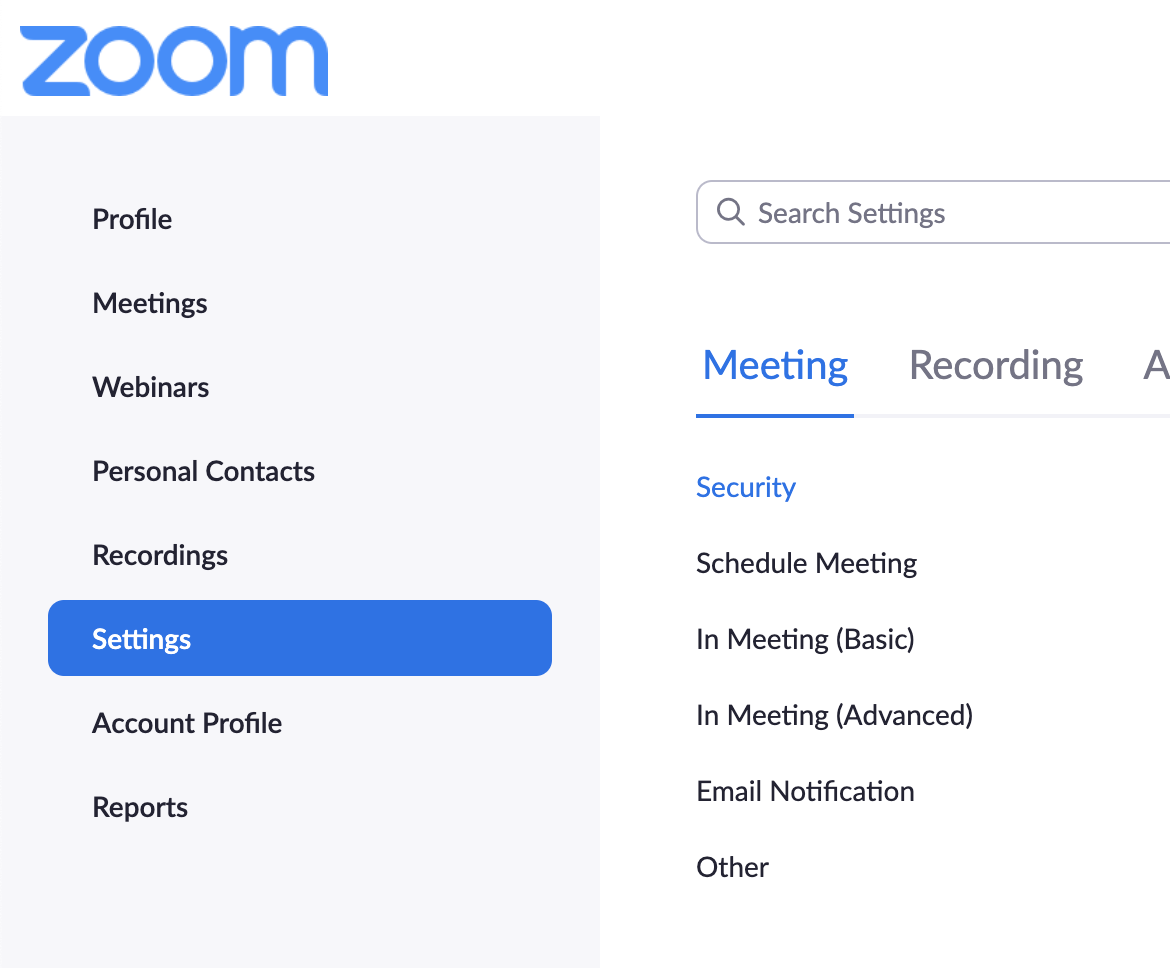
- Find ‘Meeting Polls/Quizzes’ and enable it
- Polls/Quizzes icon will be on the icon bar in the meeting from now on!

Creating Polls
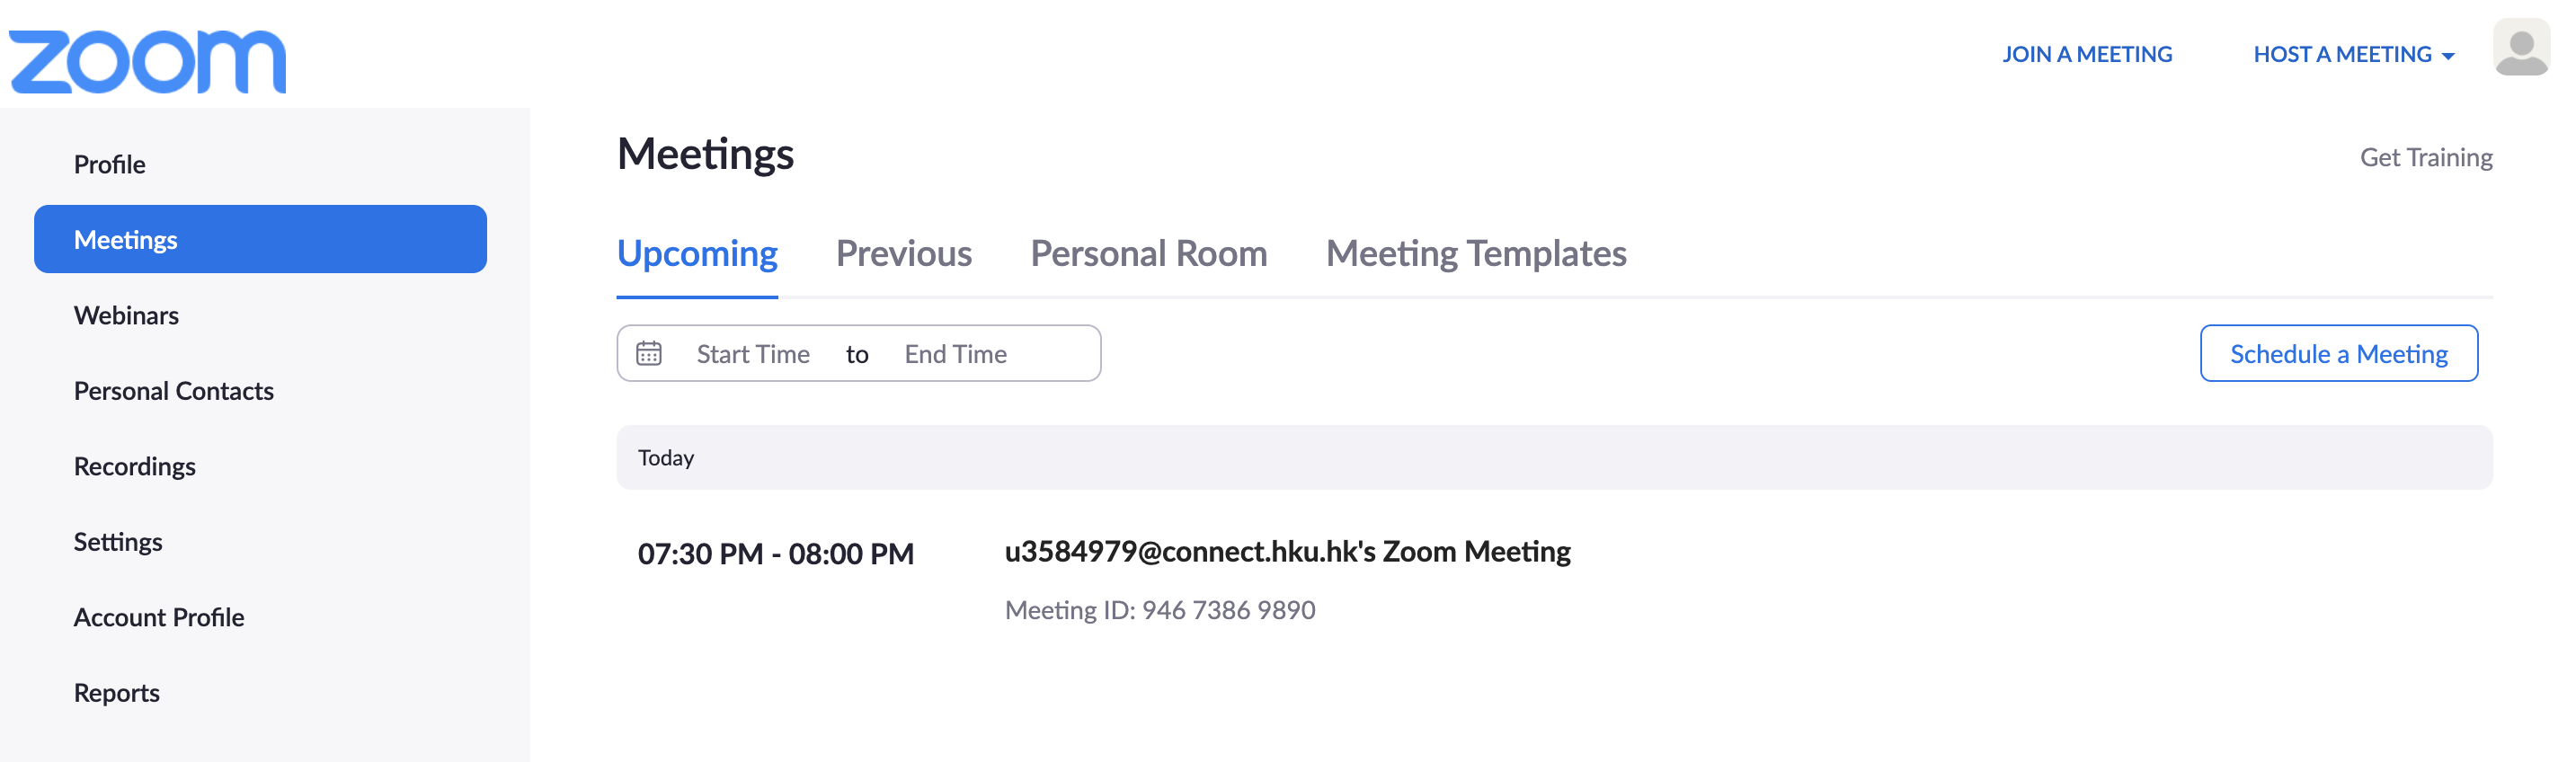
- Go on Meetings on Zoom Web, and click on the scheduled meeting you’d like to create polls for.
- Scroll down to find the ‘Poll/Quizzes’ and click ‘Create’

- Customise the questions/answers and save.

Launching/Ending polls
- In the meeting, click on the ‘Polls/Quizzes’ icon

- Press ‘Launch’
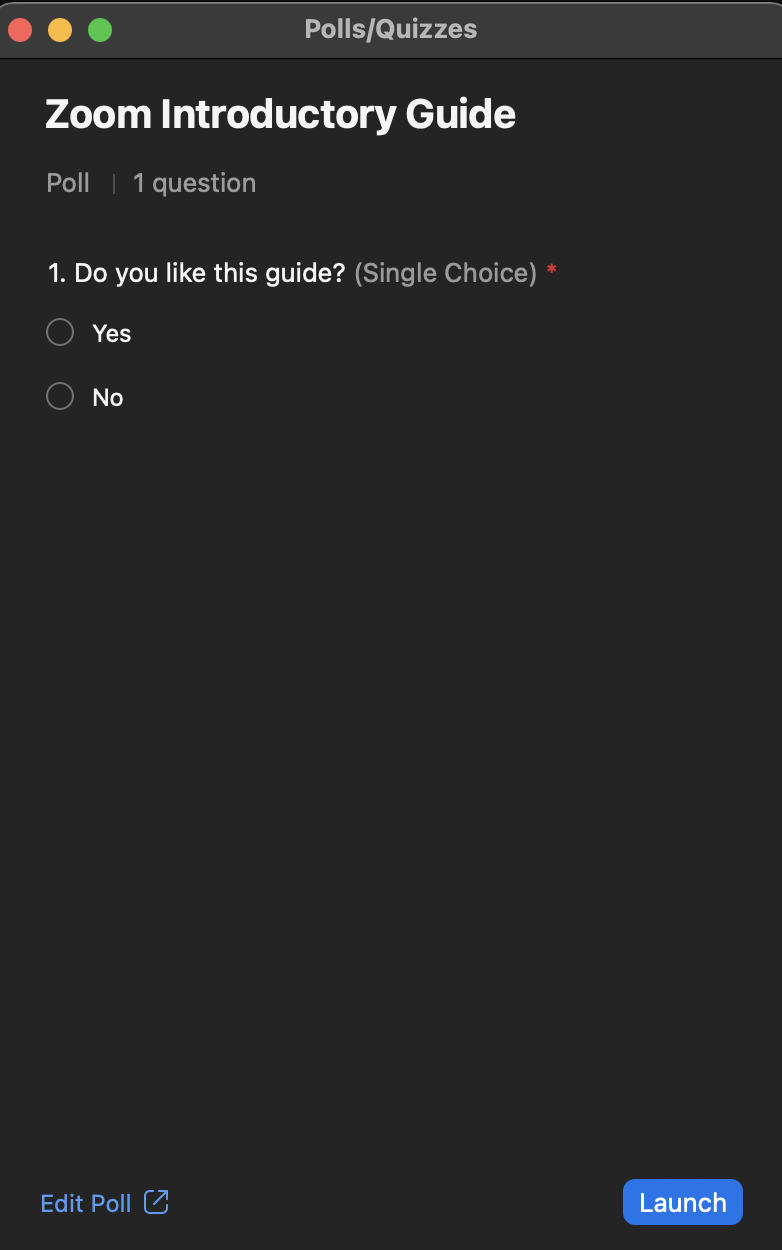
- The poll will pop-up on participants’ screen
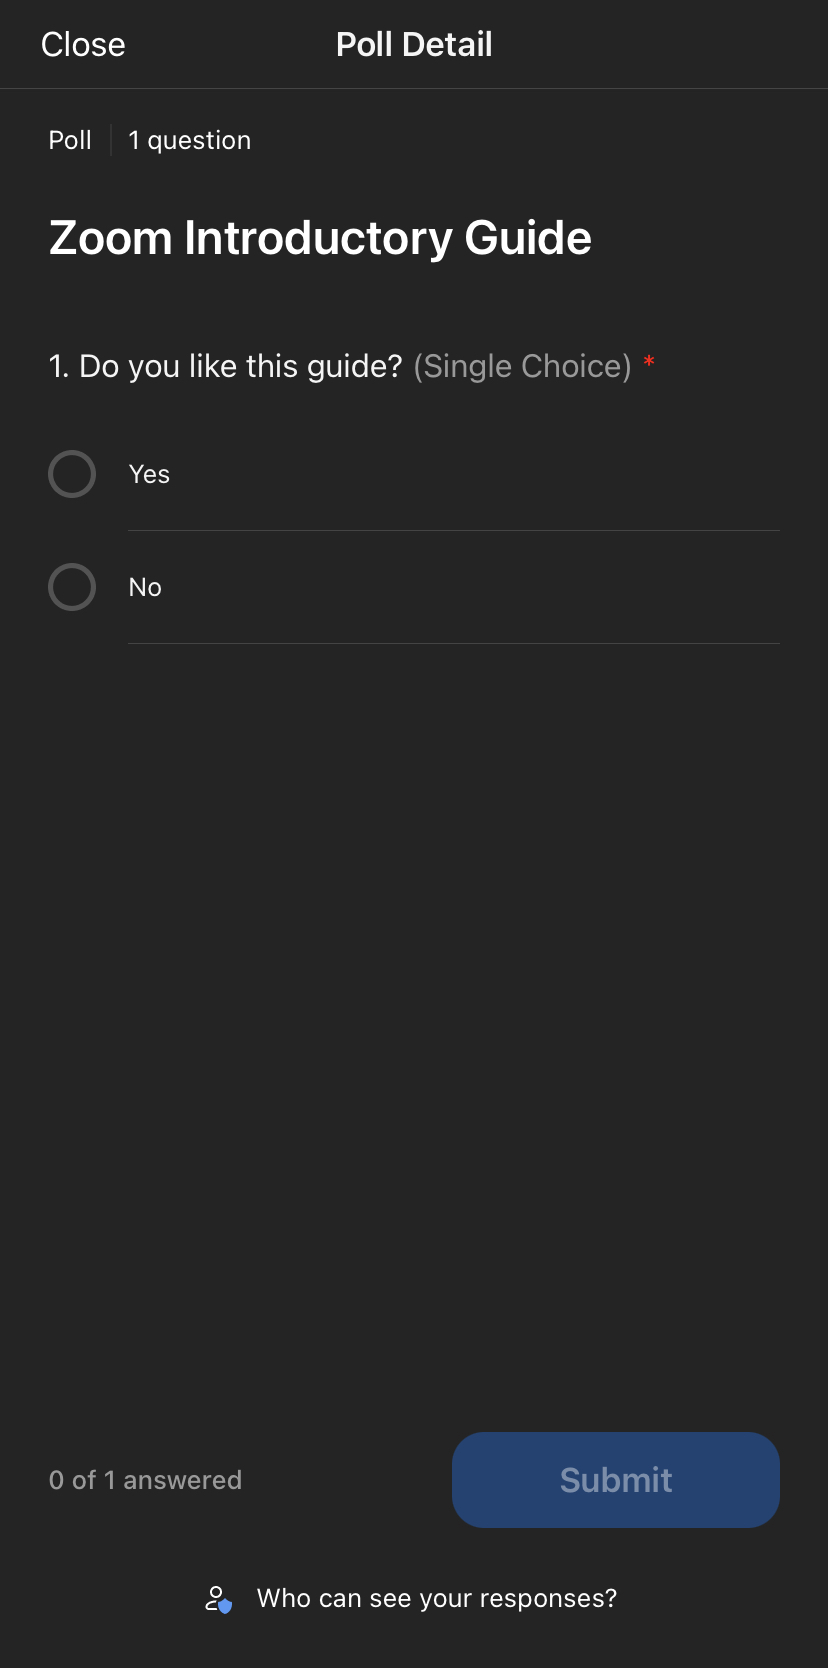
- After confirming whether all participants have completed the polls, end the poll
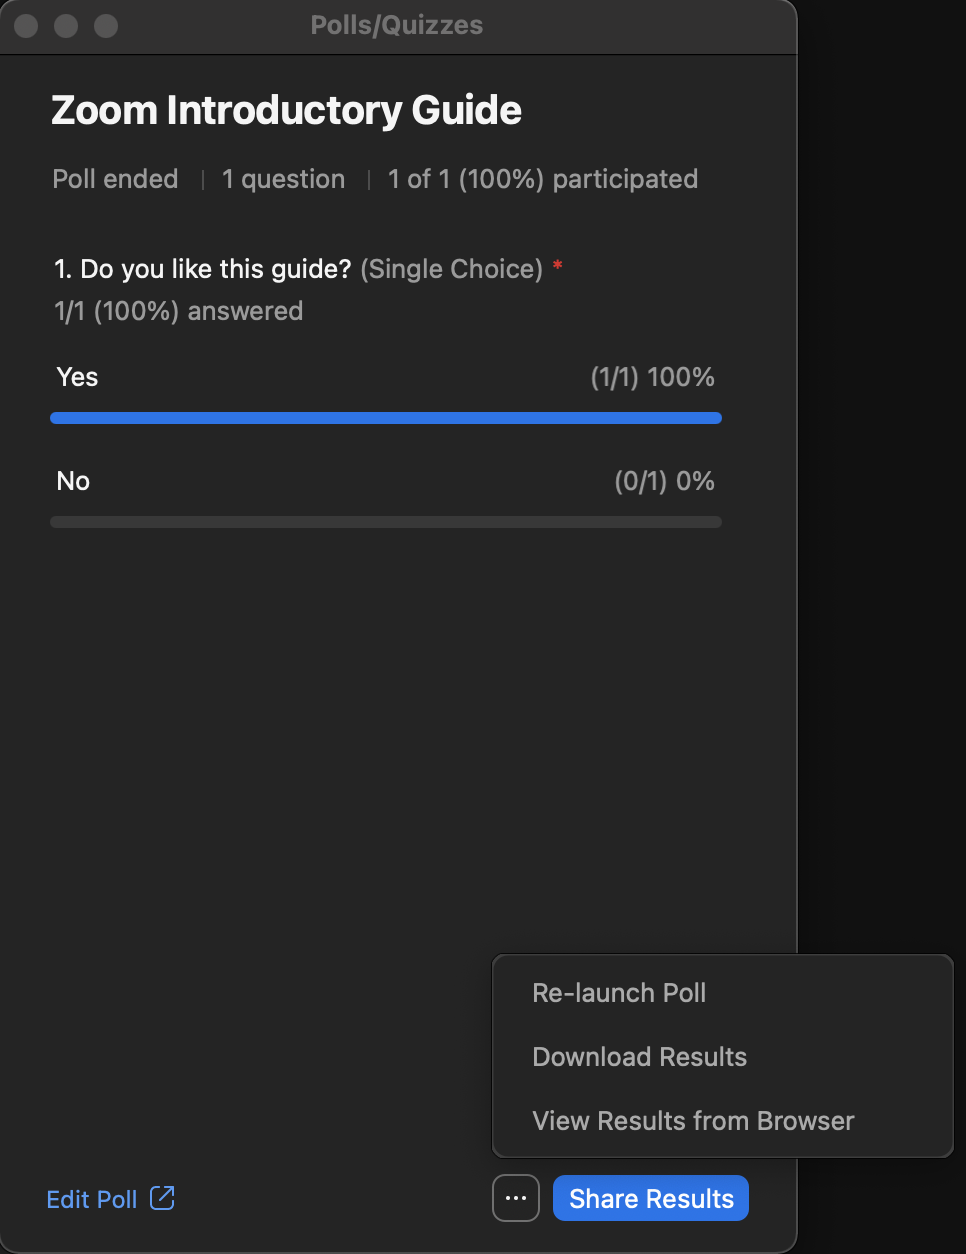
- Download the results
(7) Assigning Co-host
As a host, you can share hosting privileges with the participant(s), allowing the co-host to manage the administrative side of the meeting
- Host: The user that scheduled the meeting. They have full permission to manage the meeting. There can only be one host of a meeting.
- Host Privileges (Expand the toggle to find out)
- Start/End the meeting
- Create or Edit polls
- Mute/Unmute participants
- Stop participant’s video / Request participants to start video
- Promote participant to host or co-host
- Administrate who attendees can chat with
- Remove attendees
- Rename participants
- Mute controls for participants
- Assign participants to break-out rooms
- Cloud recording
- Allow/Forbid participants to start local recording
- Live Streaming
- Host Privileges (Expand the toggle to find out)
- Co-host: Shares most of the controls that hosts have, allowing the co-host to manage the administrative side of the meeting, such as managing attendees. The host must assign a co-host during the meeting.
- Co-hosts cannot do the following:
- Start/End the meeting
- Promote participant to host or co-host
- Live Streaming
- Co-hosts cannot do the following:
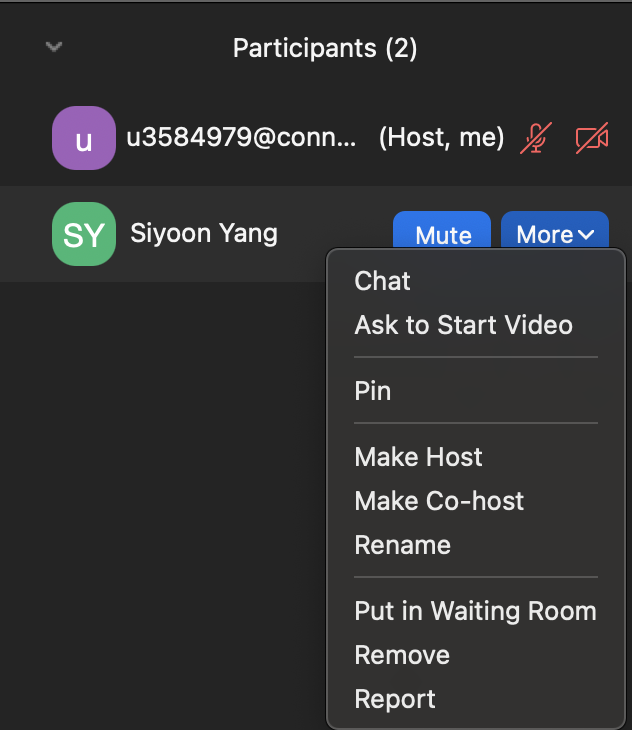
To assign a co-host, click on ‘more’ next to the participant, and press ‘Make Co-host’
Zoom Subscription Plans
Zoom has multiple plans for you to choose from. Access the link below to see the most up-to-date Zoom plans:https://zoom.us/pricing. Please see below our summary of the major comparisons as of March 2022:
| Zoom Plans | Basic | Pro | Business | Enterprise |
|---|---|---|---|---|
| Price (Annual) | – | US$149.90 | US$199.90 | US$240.00 |
| Number of Participants | 100 | 100 | 300 | 500 |
| Group Meetings | Unlimited | Unlimited | Unlimited | Unlimited |
| One-on-One Meetings | Unlimited | Unlimited | Unlimited | Unlimited |
| Group meeting Duration | 40 Minutes | 30 Hours | 30 Hours | 30 Hours |
| Recording | Local | Local + 1GB Cloud per license | Local + 1GB Cloud per license | Local + Unlimited Cloud |
| Live Transcription | X | O | O | O |
| License Count | 1 | 1-9 | 10-99 | 50+ |
| Share Screen | O | O | O | O |
| Virtual Background | O | O | O | O |
| Language Interpretation | X | X | O | O |
| Recording Transcripts | X | X | O | O |
| Admin Portal | X | X | O | O |
Optional Add-On Plans
If you own a Zoom license, you can apply for additional add-on plans to fit your special requirement!
- Large Meetings Starts at US$600/year, and you can increase interactive participants up to 500 or 1,000 in a meeting.
- Cloud Storage Starts at US$480/year, and you can increase your cloud storage. There’s a wide range of options up to 3TB/month
- Audio Conferencing Starts at US$1,200/year, and you will be billed based on the rates per call per country. All paid plans come with local toll numbers, but this plan allows you to add Call Out, Global toll-free, and ‘local dial-in’ for premium countries.
Alternatives to Zoom
Zoom is evidently one of the best real-time video communication tools, but there are other options you might want to consider using; Google Meet and Microsoft Teams.
Google Meet
- Similar functions to Zoom but most are chrome extensions compared to Zoom’s built-in functions.
- Screen sharing and polling are available
- Breakout rooms and recordings are only for paid users; cloud space of 15GB vs 1GB on Zoom
- The free plan provides a group meeting duration of 60 min vs 40 min on Zoom
- Maximum number of participants up to 250 in all paid plans vs 1000 participants on Zoom
- Completely compatible with Google Calendar
Microsoft Teams
- Integrated with all Microsoft365 Apps; Shared docs and files
- Screen sharing and breakout rooms are available for free
- Recordings are only for paid users; cloud space of 1TB per license vs 1GB on Zoom
- The free plan provides group meeting duration of 60 min vs 40 min on Zoom
- The maximum number of participants range from 100 to 500
- Suitable for project teams where numerous files are shared and adjusted by the number of members
Additional Readings:
PS!
At FSI we’re always seeking to improve, so if you have any feedback on this guide/template, please do not hesitate to let us know.